I recently switched to Google Site Kit because I like the fact that it has reports available from the major Google products I use to run my blogging business all in one place. You can use Google Site Kit to manage your site’s Analytics, Search Console data, and AdSense data all from the same plug-in.
That being said, I do not use Site Kit on my sites that are with Mediavine – only those which are monetized with AdSense.
Google Site Kit Reports
What’s cool is that you can see all sorts of reports from Google products directly in your WordPress admin area.
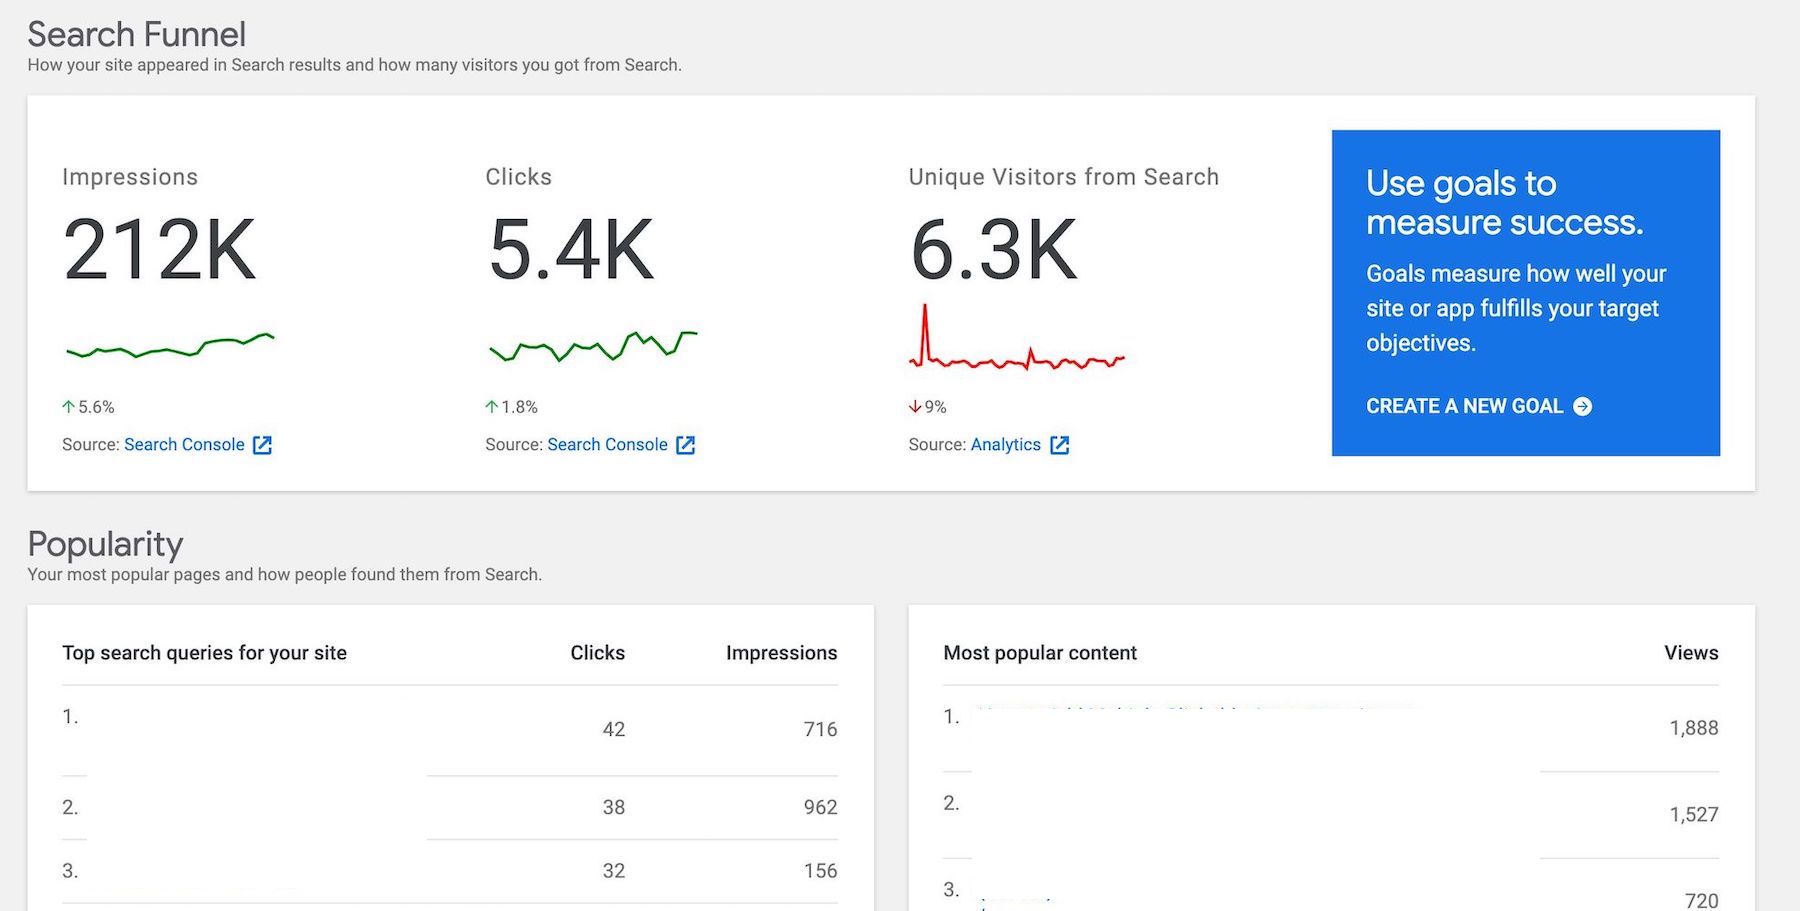
The Dashboard gives you an overview of your data such as your Traffic, Search Funnels, Popular Content, Page Speed data and your AdSense earnings overview! This is an awesome feature if you use many Google products on your websites.
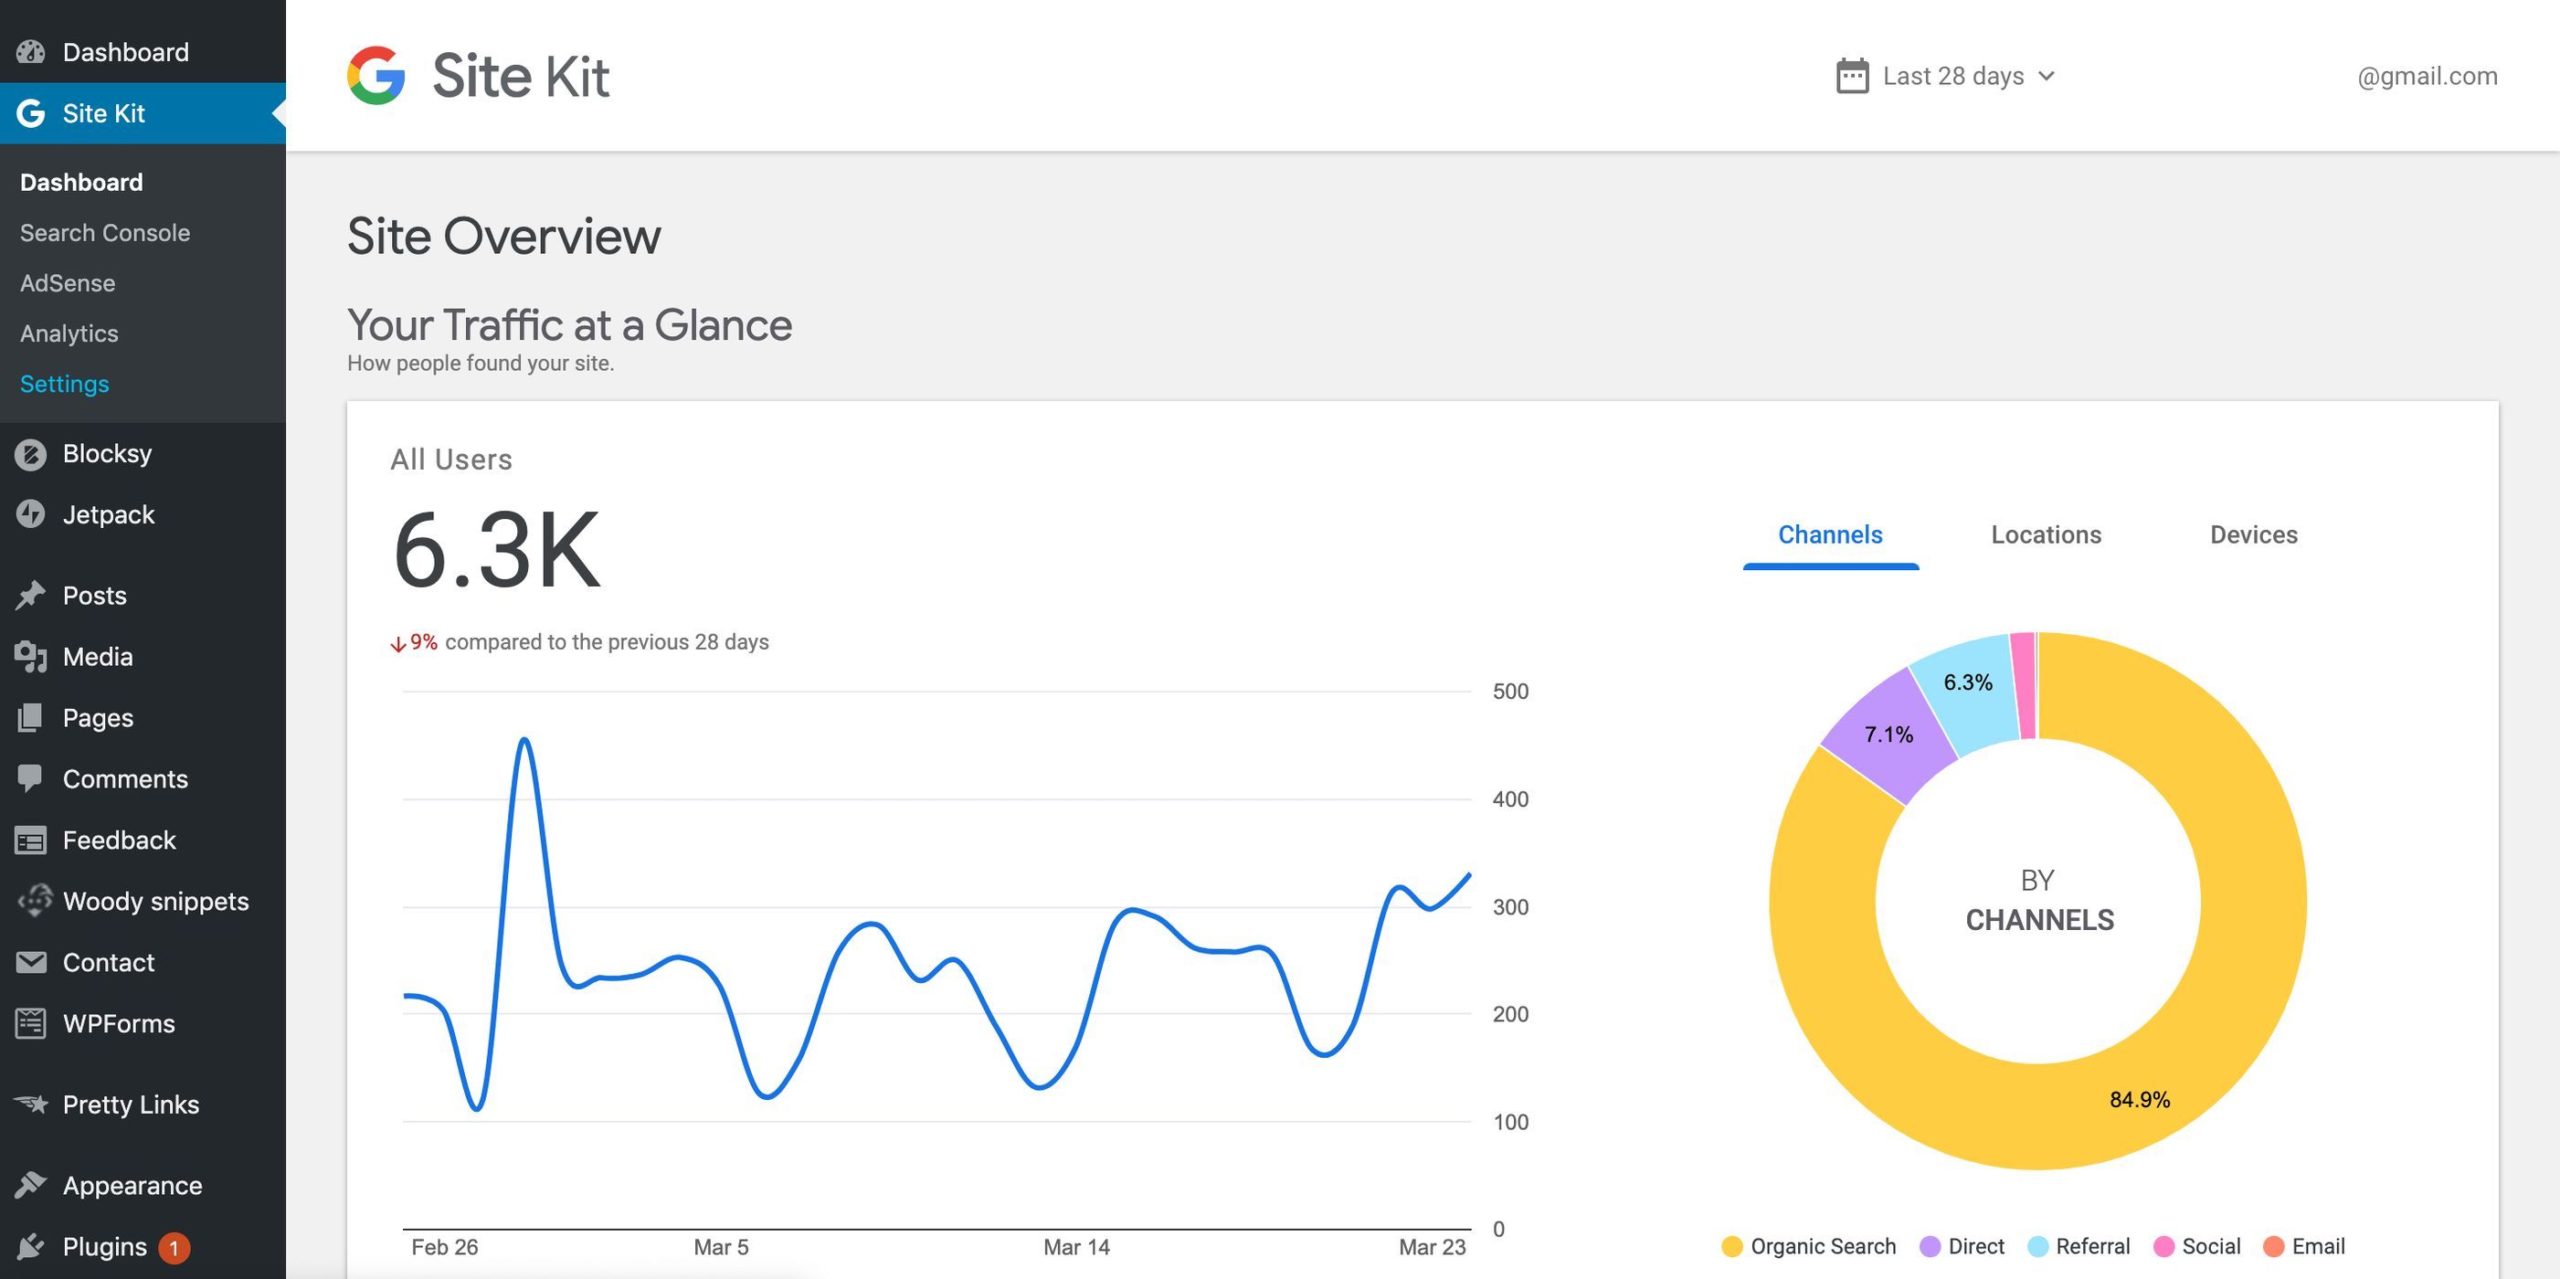
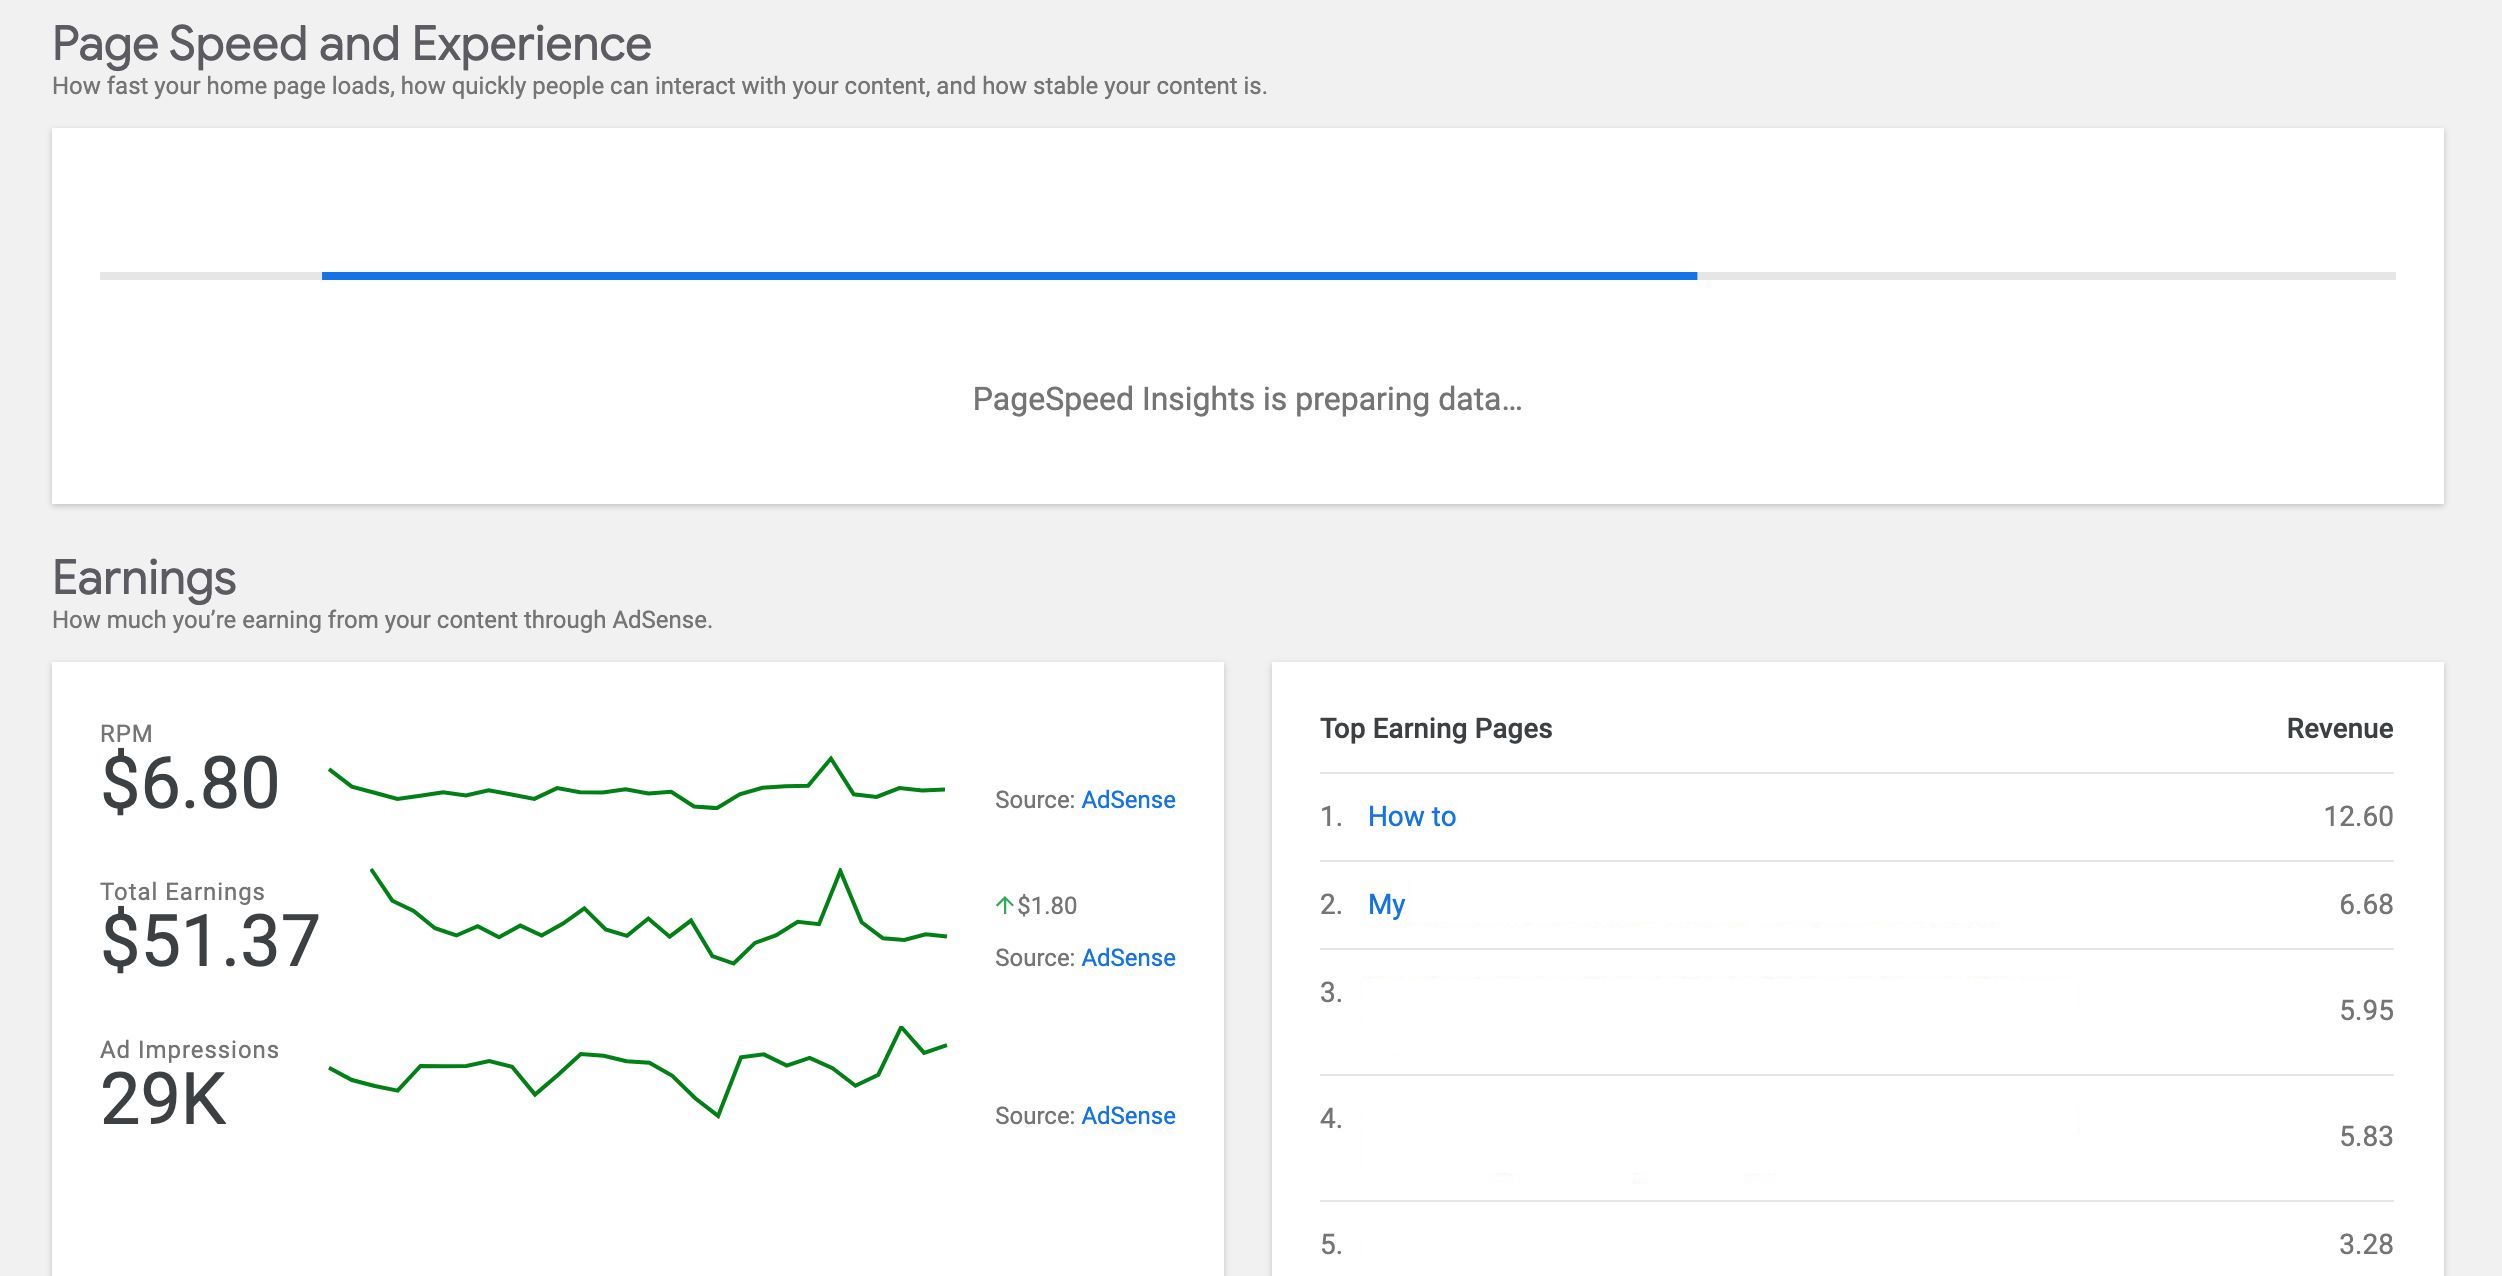
I have some smaller websites that use Google AdSense so for me, this was a no-brainer!
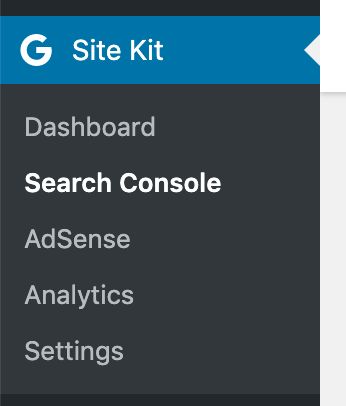
Going further through the menu, you can drill down into the Search Console, AdSense, and Analytics sections. Lastly, you have a Settings option to review your connections.
Search Console
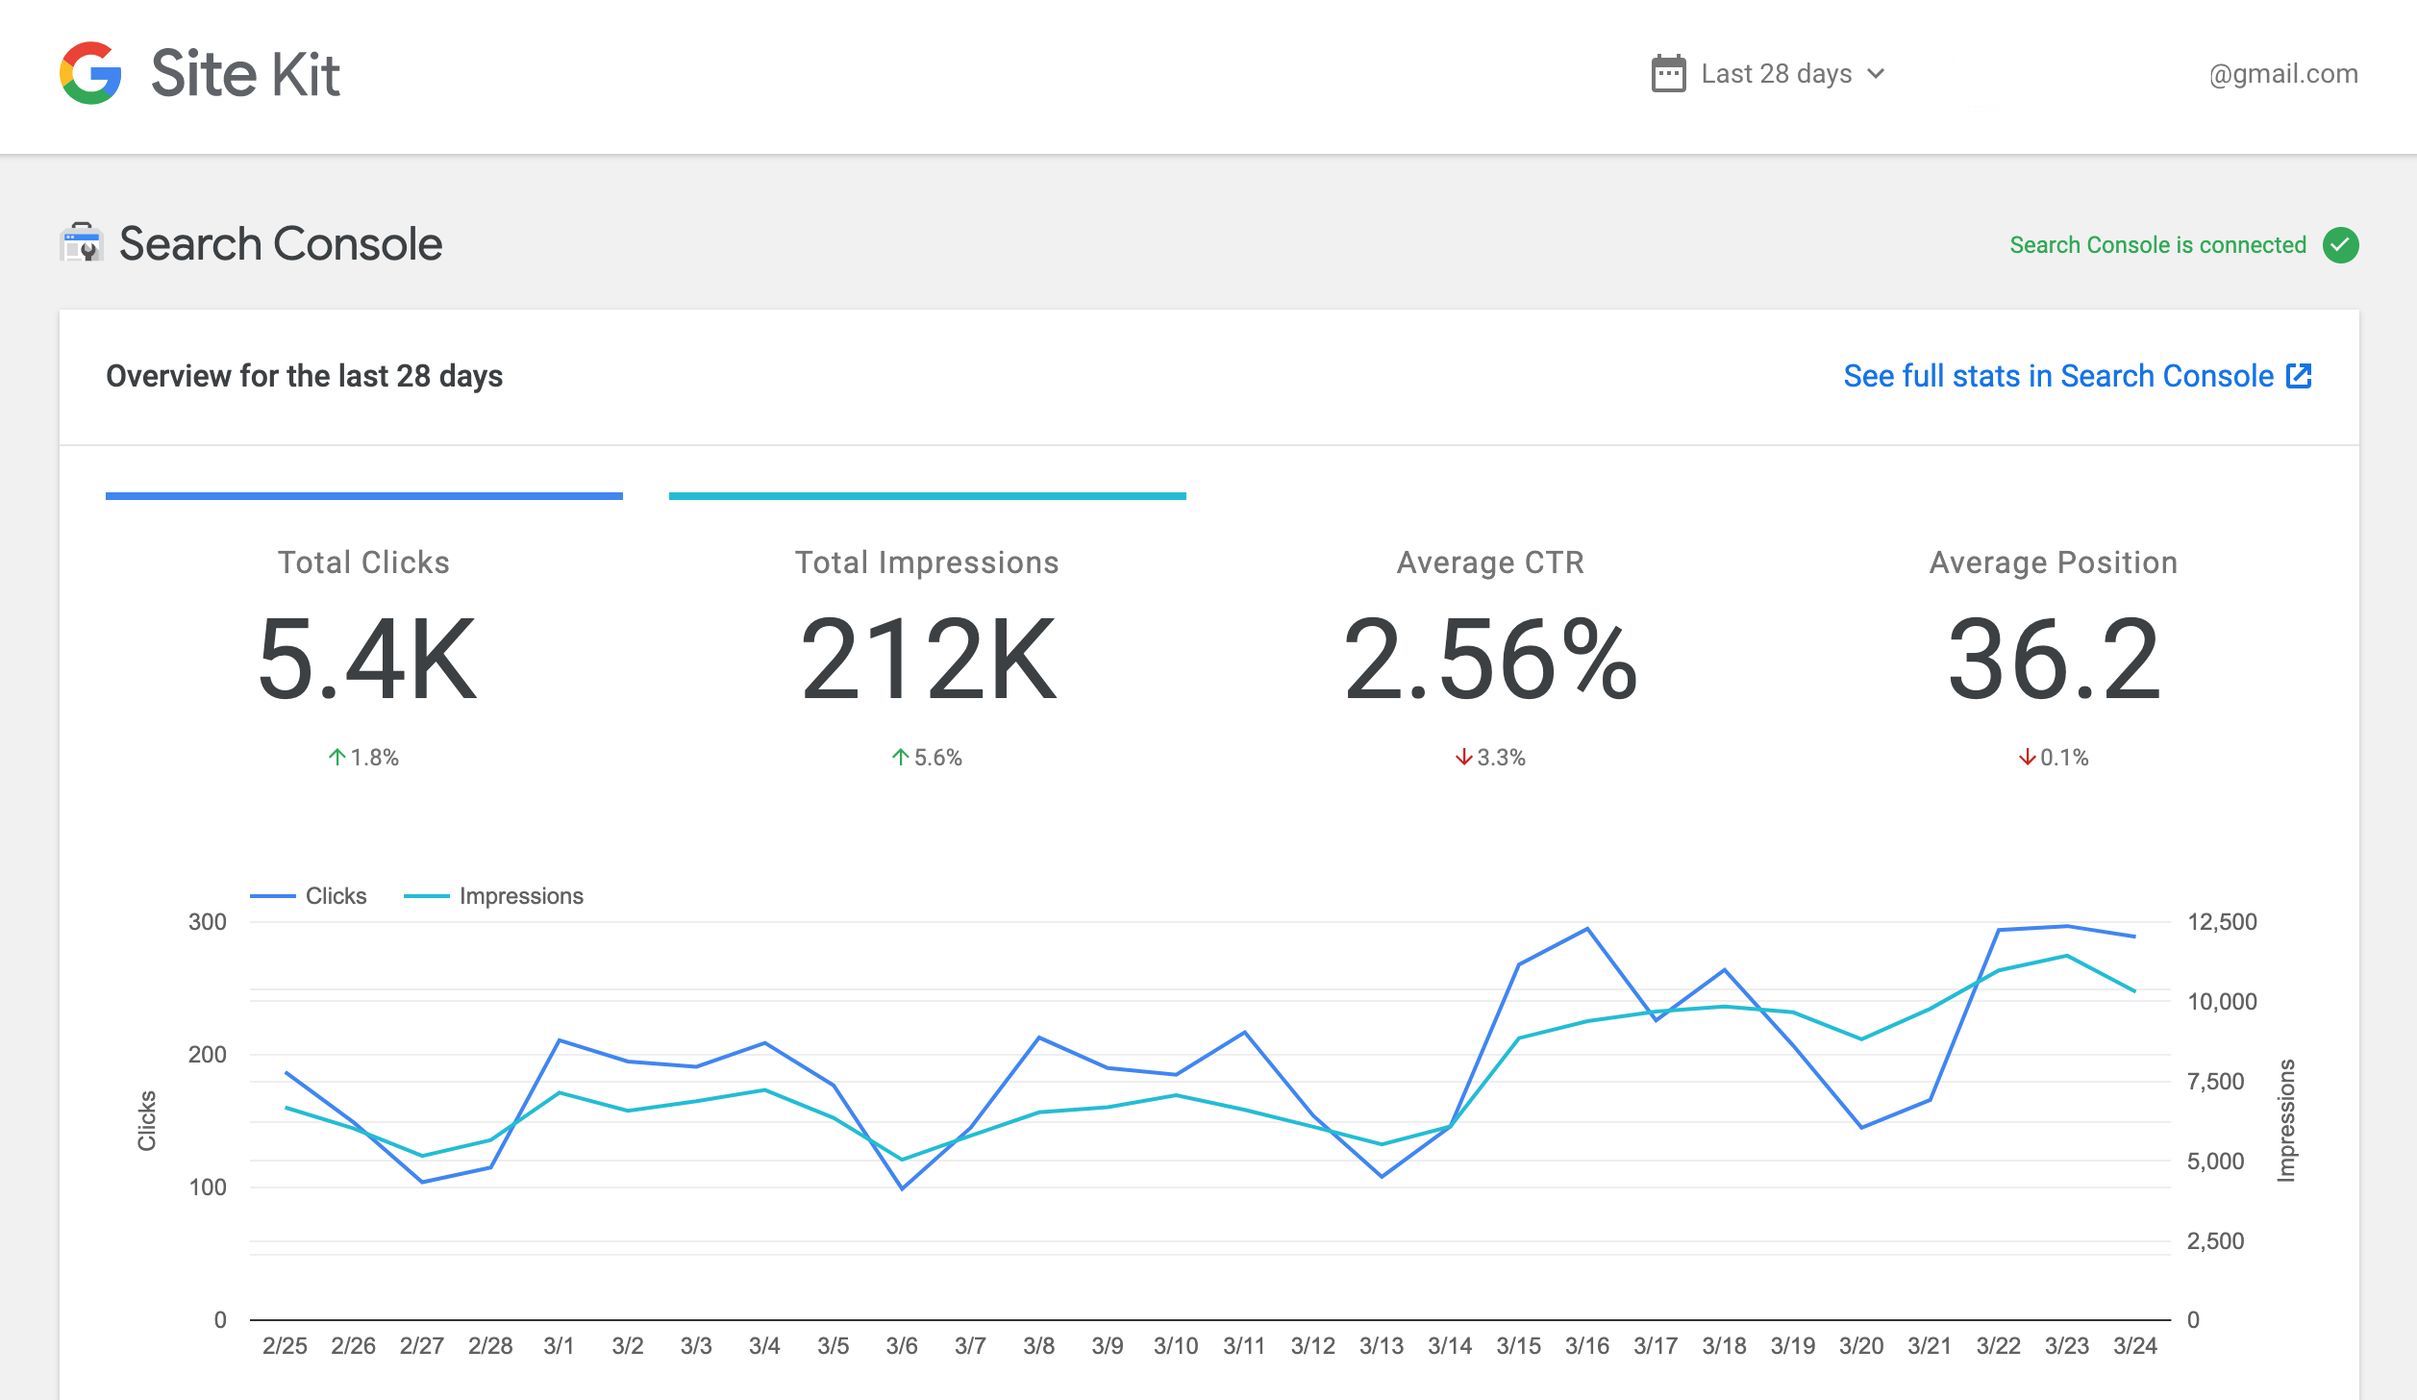
Search Console gives you an overview of the total clicks, impressions, average CTR and average Position of your site in the search results over the past 28 days by default, but you can change the time period to 7 days, 14 days, or 90 days.
A line graph accompanies the numerical data.
Below, you can see “Top search queries over the last 28 days” with a list of your site’s top Keywords, clicks and impressions for each keyword.
AdSense
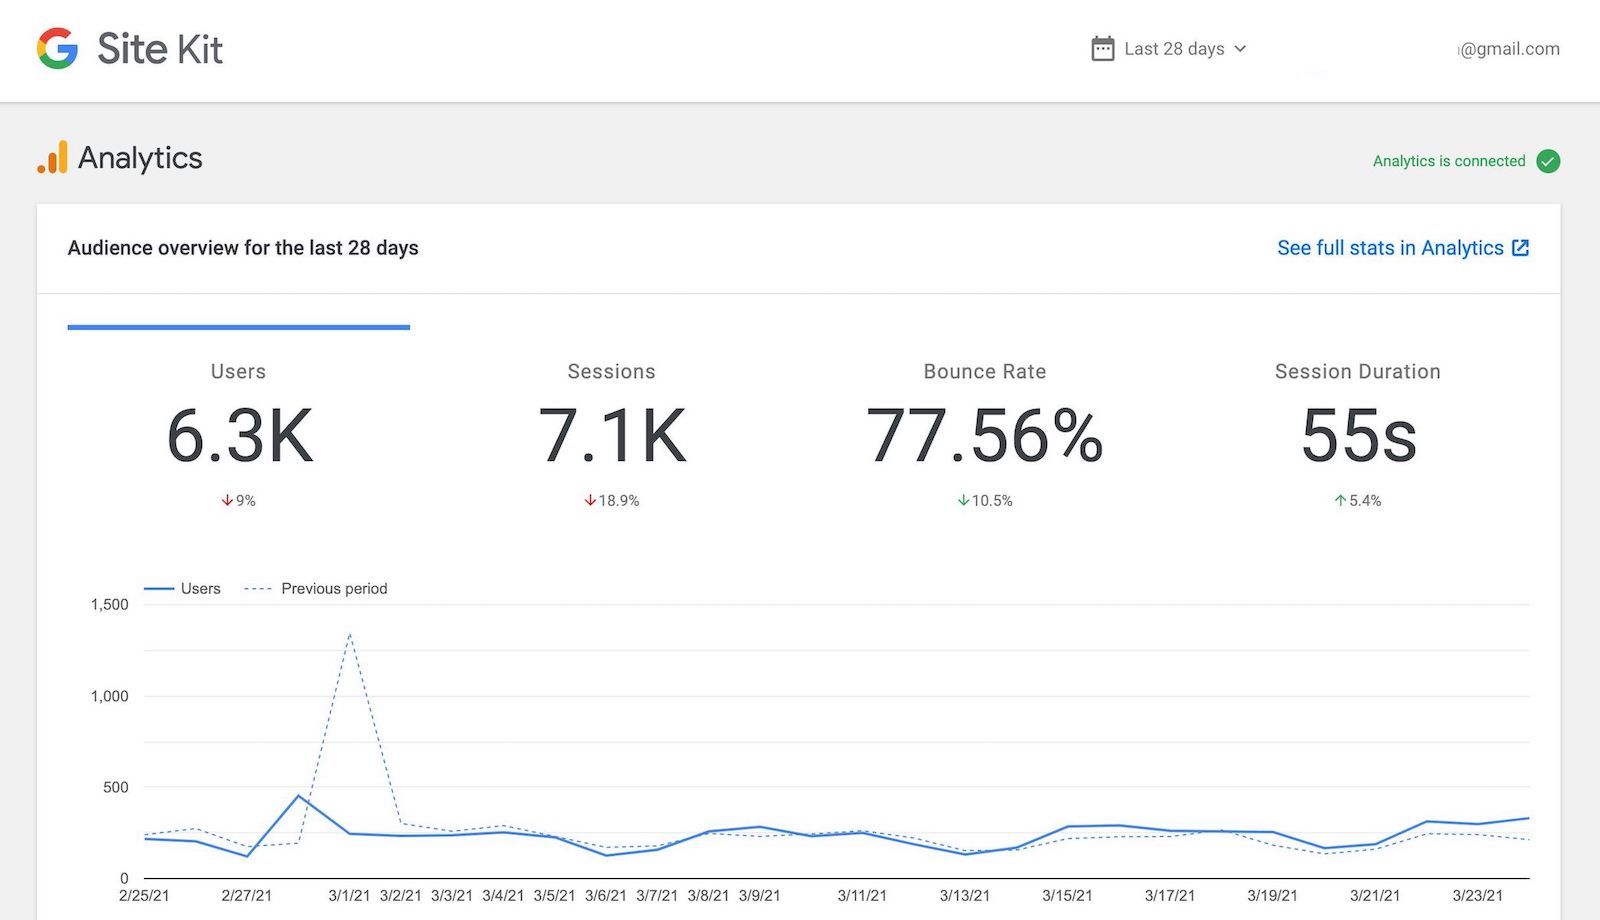
The AdSense section allows you to see the “Performance over the last 28 days” on Google AdSense. You can see your earnings, page RPM, Impressions, and Page CTR. Further down, you can analyze your page by page earnings performance over the last 28 days with details around which posts earned the most.
Analytics
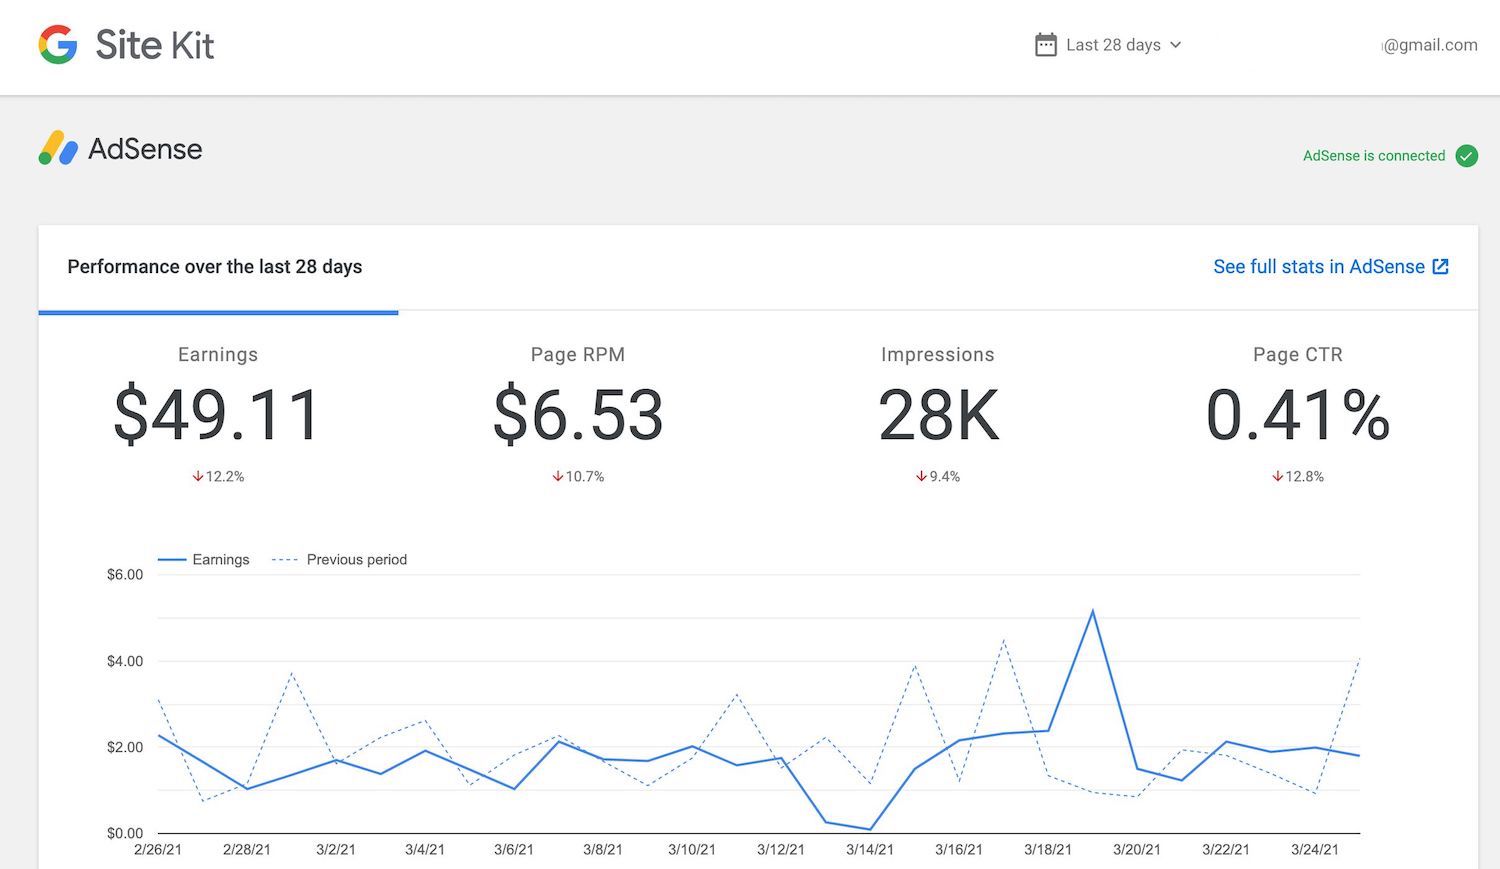
The Analytics report gives you an overview of your blog’s traffic over the last 28 days by default. Your users, sessions, bounce rate, and session duration are highlighted with numerical figures. Beneath, a line graph showing the site’s traffic is visible.
Further down you can see a list of your top performing blog posts with the Pageviews, Unique Pageviews, and Bounce Rate visible.
Below, you have a pie chart of the top acquisition channels by users including Organic Search, Direct, Referral, Social and Email traffic.
Page-Level Data
One of my favorite features of this plugin is that it allows me to see detailed page level data for every post on my blog. The previous plug-in that I used connected to Google Analytics but it did not allow me to see individual page level data such as traffic, search terms, and advertising CPMs. I could only get a monthly overview for all posts on my blog. The Google Site Kit plugin lets me have access to all of the available data in the Google ecosystem!
All I have to do is mouse over “Site Kit” on the black upper WordPress admin tool bar while on the post I want to see data for.
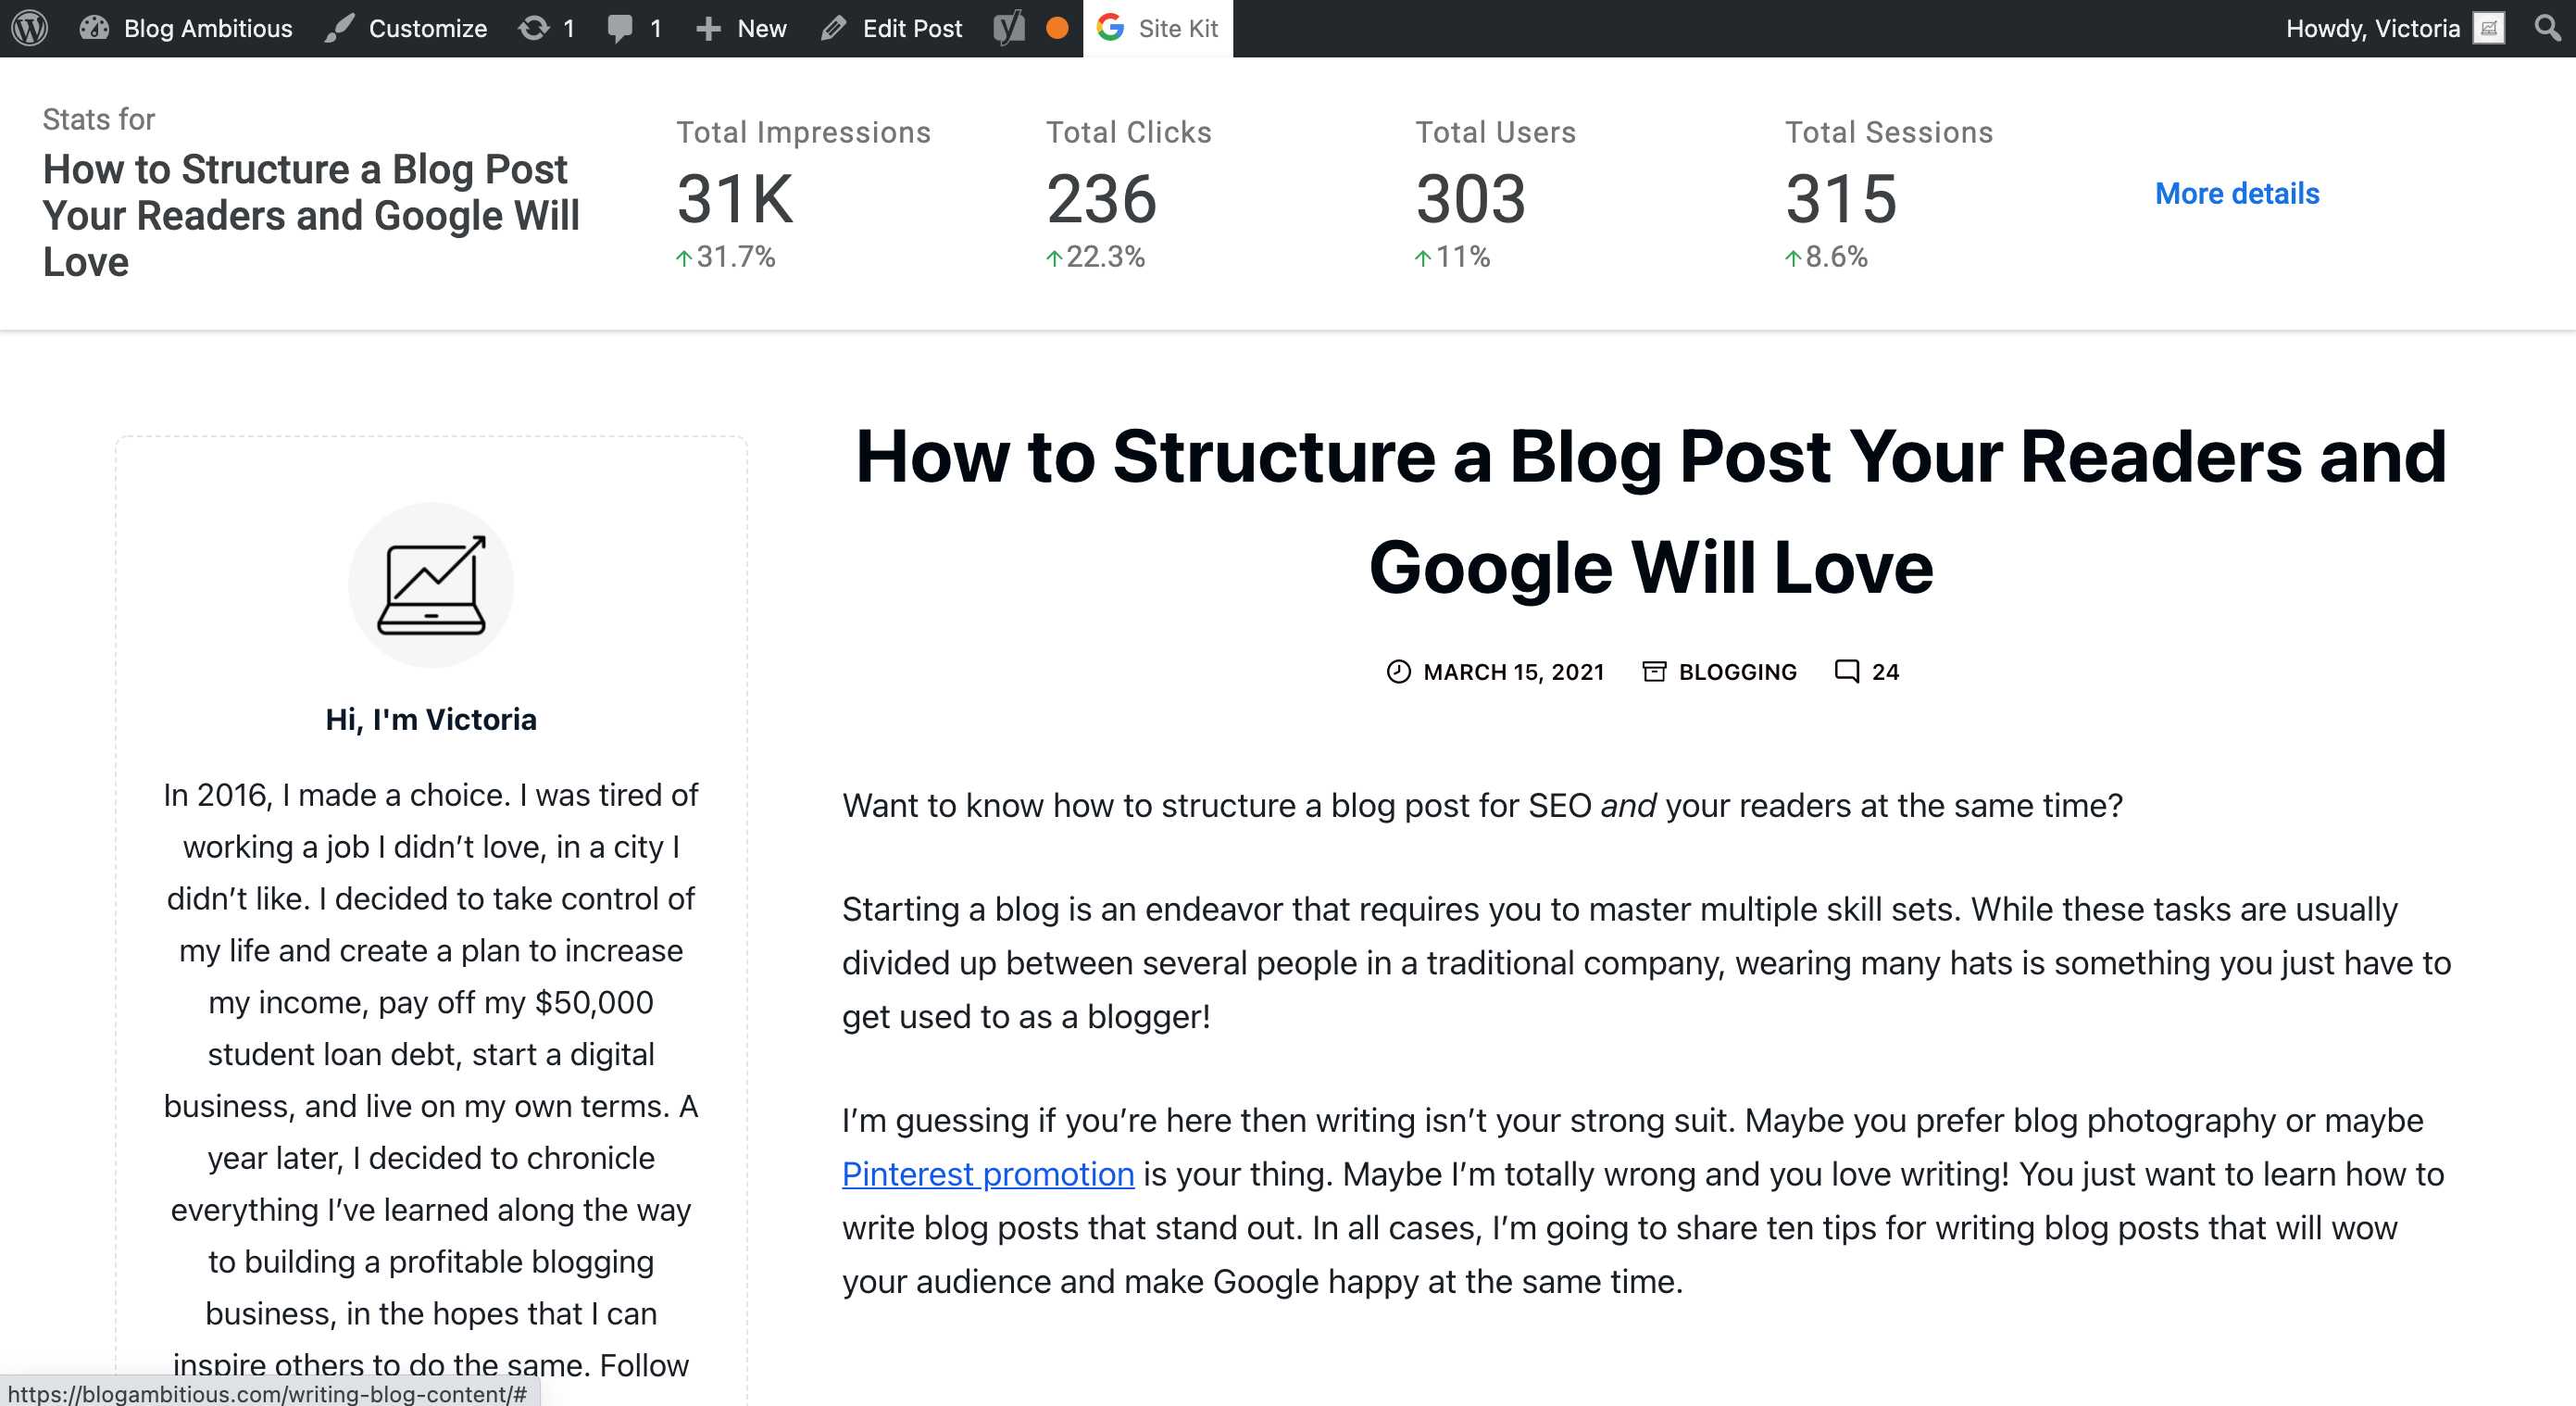
From there, I can click “More details” and see all of the Detailed Page Stats and post information!
- Search Funnel
- Traffic at a Glance
- Top Queries
- Page Speed and Experience
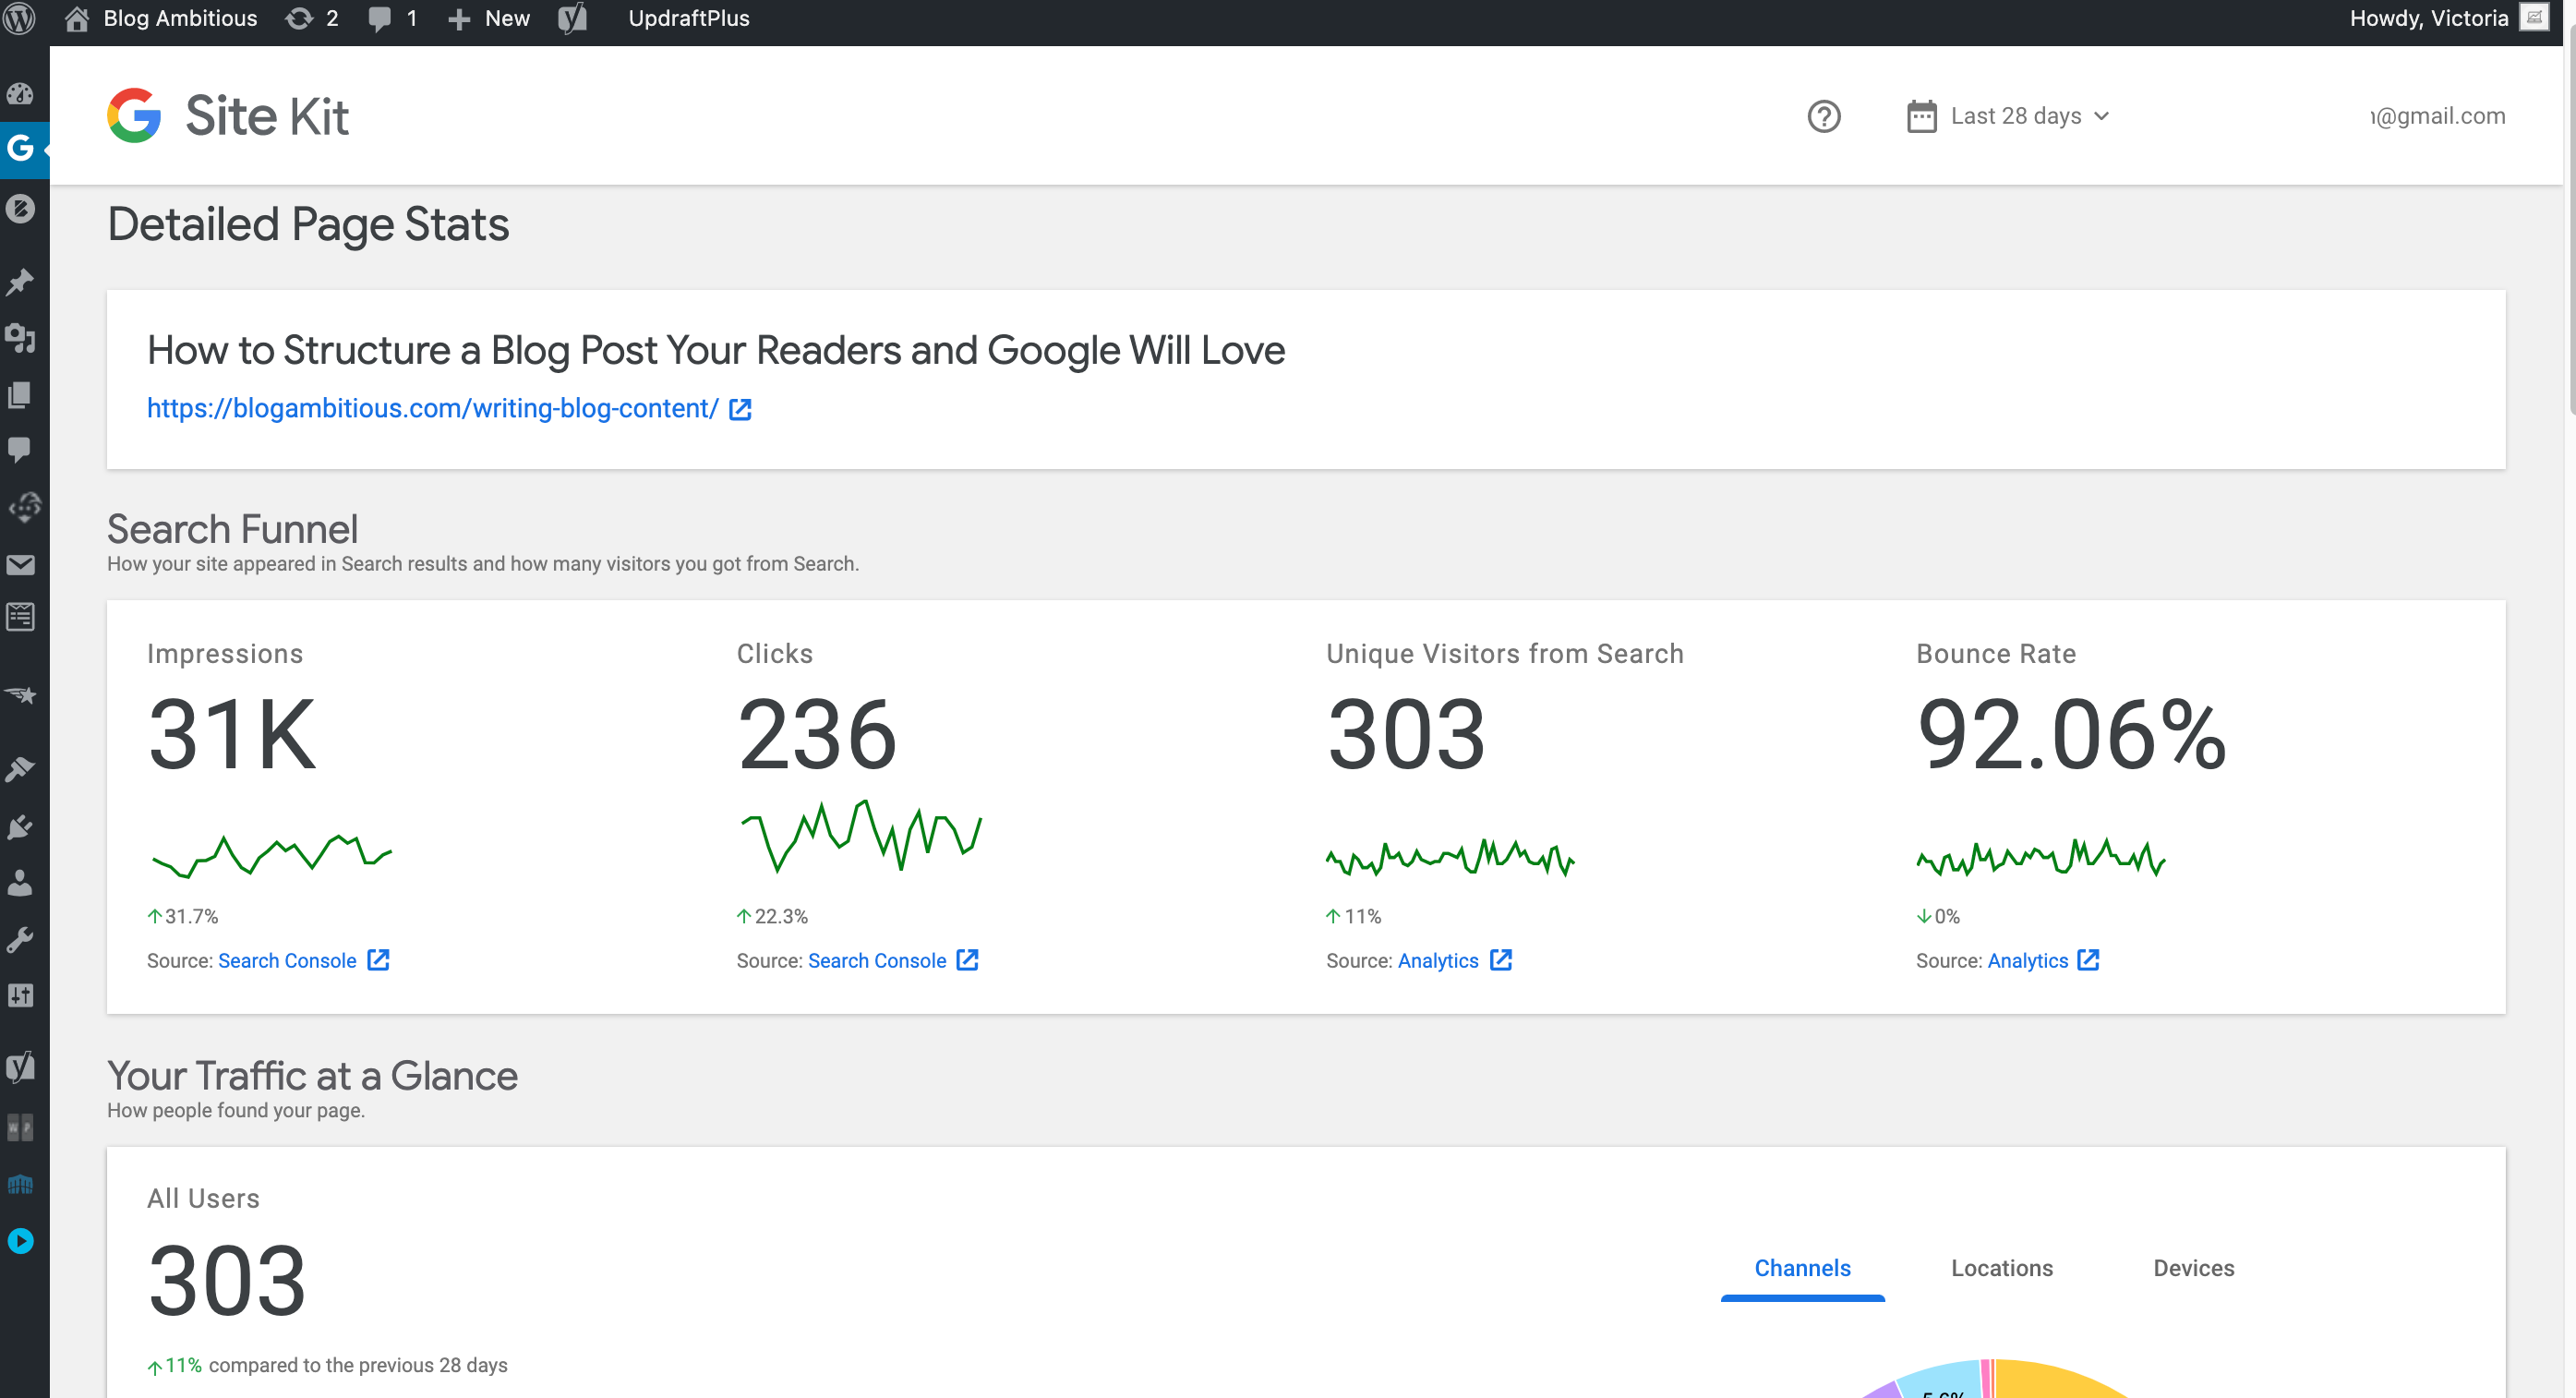
This post level data is essential to growing your blog. This is honestly one of my favorite features of this plugin!
I truly love this Google plugin. If you’re ready to install it on your own blog, then follow these instructions for installing Google Site Kit through the WordPress backend dashboard!
How to Install Google Site Kit
Here is an overview of how to install Site Kit if you are new to the plugin:
Install the Plugin
Click Start Setup

Click Sign in with Google
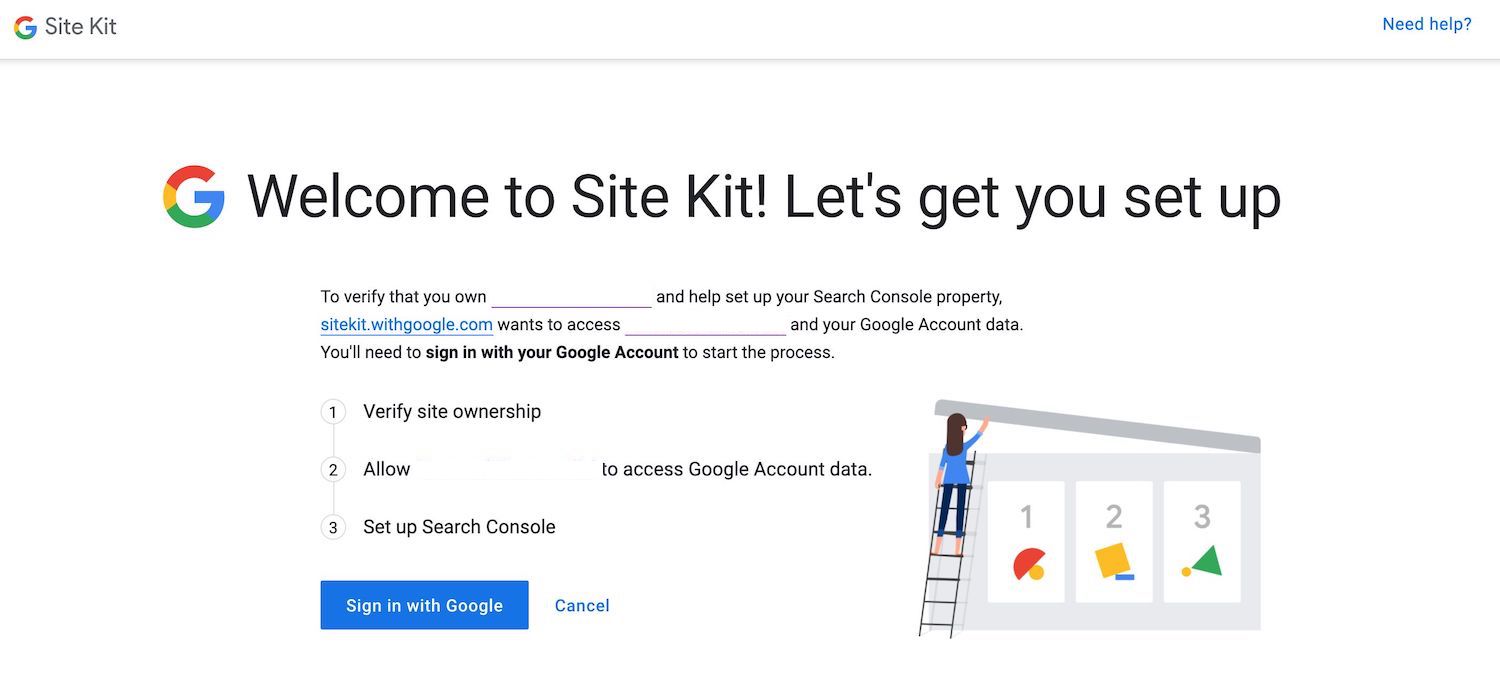
Click “Allow” to the permissions popups
Click Proceed
Click Allow
Click Add Site
Click Go to My Dashboard
You should see a success message “Congrats on completing the setup for Site Kit!”
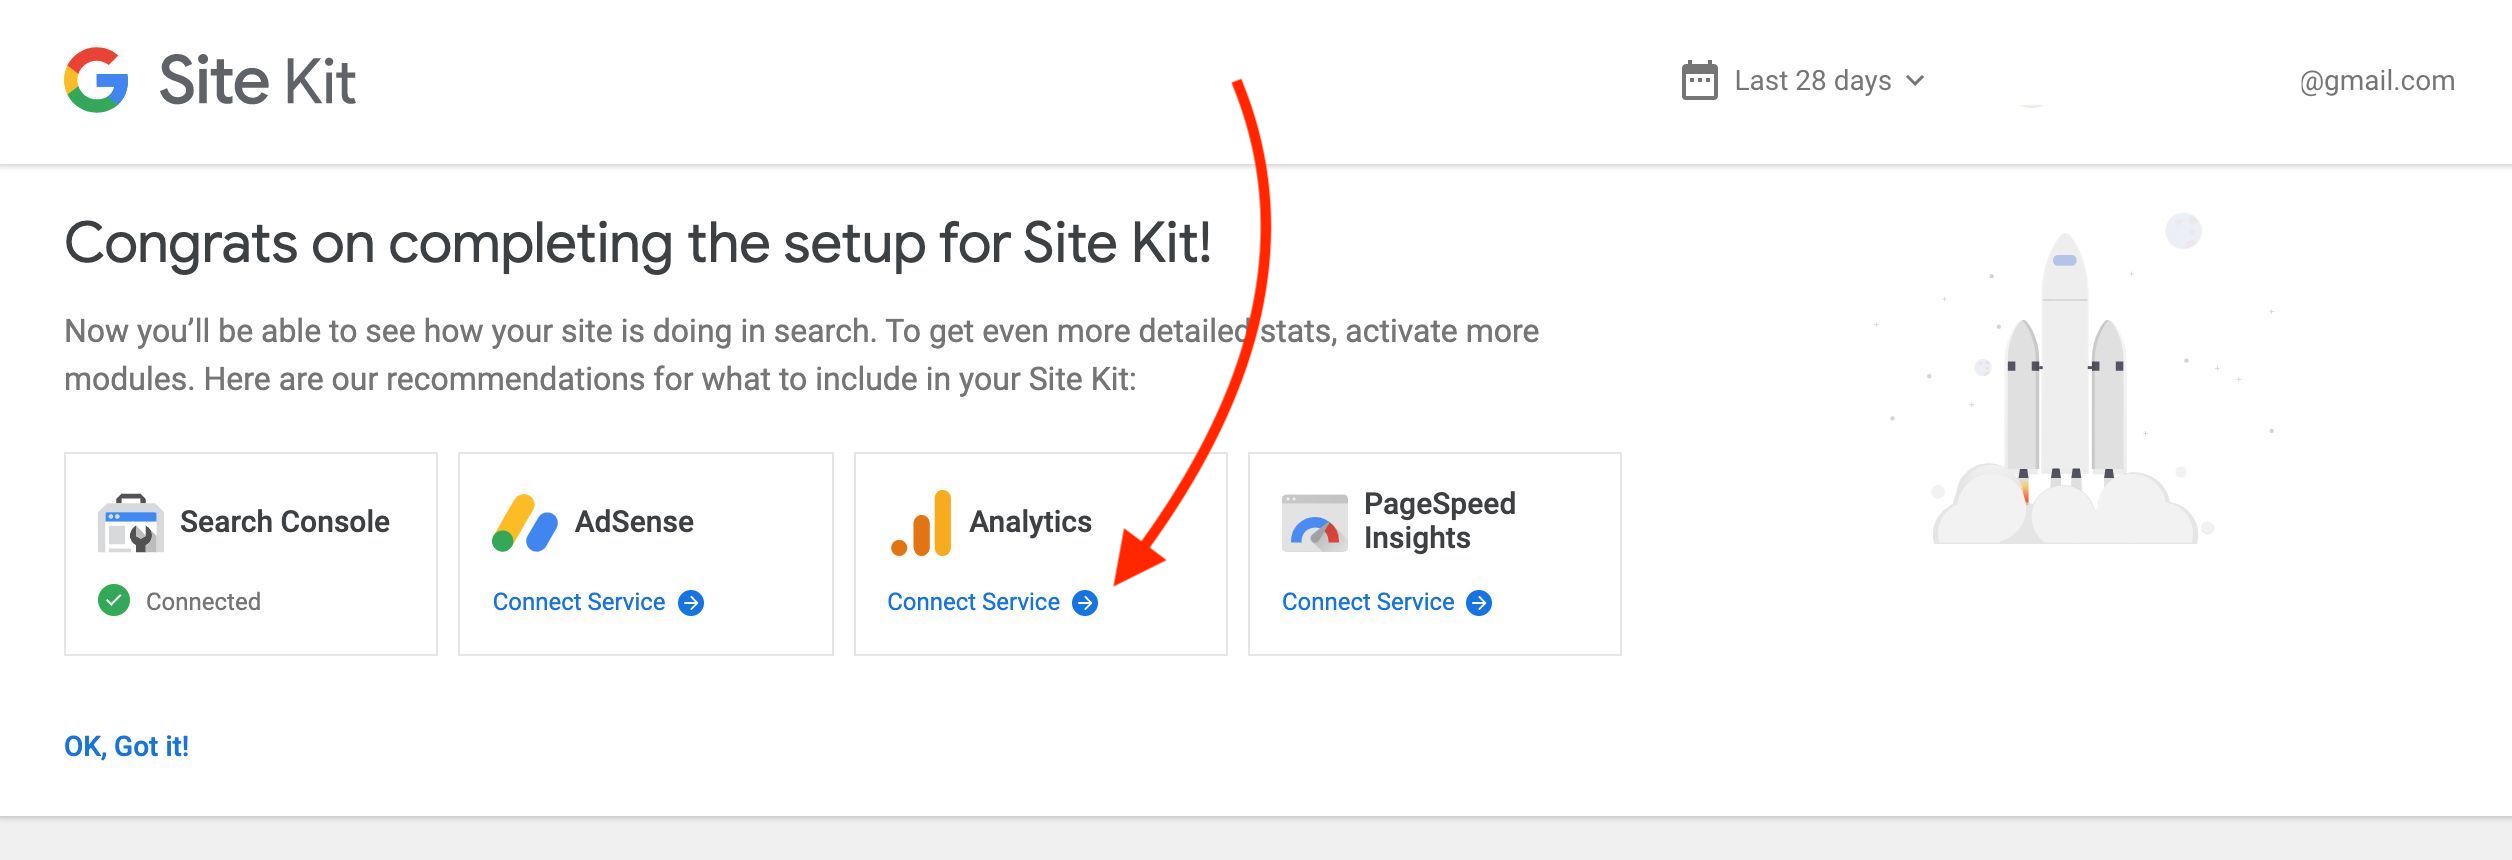
Under Analytics click “Connect Service”
Choose the Google account you want to use
Allow the permissions
Click Configure Analytics
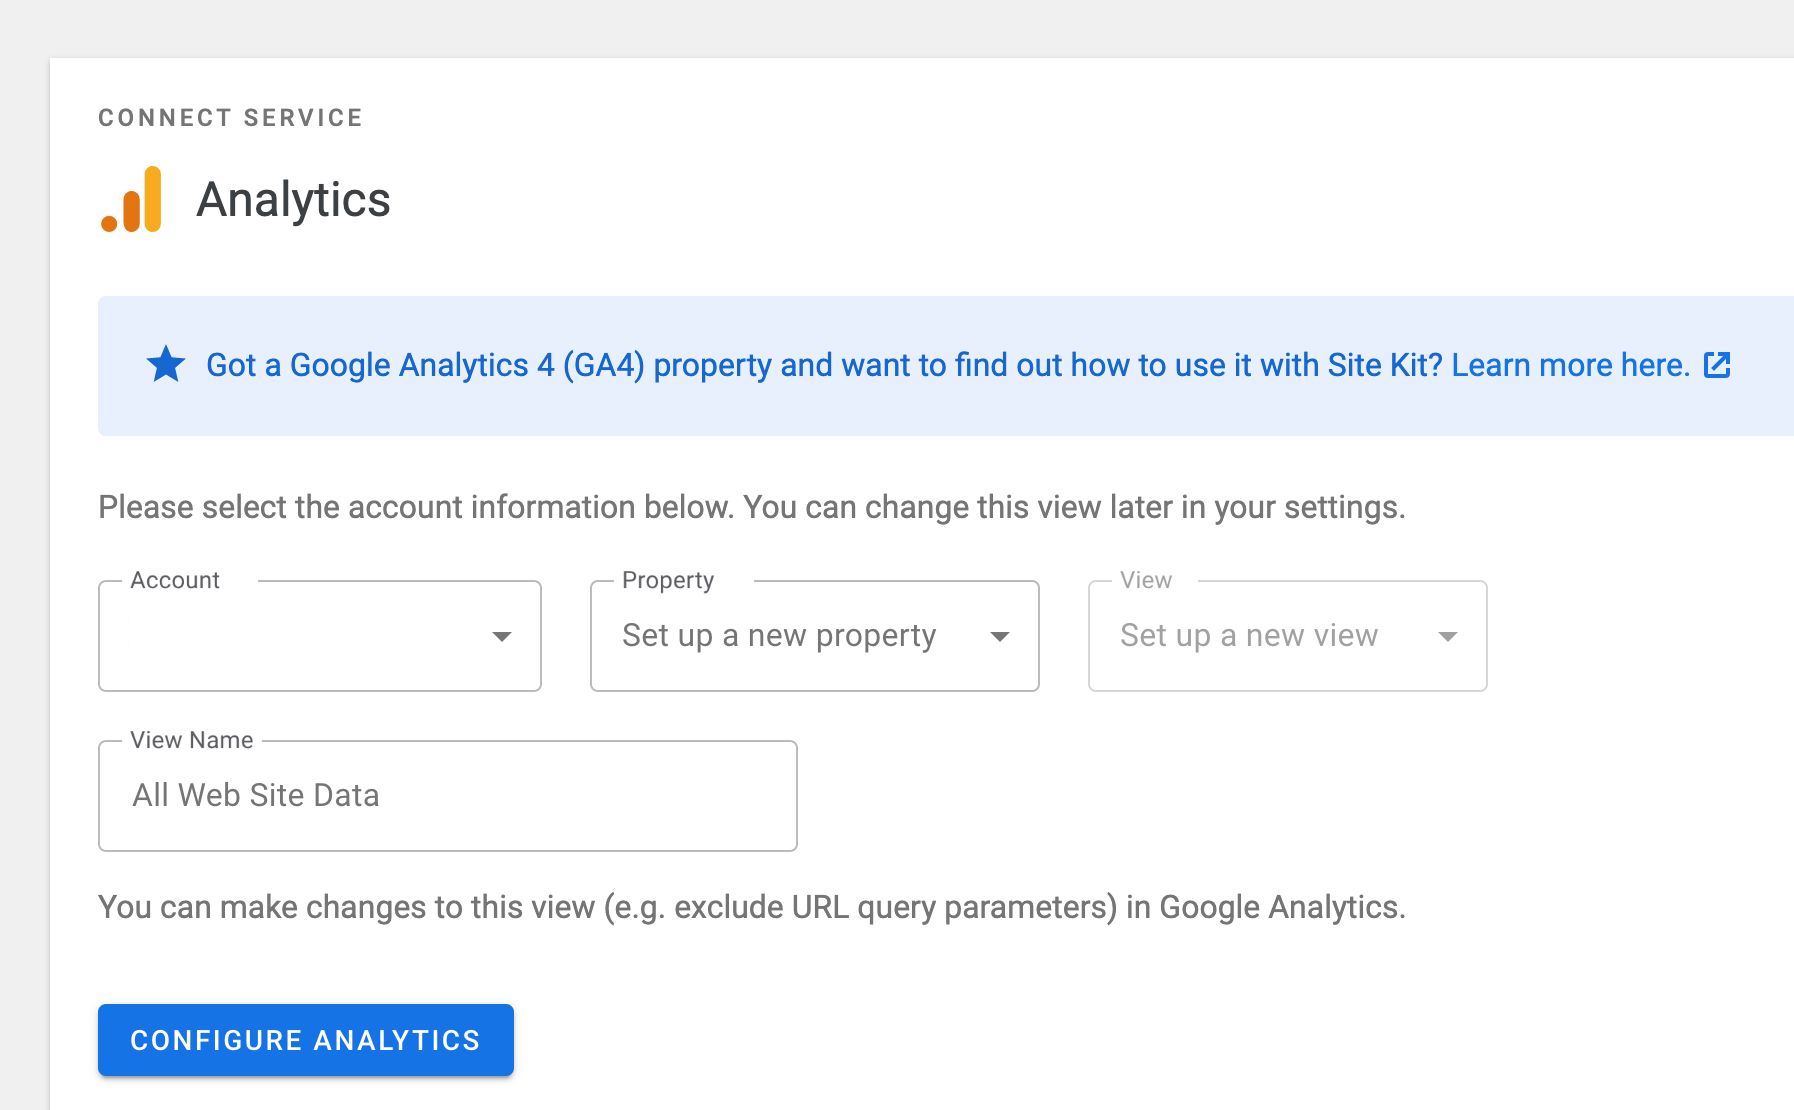
You may need to Proceed to allow Site Kit to create an Analytics property on your behalf.
It should say “Analytics gathering data” if this is your first time using Google Analytics, otherwise you’ll see the data from your existing property!
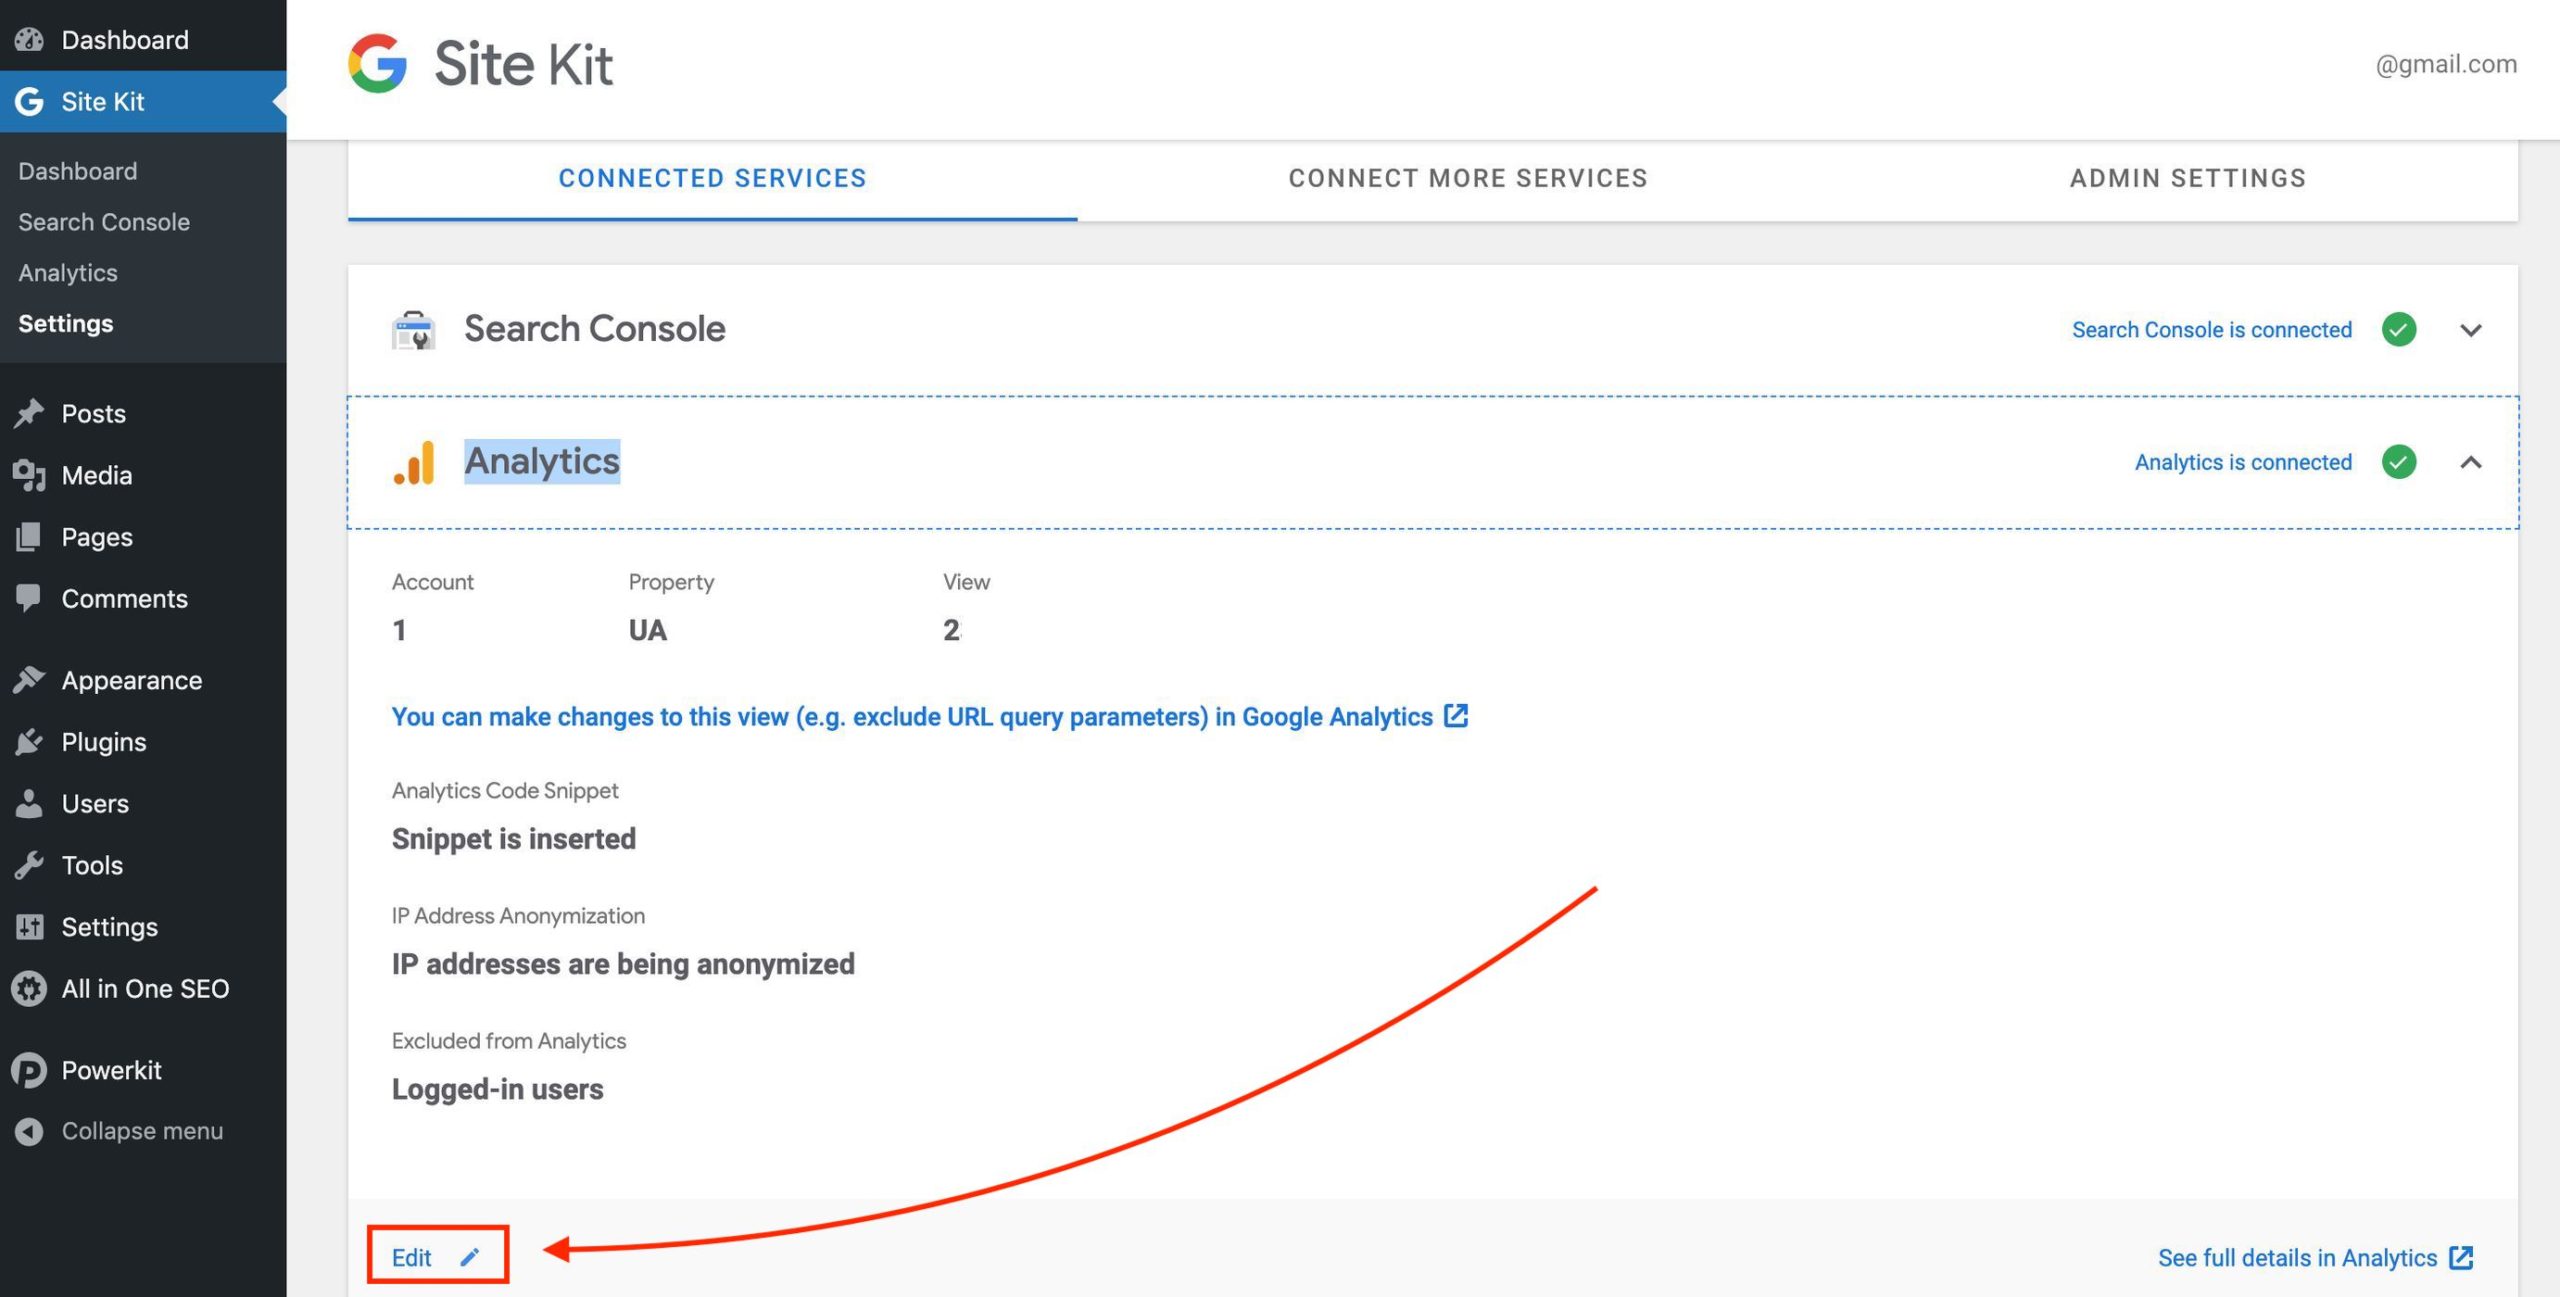
Keep in mind, if you previously inserted the Google Analytics code to your site, you need to either remove it, or go to Site Kit > Settings, select the “Analytics” section and scroll down to click “Edit.” From there you can turn off the “Analytics Code Snippet” option.
