As you may have noticed, last month, I rebranded my blog to the name Blog Ambitious! I have previous experience with rebranding and I remember a lot of headache when using the various free plugins available so this time around I decided to do it manually myself!
This guide requires a bit of technical knowledge around cPanel and phpMyAdmin, so please don’t attempt this if you don’t have experience with these tools!
Essentially, what we’re going to be doing is copy and pasting the two main parts of a WordPress website: the Database and the Files. From there, we’ll update any old URLs and redirect old traffic to the new site!
So, let’s get started. Here are the exact steps I took to transfer my WordPress blog to a new URL:
1. Buy Domain
The first step is to get a hold of your new domain! I bought my new domain from Namecheap.
2. Update Nameservers
Once your domain has been purchased, update the associated nameservers to point to your hosting account. (Your host can provide this information the way they did when you first purchased it!)
3. Install WordPress using HTTPS
You need to install a fresh version of WordPress. Don’t worry, the credentials and everything will change later, but just get a blank version of WordPress installed first. I used the Softaculous app installer to do this.
4. Download old database
Open up phpMyAdmin from cPanel and find your database. I do this by looking at the wp_options table and checking out the contents of the URL fields.
Click back to the header name of the correct database. Then click Export tab, and finally the Go button.
The export of your database should download automatically.
5. Set up your new Database
Go back to cPanel and click “MySQL® Databases”
Create a Database
Create a User
Add that User to the new Database
You should be able to do all of this from that page! Make sure you write down all this info as you’ll need it again shortly.
6. Upload your old database file into the new database
Once your new database has been created, go back into phpMyAdmin.
Click the name of your new database.
Click Import.
Choose File and select the database file you had previously downloaded.
Leave the existing setting, scroll to the bottom and click Go.
7. Update the Options Table
Find the wp_options table within your new website. Open it up and replace the two website values with your new website.
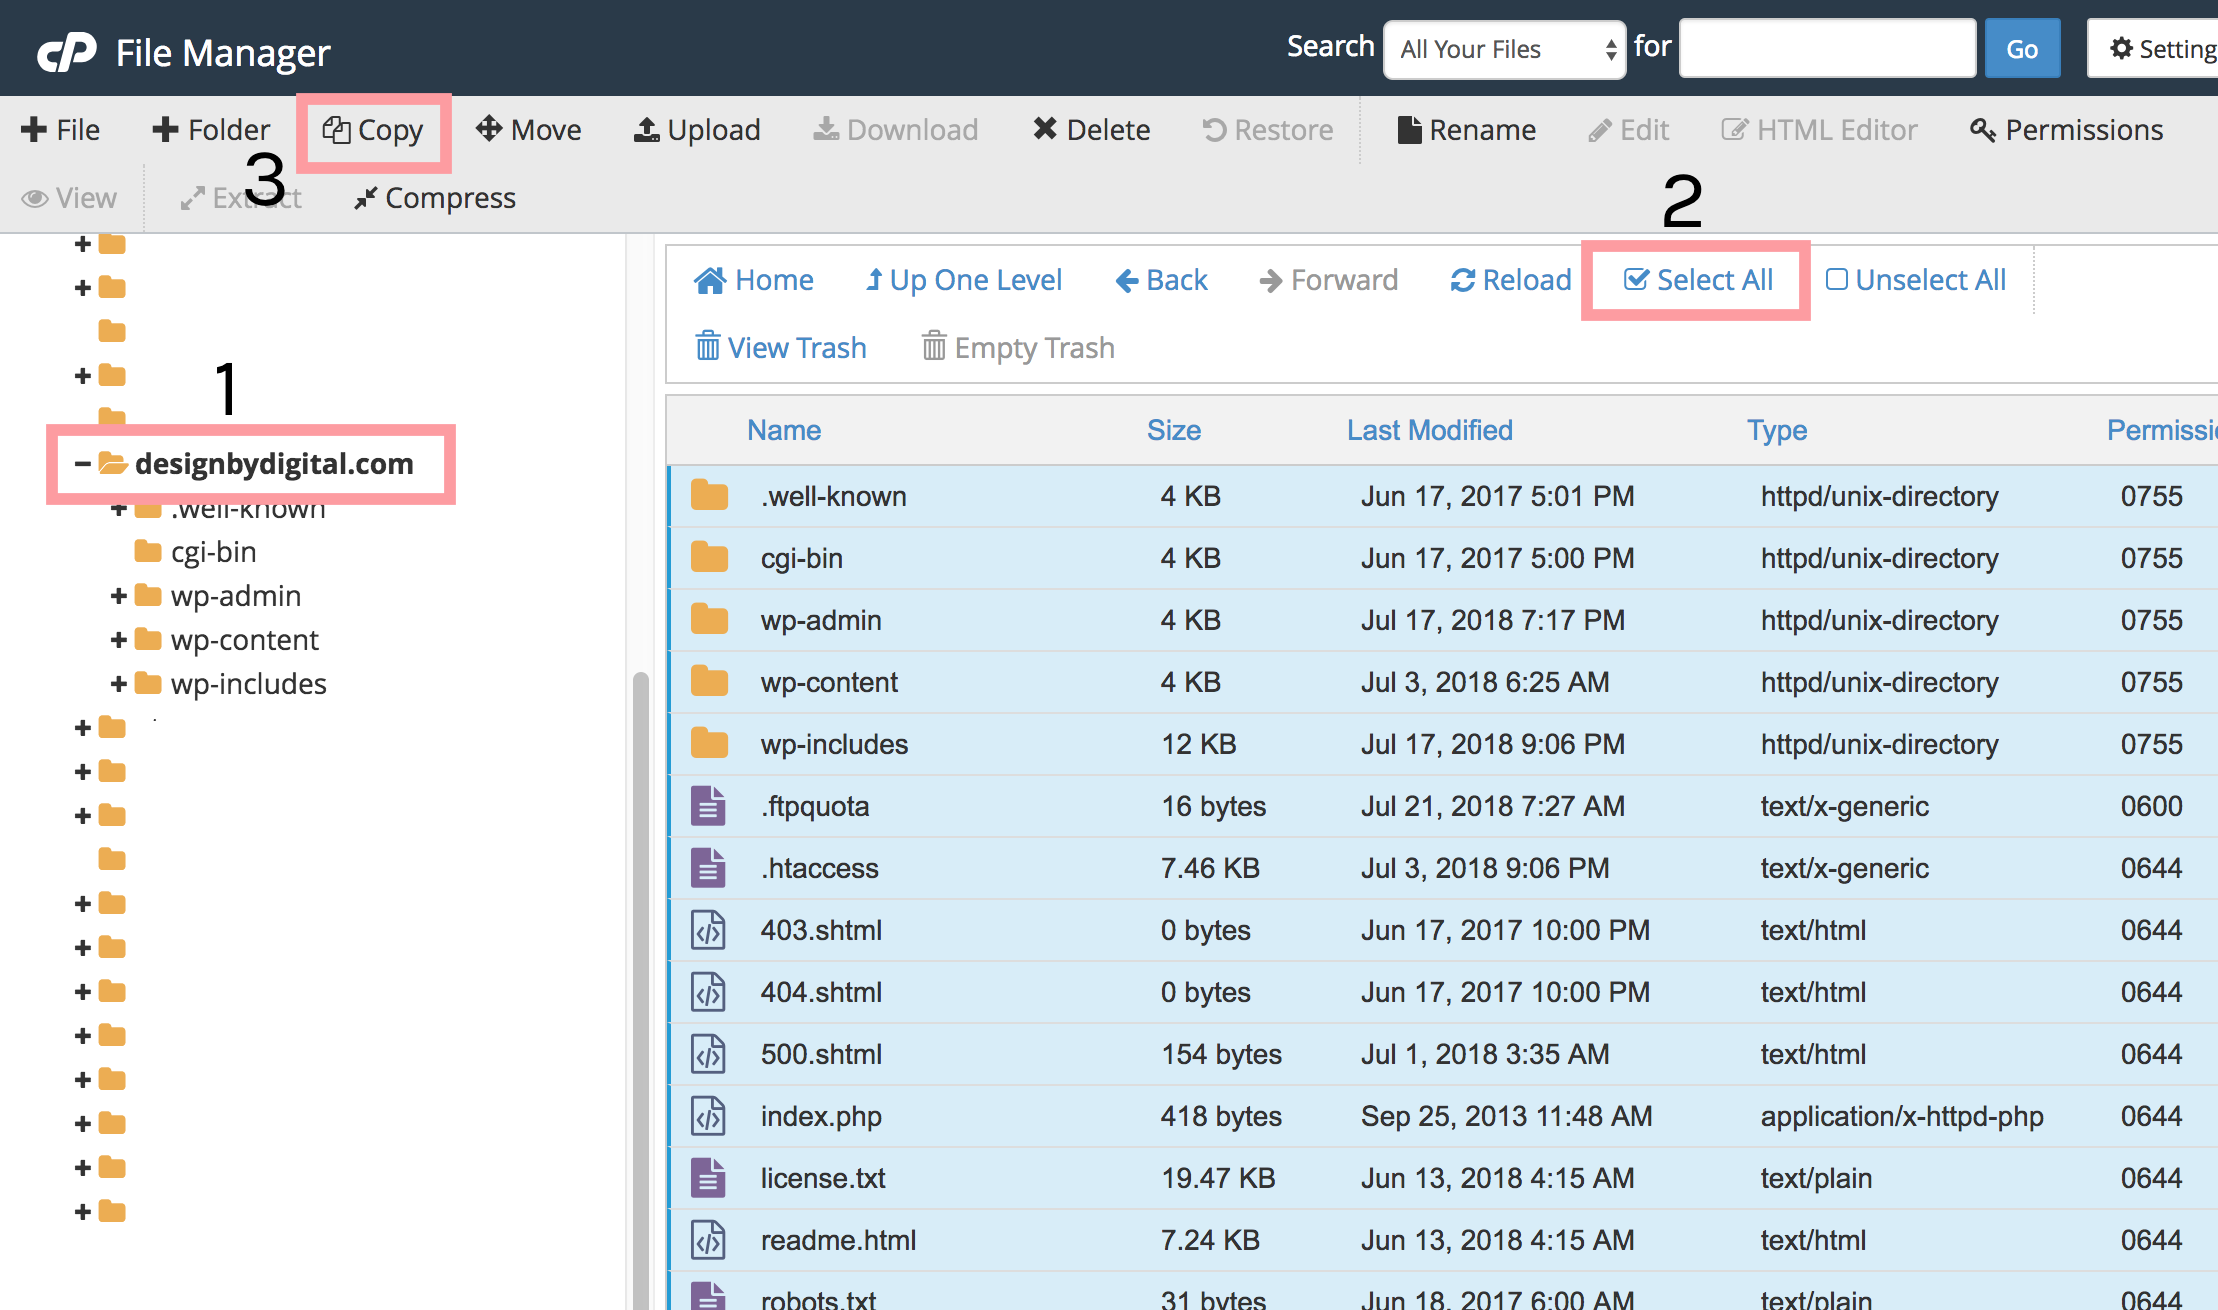
8. Copy over existing files in “File Manager”
Go back to cPanel and click into your “File Manager”
You’re going to copy all the files in your current website folder into your new website folder that was created when you installed WordPress.
First click the folder of your old website, then click Select All, and then click Copy:
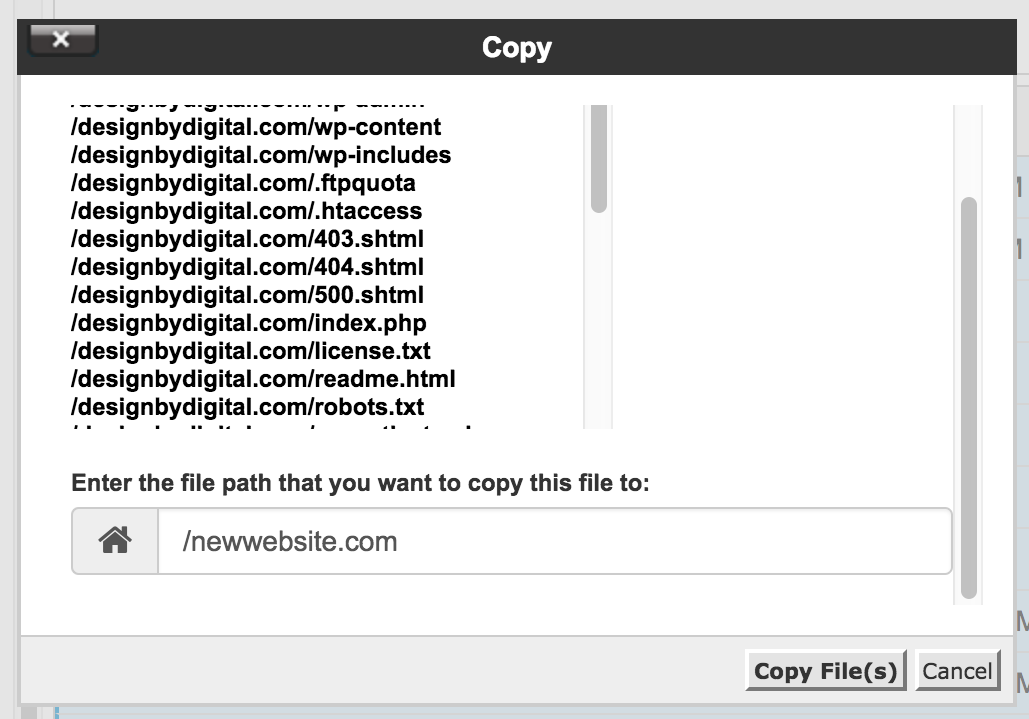
In the pop-up, enter your new website domain:
9. Edit wp-config file
Now we need to edit the wp-config.php file which tells WordPress which database to connect with your files.
Find the wp-config.php file in your File Manager (make sure you’re looking under the NEW website folder). It should be right in the top level folder (yournewwebsite.com)
Select the file and then click “Edit” at the top.
If you get a pop up, click Edit again.
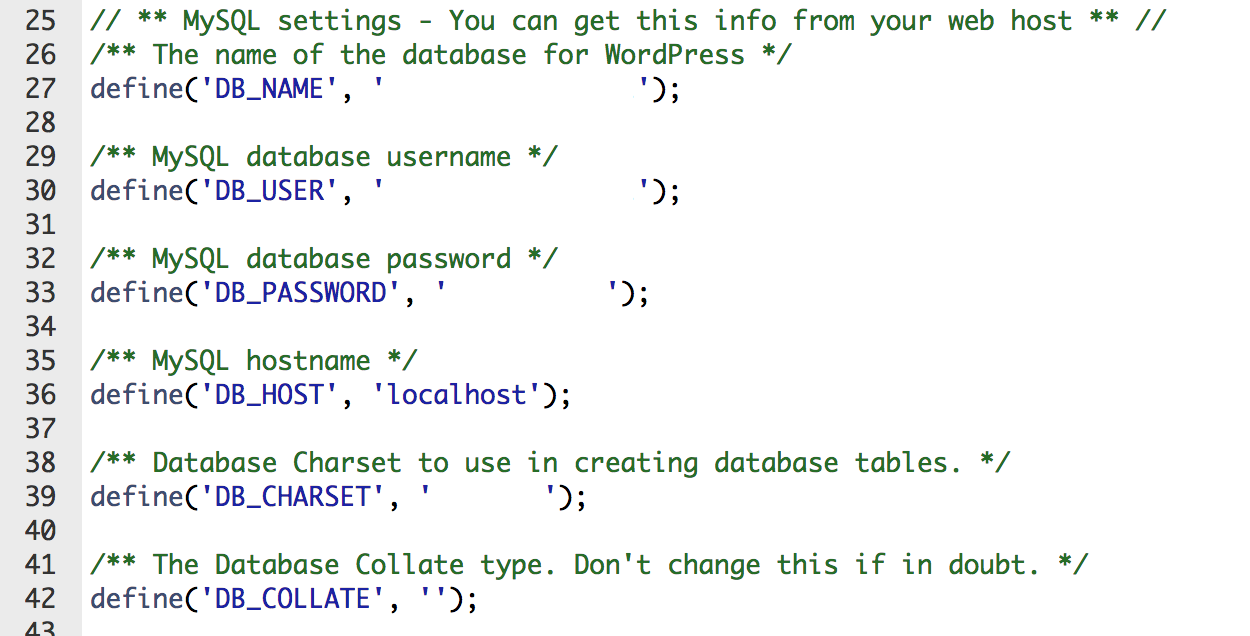
Scroll down to the “MySQL settings” section
Replace the existing values with your new database name, user and password:
10. Log into your new site!
Now it’s time to log in! Keep in mind, you will need to log in with your OLD credentials, since even though we installed a fresh WordPress, we essentially replaced it with old files and databases. If you want to change your website’s username, the you can do that from the “Users” section of the WordPress admin.
11. Re-Connect Jetpack
If you use Jetpack, the plugin might ask you to reconnect your site and migrate your old stats. Follow their instructions to do this!
12. Update old links
So I’m pretty sure there’s a better way to do this, but here is what I did. I used two plugins to update any internal links on my site that were pointing to my old domain:
The first was the Velvet Blues Update URLs plugin, which worked ok but didn’t fully do the job I needed. Once you have it installed you go to Tools > Update URLs.
I then used Better Search and Replace for any missing links in wp_posts. I also used Better Search and Replace to update the Name, Website and Email associated with my blog comments in wp_comments. (In this plugin, I selected everything except the last option)
Let me know in the comments if you have a more seamless way of doing this!
13. Redirect your old traffic
Arguably the most important step! You need to redirect any traffic to your old domain to your new website via the old site’s htaccess file.
Add the following code:
2
3
4
RewriteCond %{HTTP_HOST} ^oldsite.com [NC,OR]
RewriteCond %{HTTP_HOST} ^www.oldsite.com [NC]
RewriteRule ^(.*)$ https://newsite.com/$1 [L,R=301,NC]
14. Save Permalinks
Lastly, go to Settings > Permalinks and click Save in your WordPress admin. (This is a best practice which sort of refreshes your new WordPress install)
That’s it! Hope you were able to successfully transfer your blog to a new URL using this guide!