As a new Mailchimp user, you’ll likely be using a free email account at first to send out your business newsletters. As you grow you should think about setting up a custom domain email address for your business and using it to send out your email newsletters.
Your newsletters will appear ten times more professional when they come from “[email protected]” or even “[email protected]” which is popular with a lot of corporations.
In my opinion, newsletters should be sent from real email address (don’t use “[email protected]”) that recipients can actually respond to! After all, the purpose of email marketing is to strengthen a true and genuine relationship with your business’ followers.
I’m always shocked at the number of corporations who send emails from a no-reply email. To me, it’s the equivalent of speaking to a person and walking away before they have a chance to respond. It’s just rude!
Since you’re a much more savvy business owner, let’s go over how to setup a custom email address from your domain in Mailchimp so you can use it to send out your newsletters. This will strengthen your overall email marketing strategy.
This will work both with automated and manual Mailchimp campaigns!
Verify your Domain in Mailchimp
First we need to verify to Mailchimp that we we actually own the domain.
Click the Website icon in the lefthand panel, and then Domains in the yellow column.
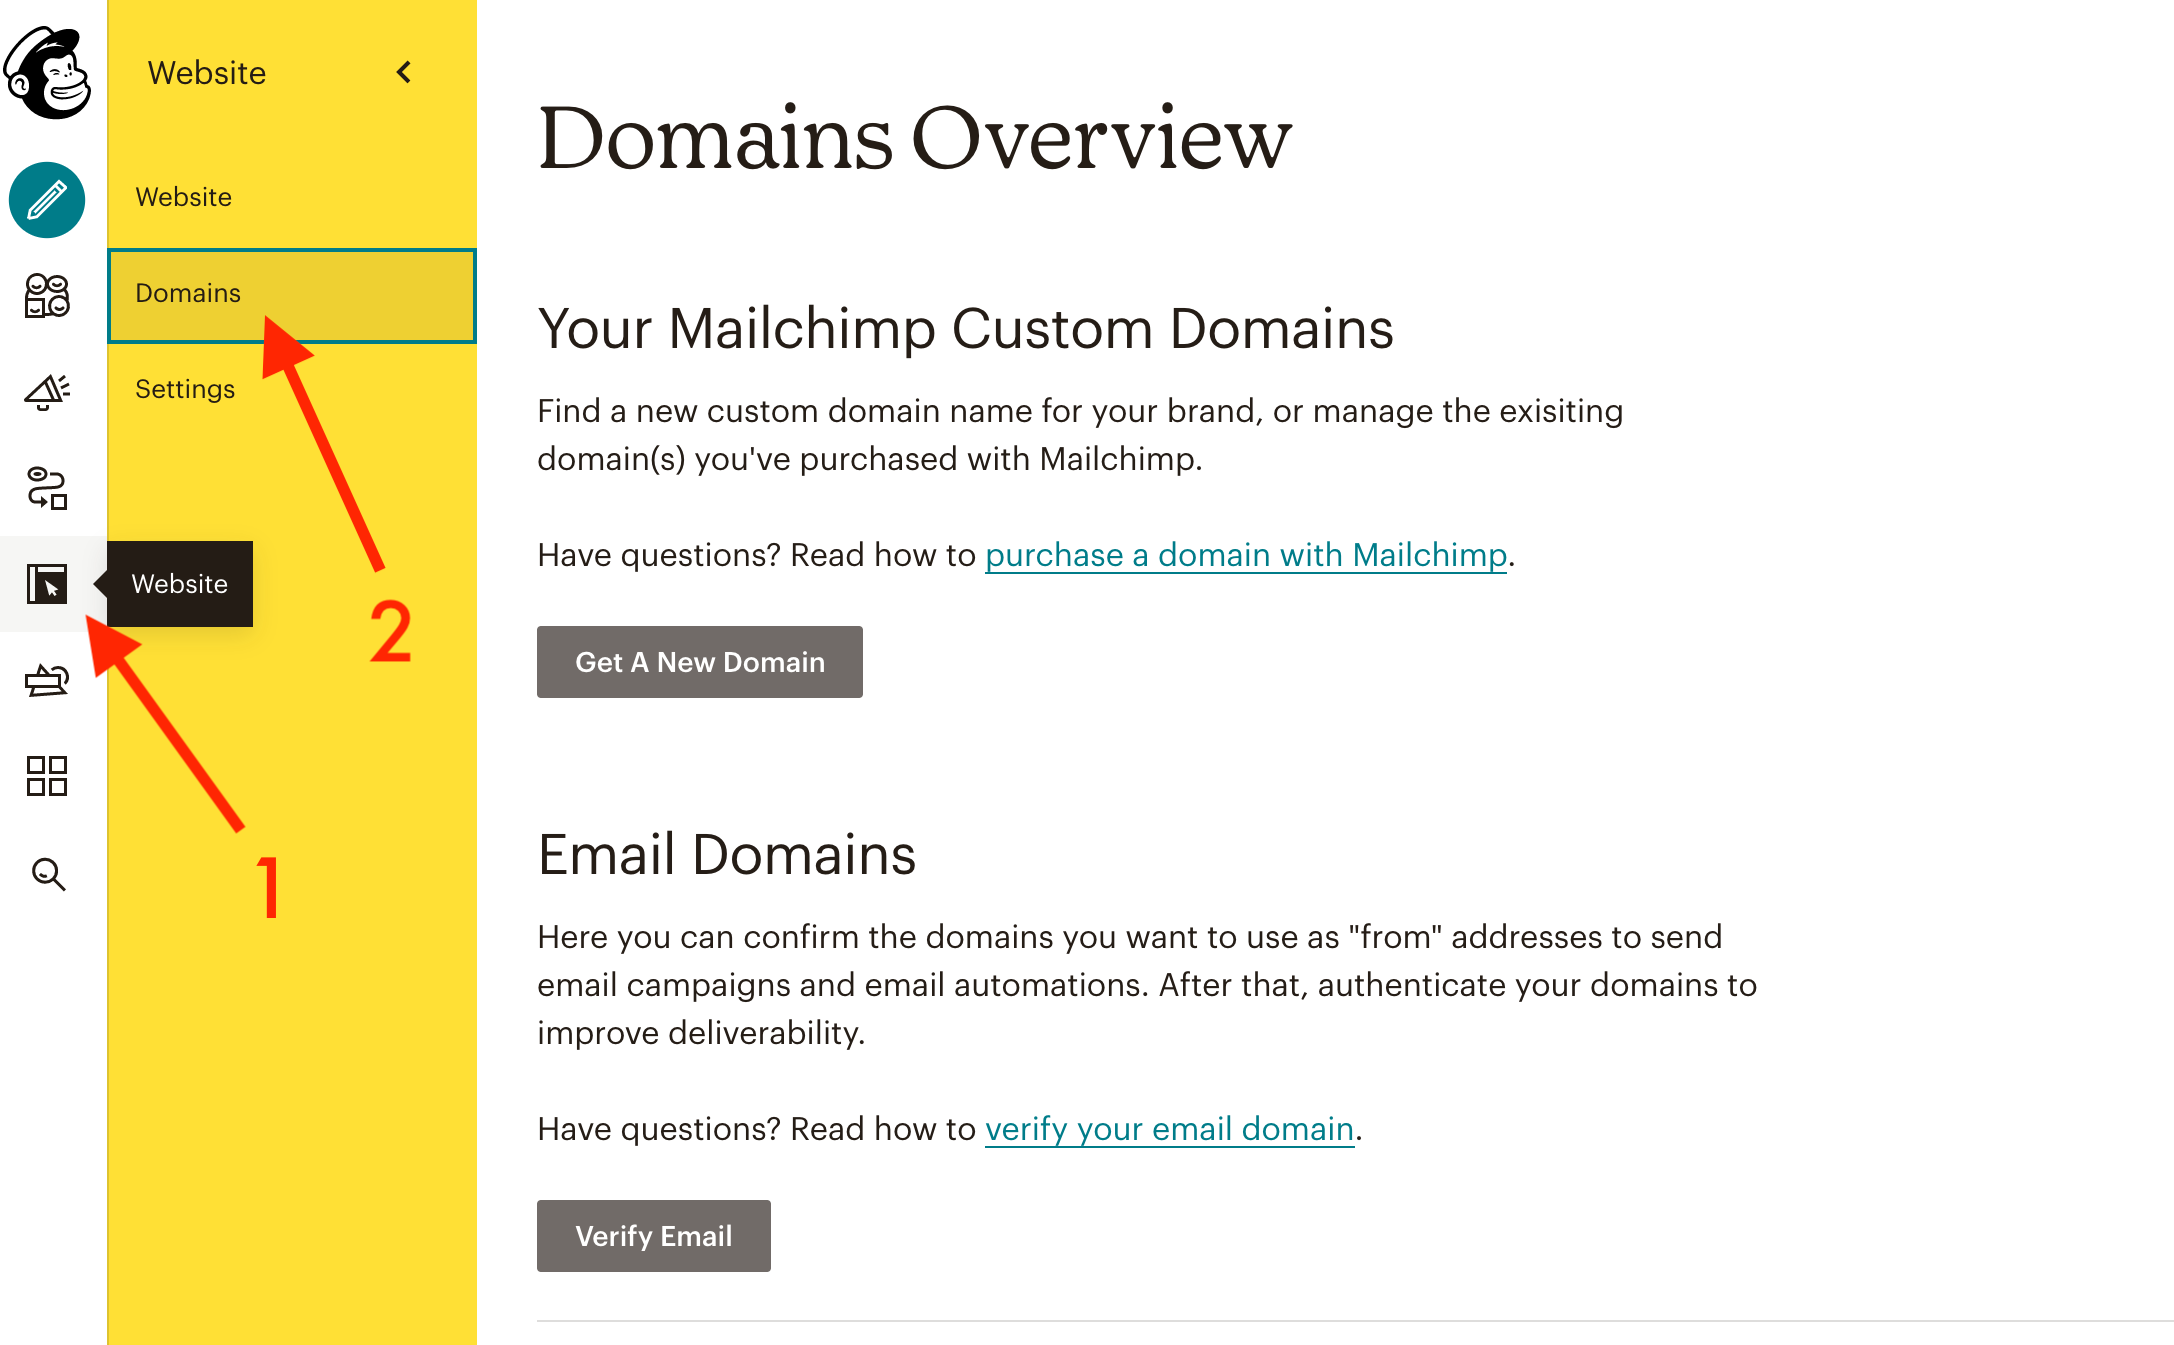
Under the “Email Domains” section, click Verify Email.
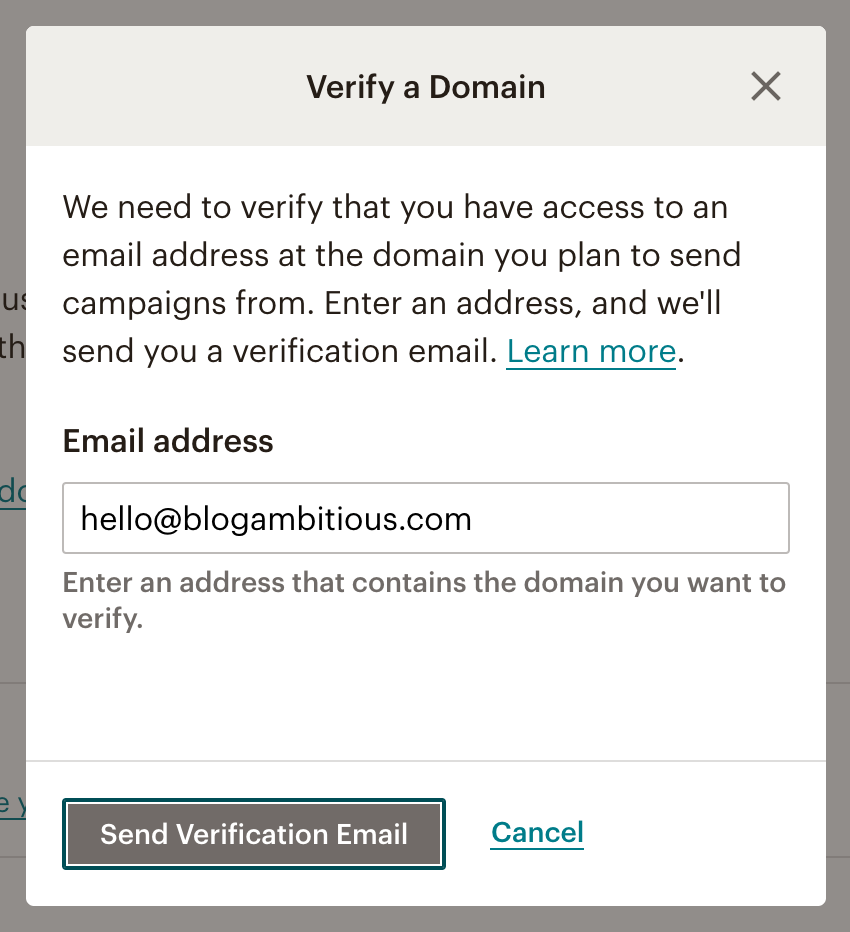
Enter the e-mail address you would like to use to send Mailchimp email campaigns. Click the Send Verification Email button.
Head over to your email and click the big Verify Domain Access button in the email you receive from Mailchimp or copy and paste the code into the “Enter verification code” box on the Mailchimp page and click Verify.
Congrats! You just verified your custom email address for use in Mailchimp. You can stop here if you’re in a rush, but if you have time, I highly recommend authenticating your domain the following section before using your custom email in newsletters. This will improve the deliverability of your emails to ensure they reach the people on your list.
Authenticate the Domain
Authenticating your domain makes it appear less fishy in others’ inboxes. Because Mailchimp will be using their servers and your email address to send these emails, some mail clients are more likely to flag this as spam. You can try to avoid that by authenticating the domain you send emails from through Mailchimp.
Click the big gray Authenticate button to the right of your domain name.
Copy the CNAME Record Key given by Mailchimp:

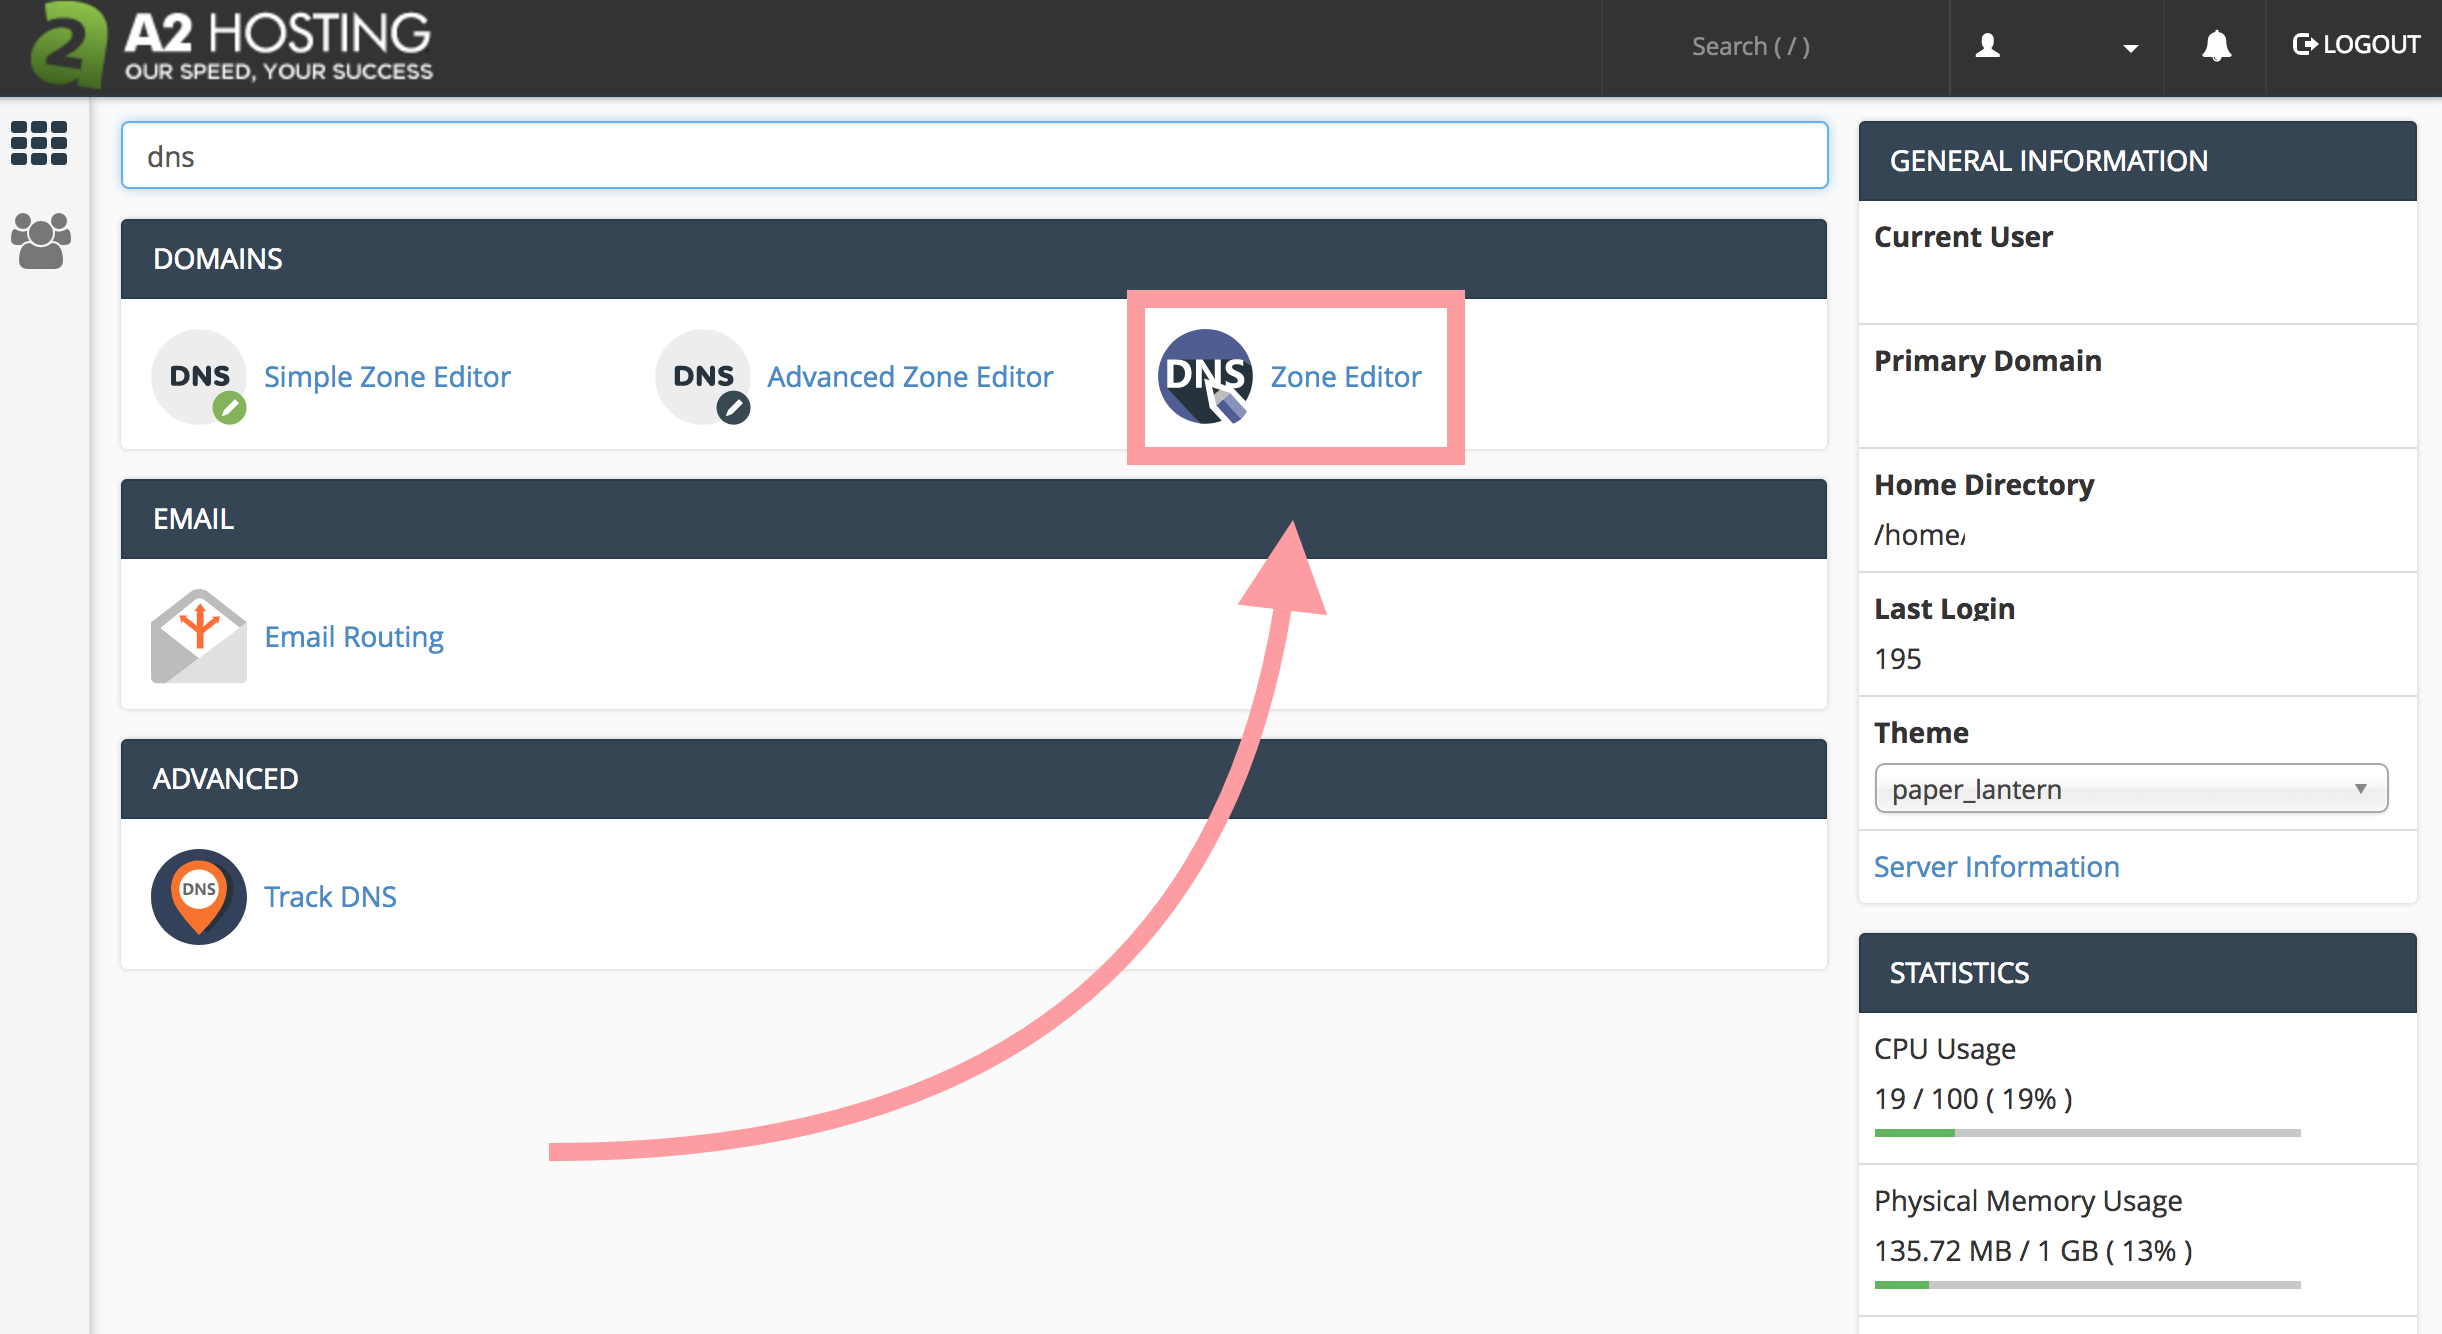
Now log into your hosting account to edit the DNS Records and add a CNAME Record.
I’ll show you how I do it on my hosting provider’s cPanel. If you host on another provider that uses cPanel, it will be quite similar:
Search your cPanel for DNS and select Zone Editor
Find your domain and click the corresponding +CNAME Record button

A pop up should appear where you’ll input the values given by Mailchimp:
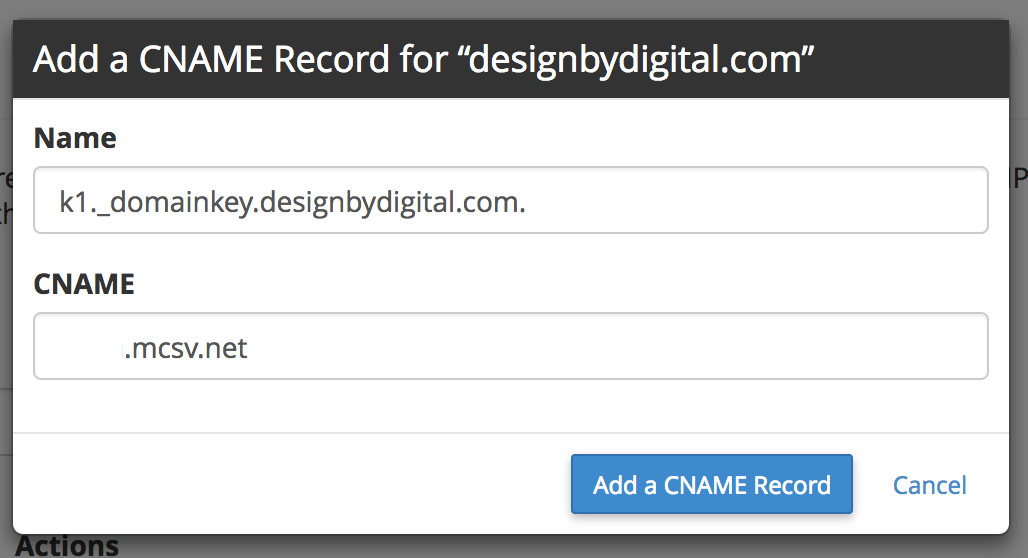
Click Add a CNAME Record to finish up.
A green success message should appear in the top right corner.
Go back to Mailchimp and select Authenticate Domain.
You may receive a red error message like this:
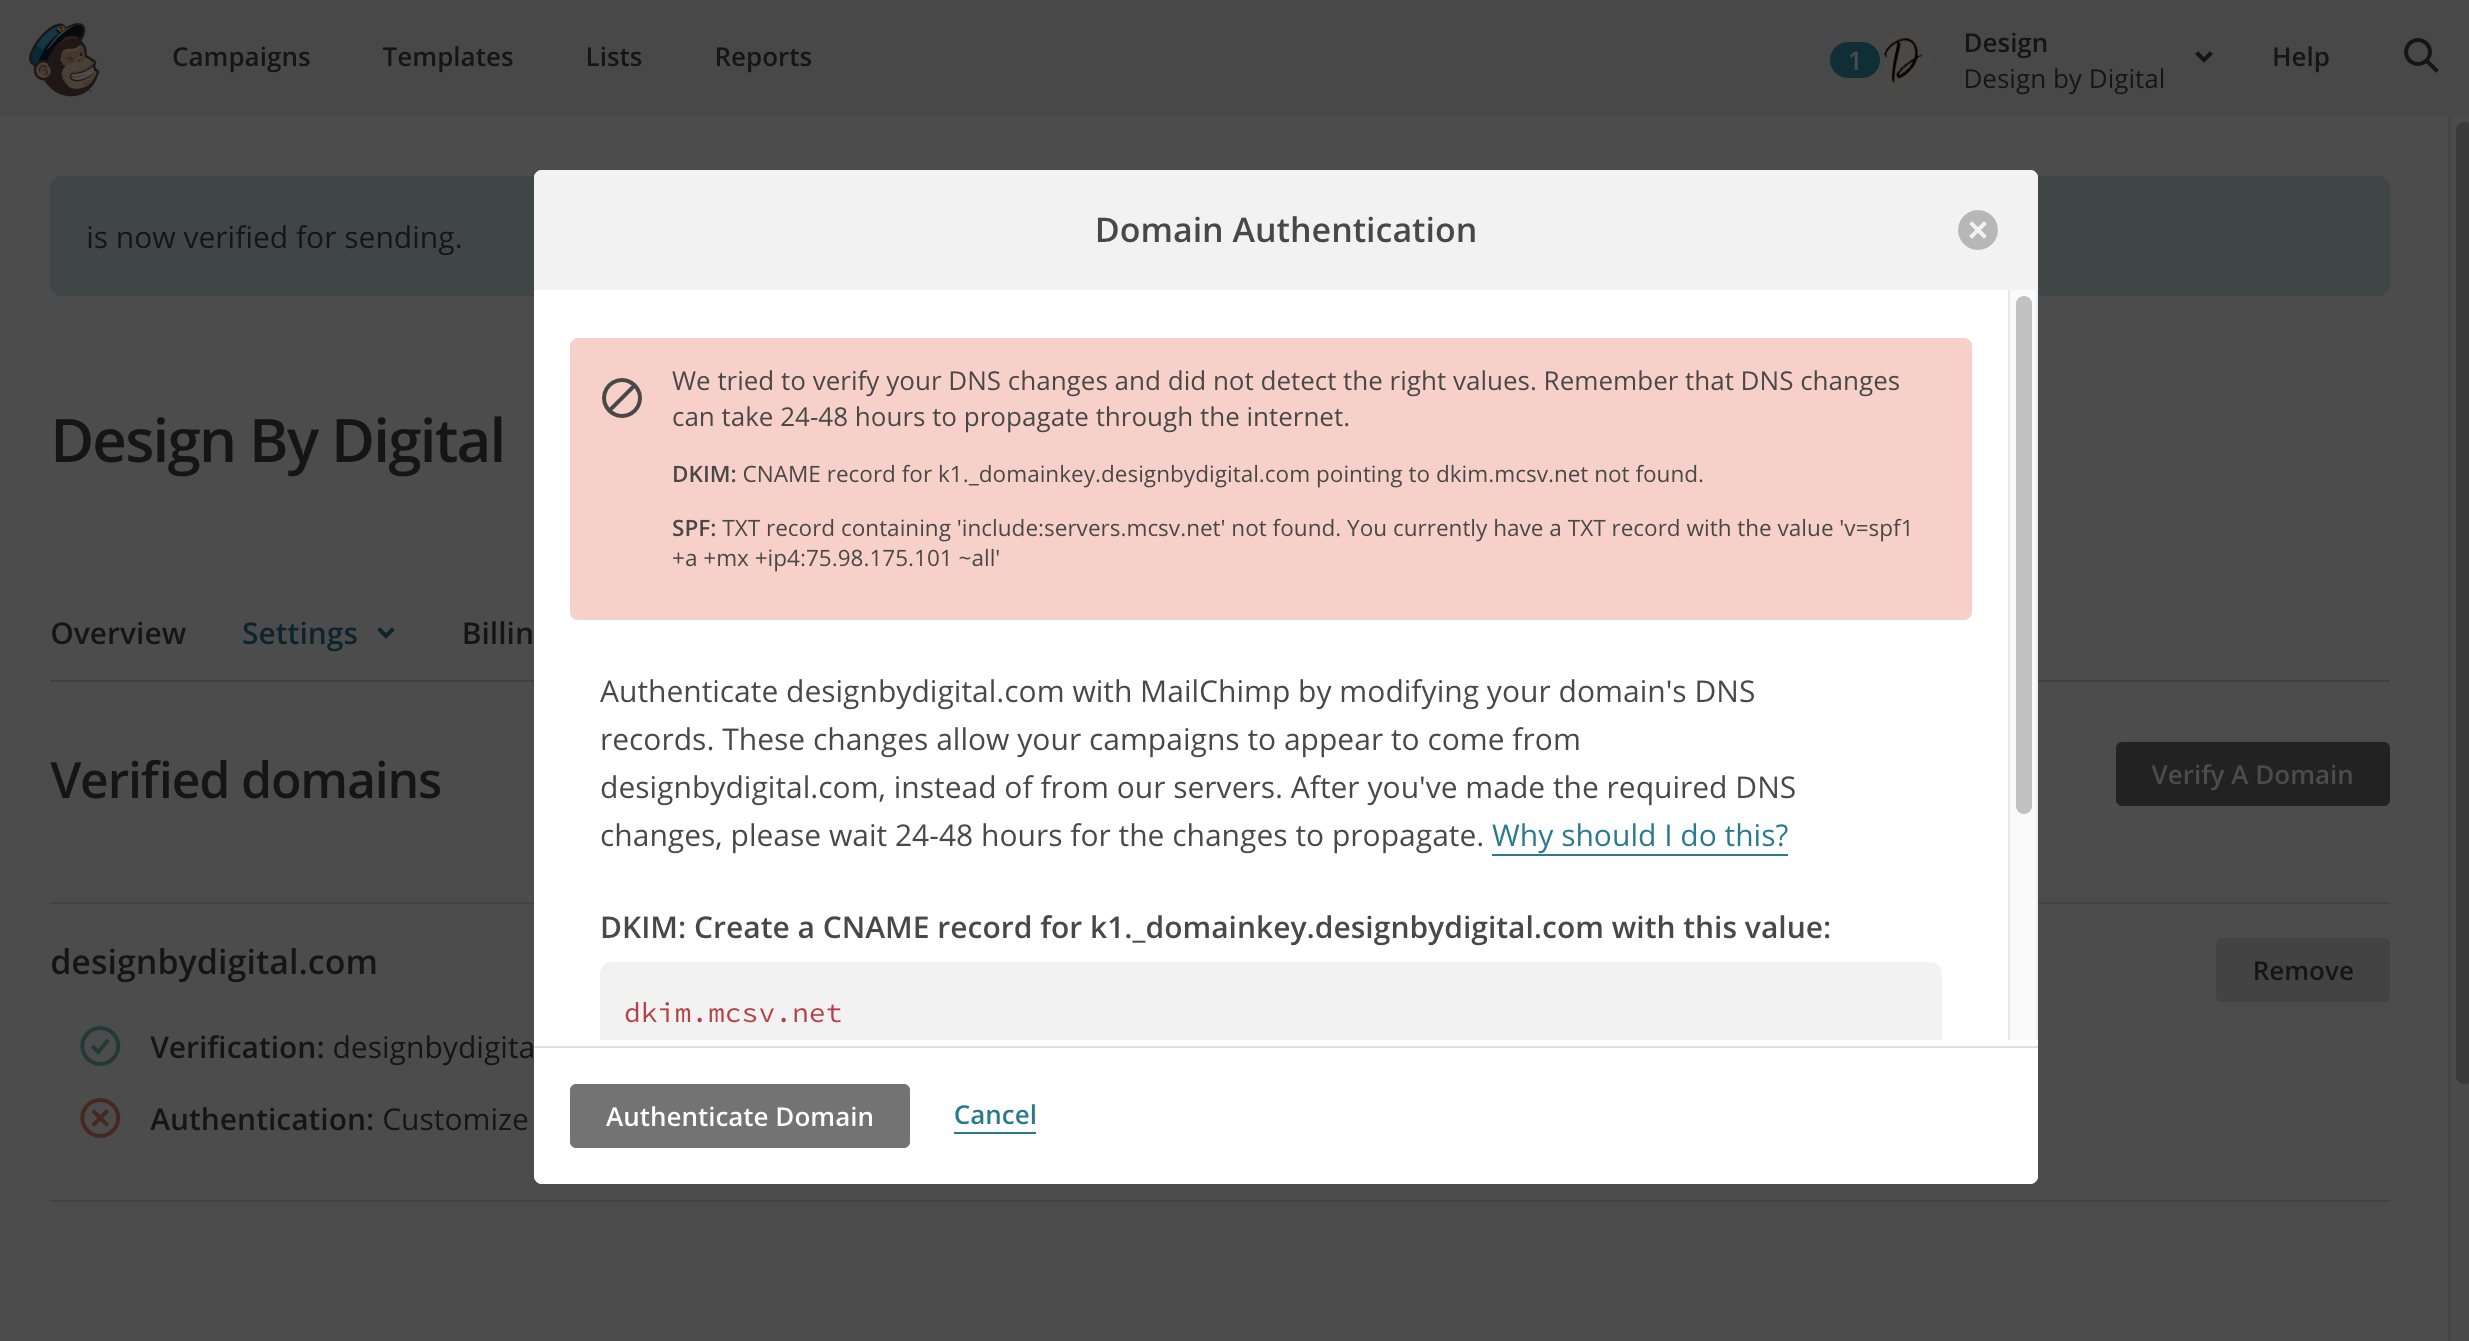
That’s ok! DNS Record changes can take a little while to update, so in the meantime, our domain is verified for use, so let’s update our Campaigns with the new email.
Add Your Email Address to Your Campaigns
You can either create a new Campaign and use the new email you just verified, or you can edit your existing ones.
I’ll show you how to edit an existing one:
Select Campaigns from the menu at the top left
Mouse over the Campaign you want to edit and choose Pause and Edit
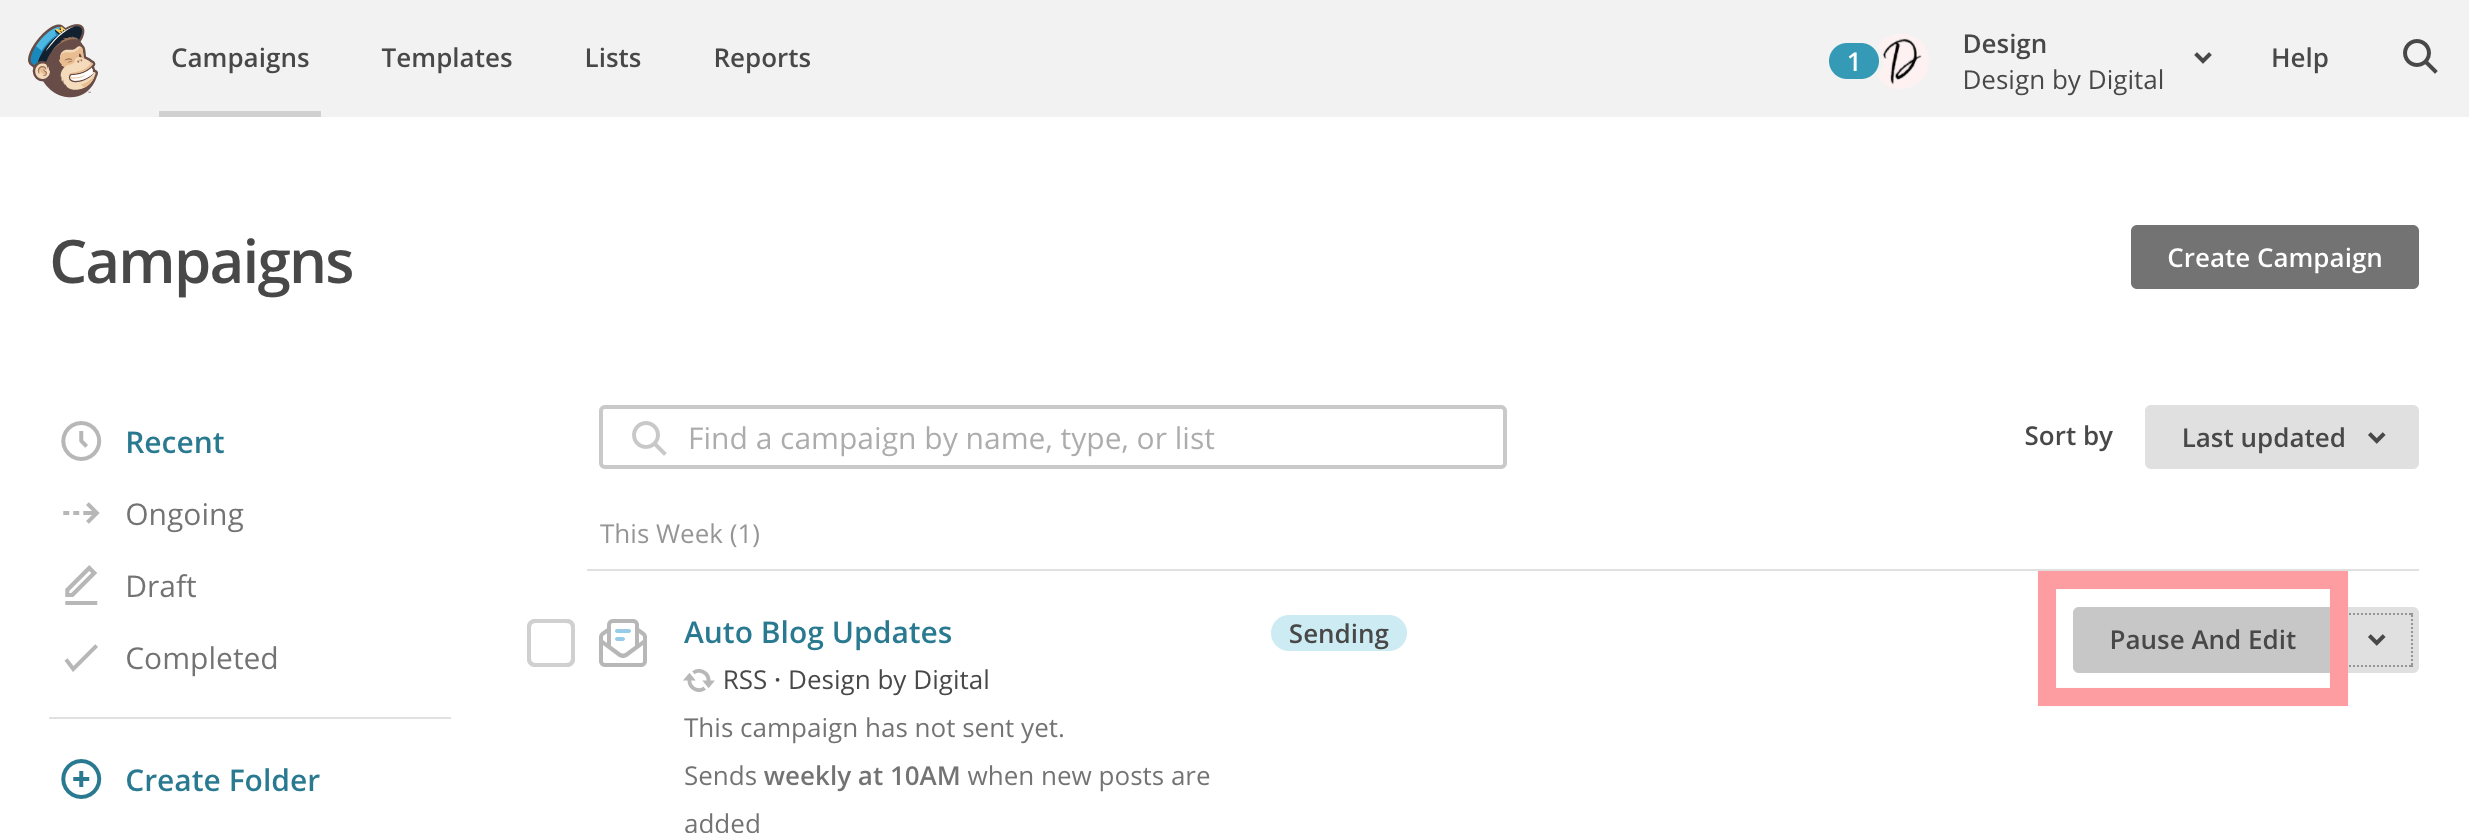
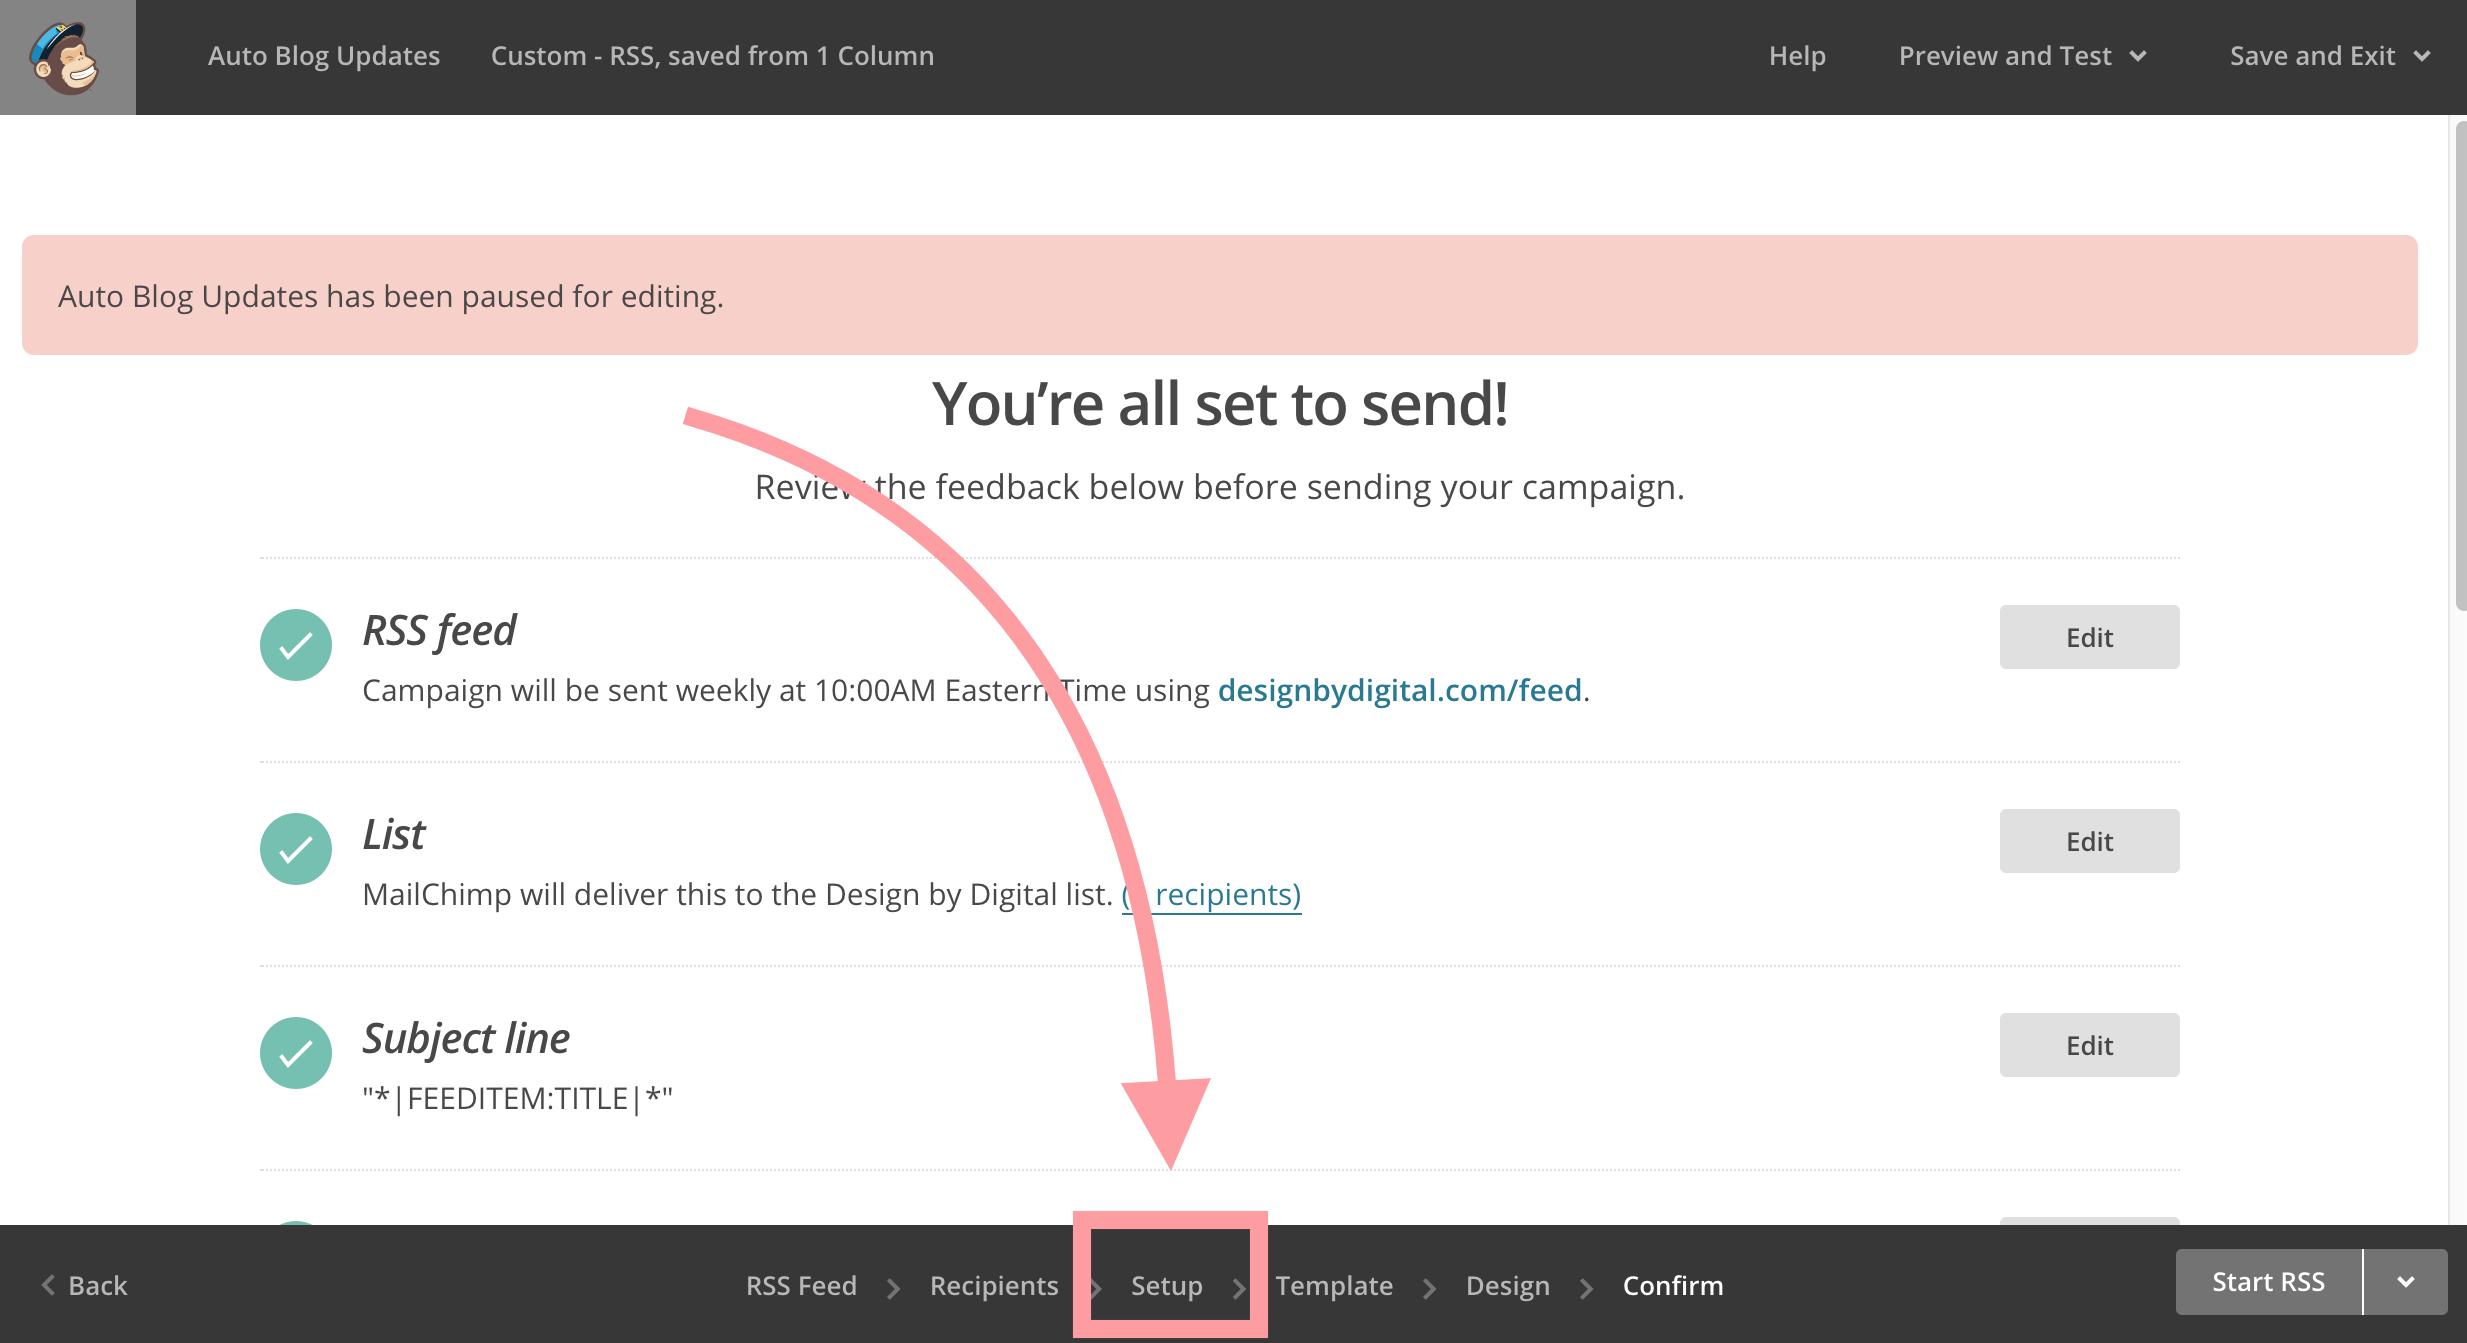
Confirm you want to Pause the campaign.
Click the word Setup at the very bottom of your screen
Scroll down until you see the “From email address” field. If you’re creating a new Campaign from scratch, this is where you’ll pick up.
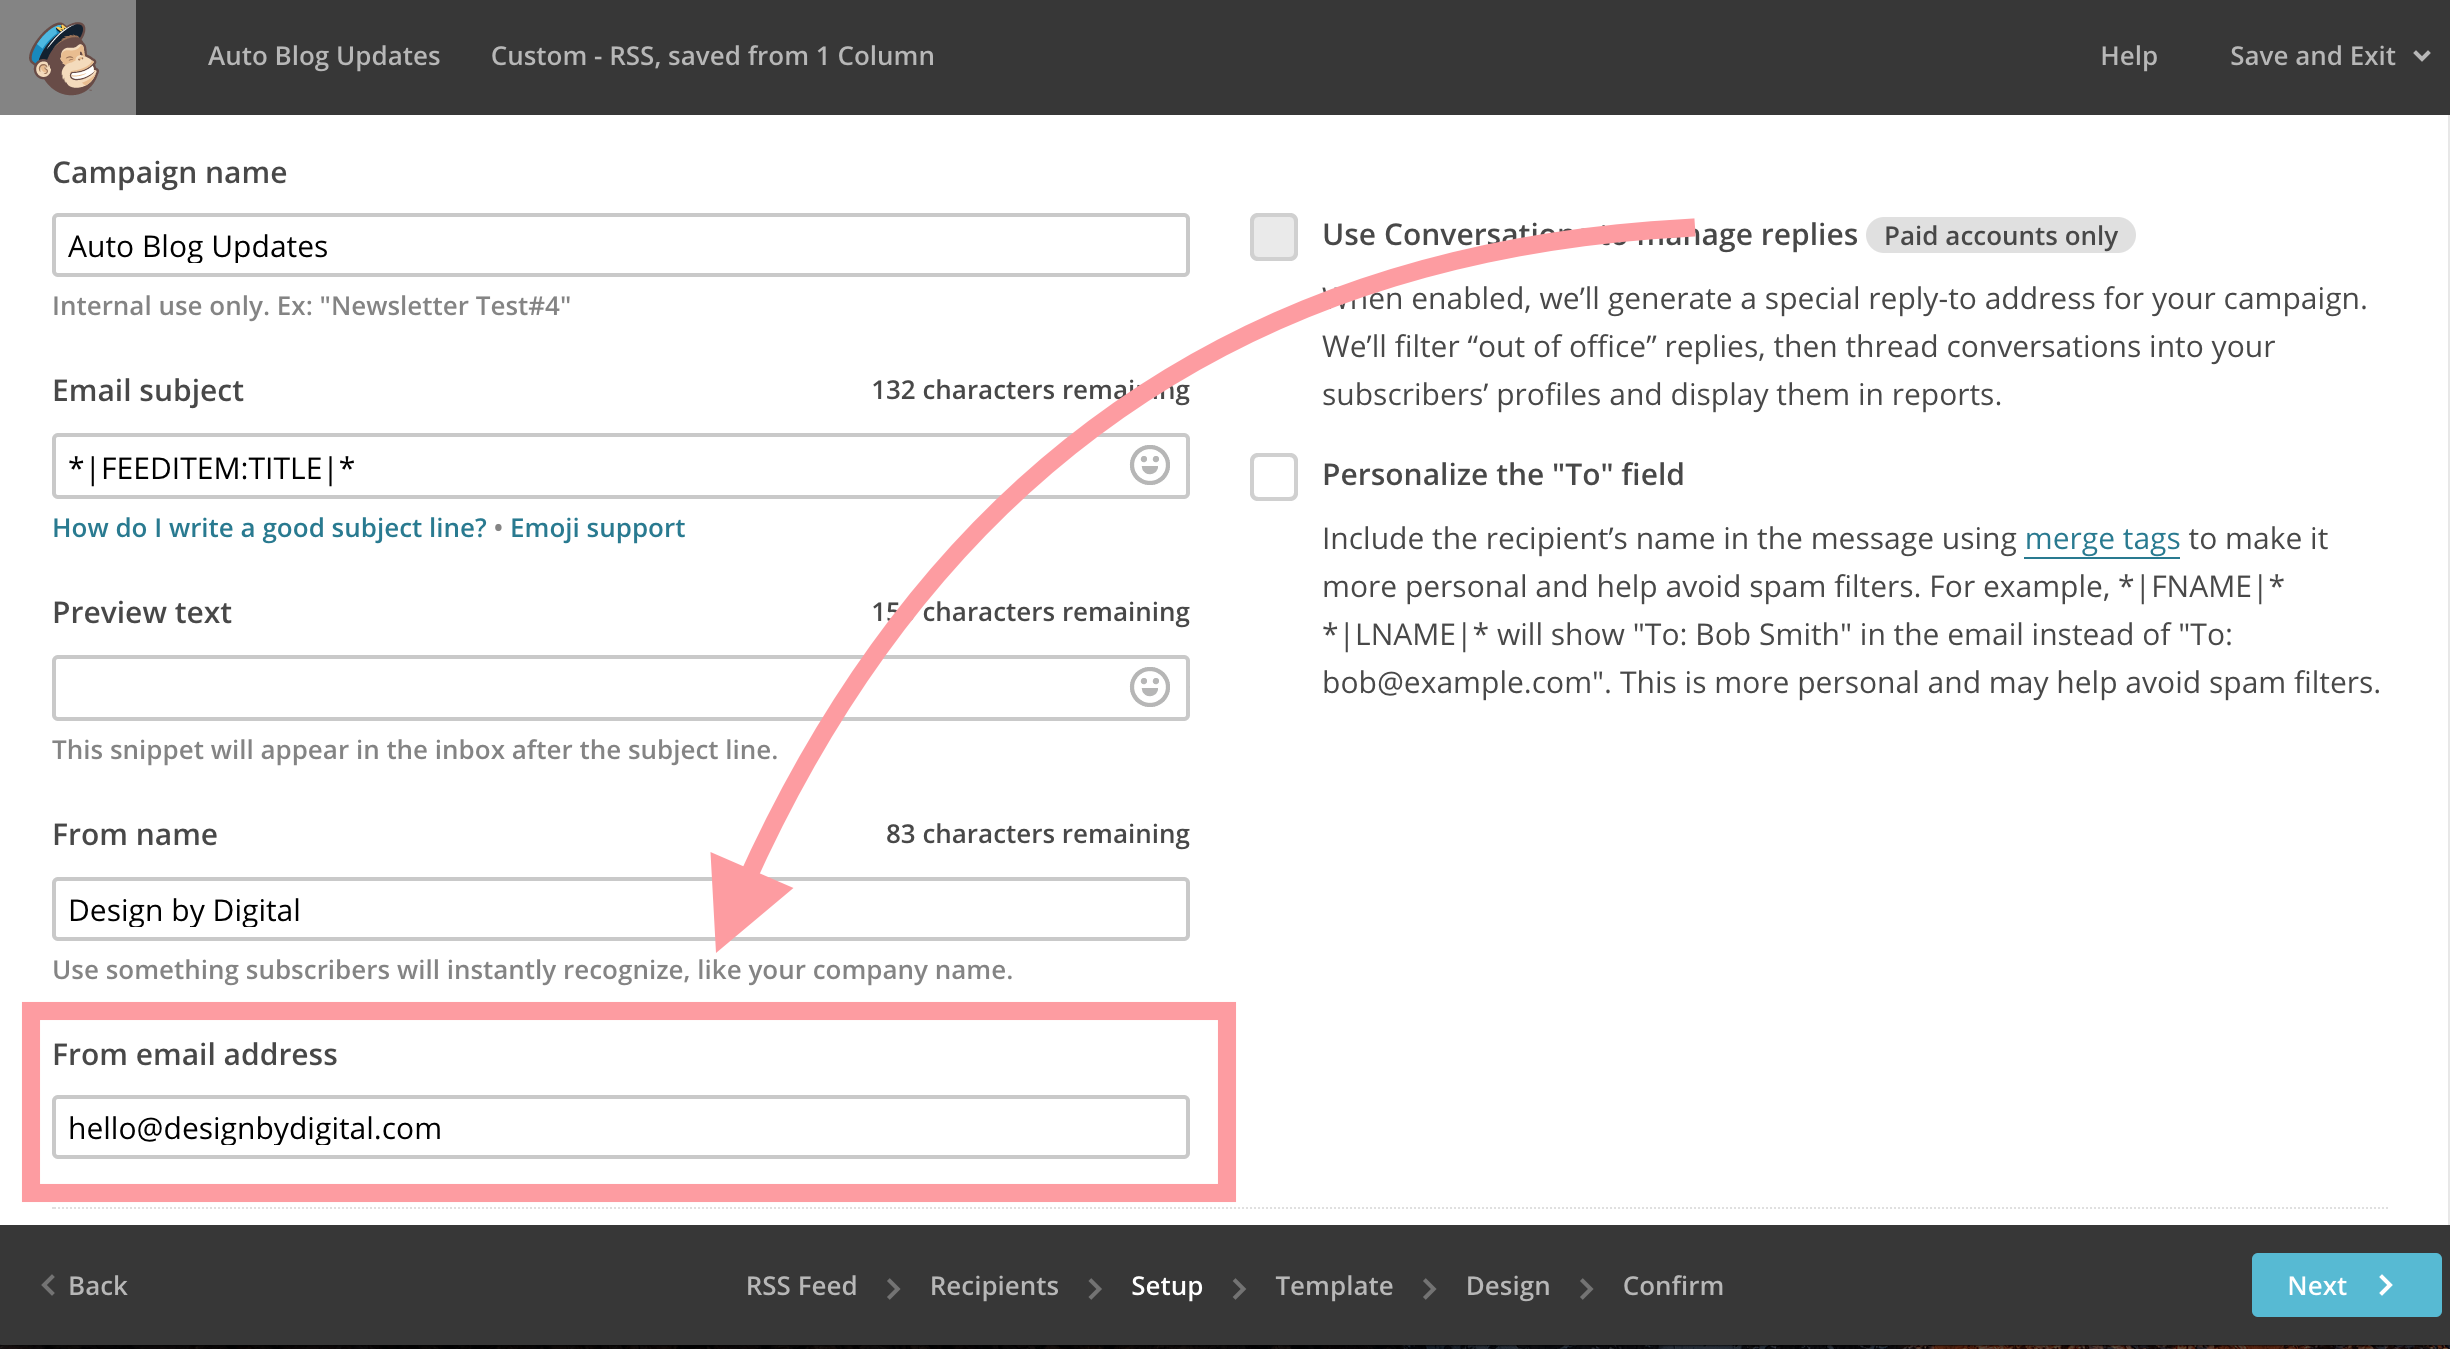
Add the new email address you’d like your Mailchimp emails to come from.
At the top right, click Save and Exit if you’re editing a Campaign, or continue on if you’re creating a new one.
Re-activate your Campaign if it was paused, and voila! You just set up a custom domain email to send out all your newsletters from!
Hello Blog. Thanks for this post. I thought the instructions you created are more helpful than the docs Mailchimp has. Question for you, did you discover any deliverability drop off when you changed the from email address? I did some testing and noticed that when I changed mine it went to spam folder.
Can you share what you found?
Hey Michael! Thanks for the kind words. I can’t say I noticed a drop in deliverability because I’ve never sent Mailchimp emails from a non-branded custom domain email. Good luck!
I think it will be very useful if you make a video of this explanation, very well explained btw.