Have you converted your site to HTTPS yet? A few years ago, Google announced it would start warning users on Chrome if they were visiting a site that was insecure (using HTTP). Site security would soon become a ranking factor and sites that were not secure could be penalized, even if they didn’t take payments from visitors. I knew that I needed to secure some of my websites by moving them to HTTPS but I dreaded the process. Luckily, it turned out to be a relatively quick task. I’ll walk you through the steps below!
What is HTTPS?
What does HTTPS mean? HTTPS stands for Hypertext Transfer Protocol Secure. It is the secure version of HTTP, which is the protocol used for transmitting data over the internet. The “S” in HTTPS stands for “Secure,” indicating that the communication between the client (e.g., web browser) and the server is encrypted and protected from unauthorized access.
HTTPS uses encryption protocols, such as SSL (Secure Sockets Layer) or TLS (Transport Layer Security), to establish a secure connection between the client and the server. This encryption ensures that the data exchanged between the two parties remains confidential and cannot be intercepted or tampered with by attackers.
The main purpose of using HTTPS is to provide a secure and trustworthy environment for users when they access websites or perform online transactions. It is commonly used for sensitive transactions, such as online banking, e-commerce, and any other situation where the privacy and integrity of data are crucial.
To identify a website that uses HTTPS, you can look for a padlock symbol in the browser’s address bar, along with the “https://” prefix in the website’s URL. These indicators show that the connection is encrypted, and it is generally considered safer to transmit sensitive information through websites using HTTPS.
Secure Your Site Using HTTPS
I’m going to share how I converted my sites from http to https in the steps below. This guide is intended for websites created with WordPress.
Most shared hosting plans provide a free HTTPS certificate, and mine did. I simply emailed the support team to make sure it was installed, and it was. All I had to do was activate it using the steps below.
1. Change Your WordPress Settings
First off, I had to update my WordPress settings like so:
Go to Settings and then General in your WordPress Admin
Change WordPress Address (URL) to https://example.com
Change Site Address (URL) to https://example.com
Click Save
2. Update Internal HTTP Links
Next up, we need to modify any internal blog links which point to http://example.com and update them to https://example.com.
Luckily there is a plugin that can do that for us!
Install the SSL Insecure Content Fixer plugin to your site.
Click Activate, and then visit the plugin’s settings which you can find under “Settings” on your lefthand WordPress admin bar, and then “SSL Insecure Content”
Under Fix Insecure Content, choose “Content” and then click “Save Changes” at the bottom. Try visiting different pages on your website, and you should see https appear. If it doesn’t, you may need to try the additional options within that plugin.
3. Force Re-Direct Existing External HTTP Links
This last step is optional, but recommended. I wanted to force users to visit the secured version of my site, rather than the unsecured. Meaning if they went to a link like http://example.com/blog-post, I wanted them to be automatically redirected to https://example.com/blog-post, without them even noticing.
To do this, we need to update the .htaccess file within our WordPress site.
You can access this hidden file using FileZilla. Use the FTP credentials provided by your hosting account to access this file, which is typically under the top folder.
Your .htaccess file will look something like this normally:
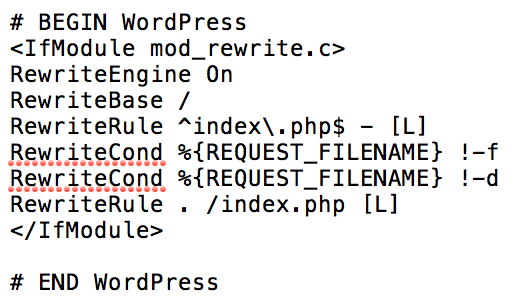
Create a space above the line “RewriteEngine On” and add these lines of code:
2
3
RewriteCond %{HTTPS} !=on
RewriteRule ^(.*)$ https://%{HTTP_HOST}%{REQUEST_URI} [L,R=301]
Save and re-upload the file to its place on your site. “Overwrite” if FileZilla asks you to.
Boom! You should test out visiting the unsecured version of your site, and hopefully you’ll be auto-redirected to the secure version.
Congratulations, you’ve now secured your WordPress site!
Optional But Recommended Tips
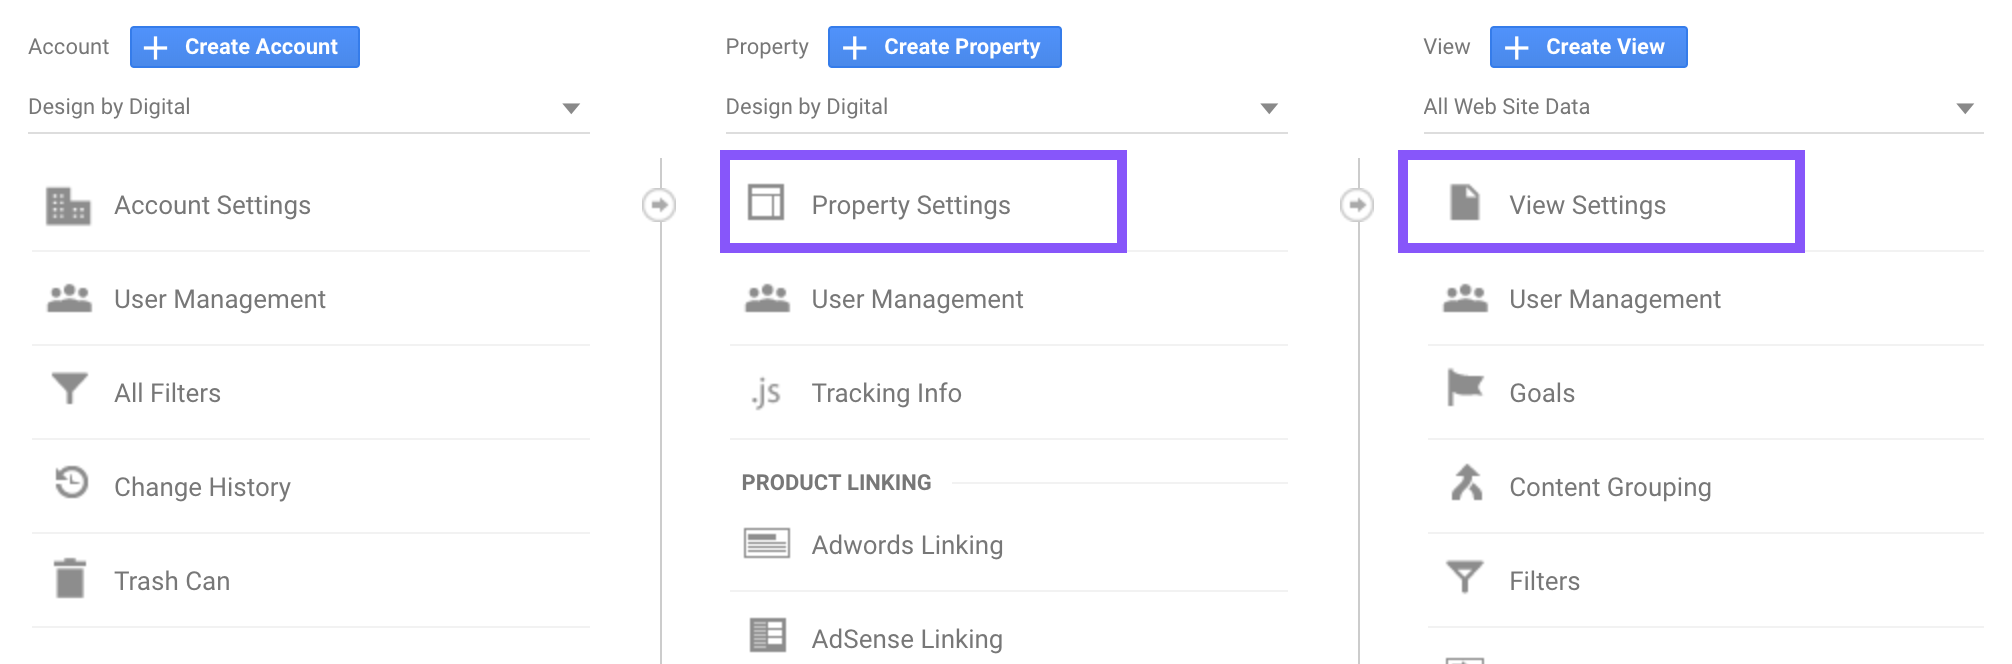
If you use Google Analytics or Google Search Console, you’ll need to update your settings on those two platforms to ensure the new SSL certificate is recognized.
To do this, click the Admin wheel at the bottom left of your Google Analytics account. From there click into “Property Settings” and then “View Settings” and update the site URL to https:// in both of those spaces.
In Google Search Console, you’ll need to Add a New Property entirely, making sure to use https:// when typing out your new domain name.
I hope this article on how to switch your site to HTTPS was helpful!
Such an important aspect of having (and maintaining) a website these days! Plus it helps with SEO because it sends an extra signal to Google that your site is secure & trustworthy 🙂
Nice post! My clients website vendor recently made that change from HTTP to HTTPS. Super important if you want to rank on Google!
Great post – thanks for explaining so clearly, this felt easy! 🙂