What do all the five and six-figure bloggers have in common?
Well, there’s a good chance they’re using a powerful Pinterest automation tool called Tailwind.
Tailwind is a time-saving Pinterest scheduler you can use to automate the sharing of images from blogs to boards. Tailwind pins for you at the days and times you choose, monitors your profile performance, and optimizes it as you go. It’s like having a virtual assistant who works around the clock for you – for very, very cheap.
I used to keep track of the images I’m supposed to share to 30+ group boards using an Excel spreadsheet. It was tedious, painful, and time-consuming!
When I discovered Tailwind, it was truly a lifesaver for my business. It freed up my time while ensuring my content was shared where it needed to be.
I started using Tailwind in October 2016, when I had around 2,000 pageviews per month to my blog. After scheduling my pins with Tailwind, I quadrupled my traffic to over 8,000 pageviews by December of that year!
That’s when I knew I had struck gold with this tool.

UPDATE 1/28: I recently purchased Tailwind for this blog (Blog Ambitious) and have seen much more immediate results after pinning consistently to Group Boards:

Today, I’ll share the strategy I used with Tailwind to boost my blog traffic by 4 times the pageviews in just 2 months (and quicker with this blog you’re reading now!)
Tailwind isn’t going to make you an overnight success. What it will do is ensure you’re consistently pinning, without bombarding your audience with too much content at once. That’s precisely why it’s worth your time and investment.
The first step to getting started with Tailwind and increasing your own Pinterest traffic is to sign up for a free trial, where you’ll get to schedule your first 100 pins free!
Creating a Schedule
Once you’ve signed up and connected your Pinterest account, you should make a posting schedule.
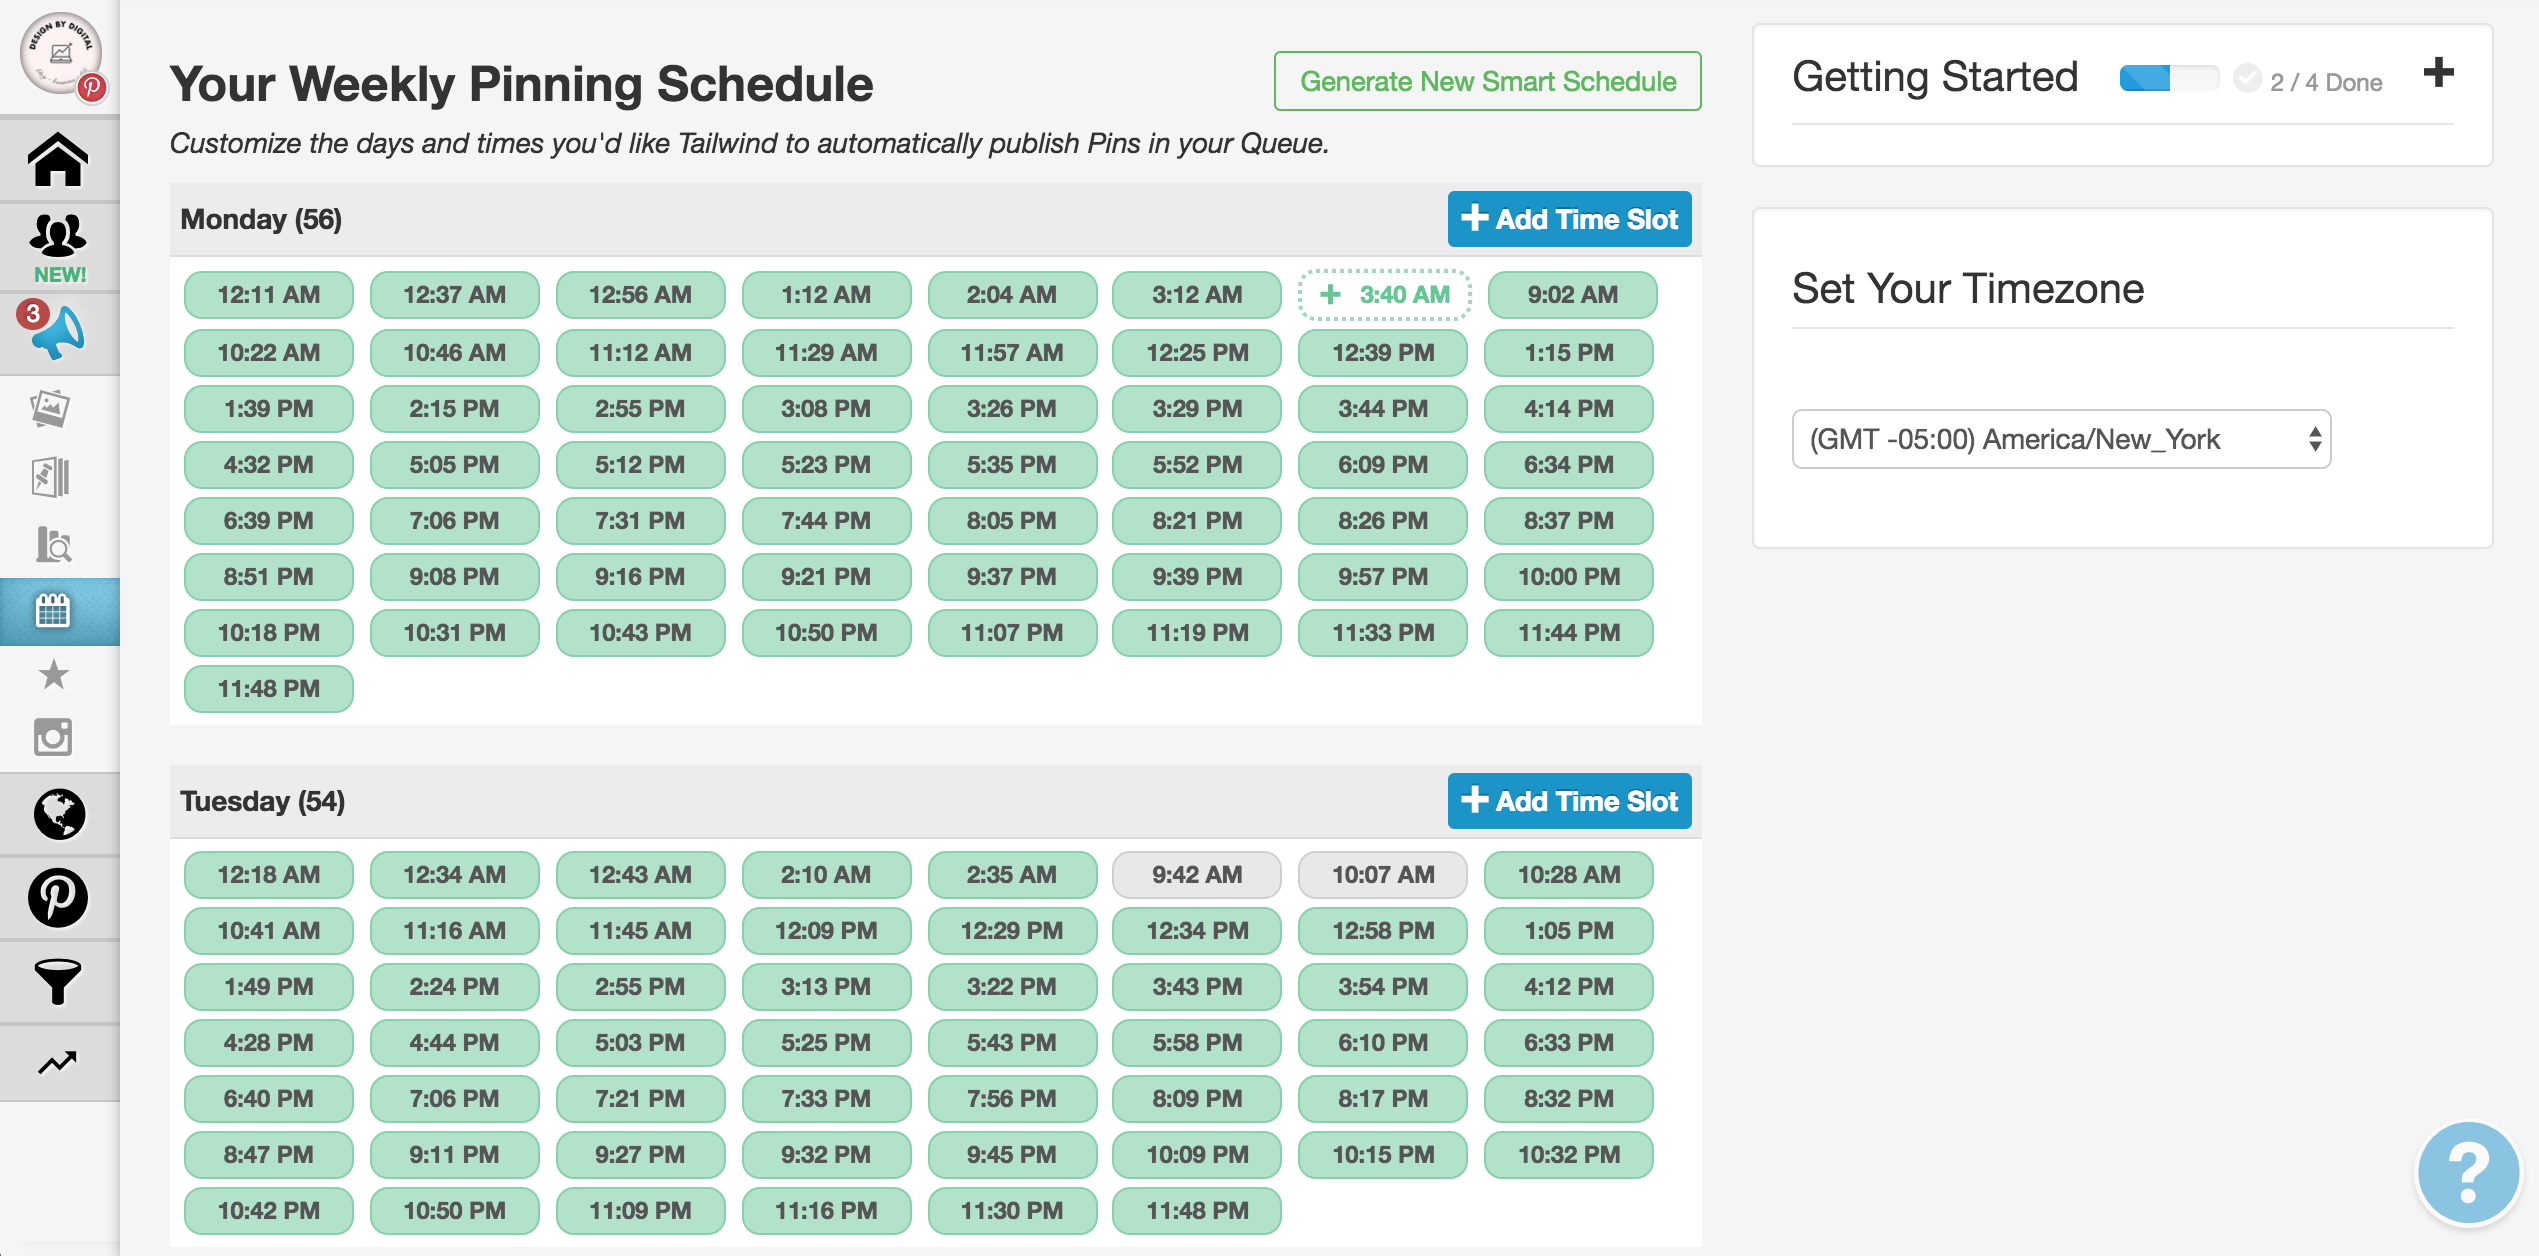
Tailwind will automatically suggest times it believes your pins will be the most successful, but you can customize this as you like. Be sure to set your time zone to the right!
How often should you pin?
Now you’re probably wondering how many pins you should pin per day. Personally, I started pinning about 20 per day when I first joined Tailwind, and over 3 months or so, increased that to 50-60 per day.
Many people complain that Tailwind doesn’t make it easy to ensure you’re following the group board rules (like posting no more than 5 pins per day), but here’s how I manage this in Tailwind:
I am a member of around 30 different group boards. Out of all the boards, most allow me to pin as I like except for one which has a limit of 2 pins per day. Keeping this in mind, I need to make sure my Tailwind schedule has no more than 60 slots per day. If you pin to your own board as well, that number could go up to however many pins you plan on adding per day using Tailwind.
This is a general guideline that has served me well. Simply count the number of group boards you plan on pinning to and multiply that by the lowest pin limit on the boards to find your own guideline.
When is the best time to pin?
As far as when the pins should be scheduled, I’ve found the best times to pin are during the afternoons and evenings of US time zones. So the majority of my pins are pinned between 2pm and 2am EST. (2am is 11pm PST). I then have a quiet few hours until my pins start up again slowly in the morning around 9am EST.
Depending on where your audience is, you may find another schedule that suits you better.
Board Lists
Once you’ve got a schedule you’re ready to start with, head over to Board Lists, under the Publish section of Tailwind.
Board Lists are great for organizing the different boards you’d like to pin to. This feature makes it really easy to schedule your pins to many group and personal boards at once.
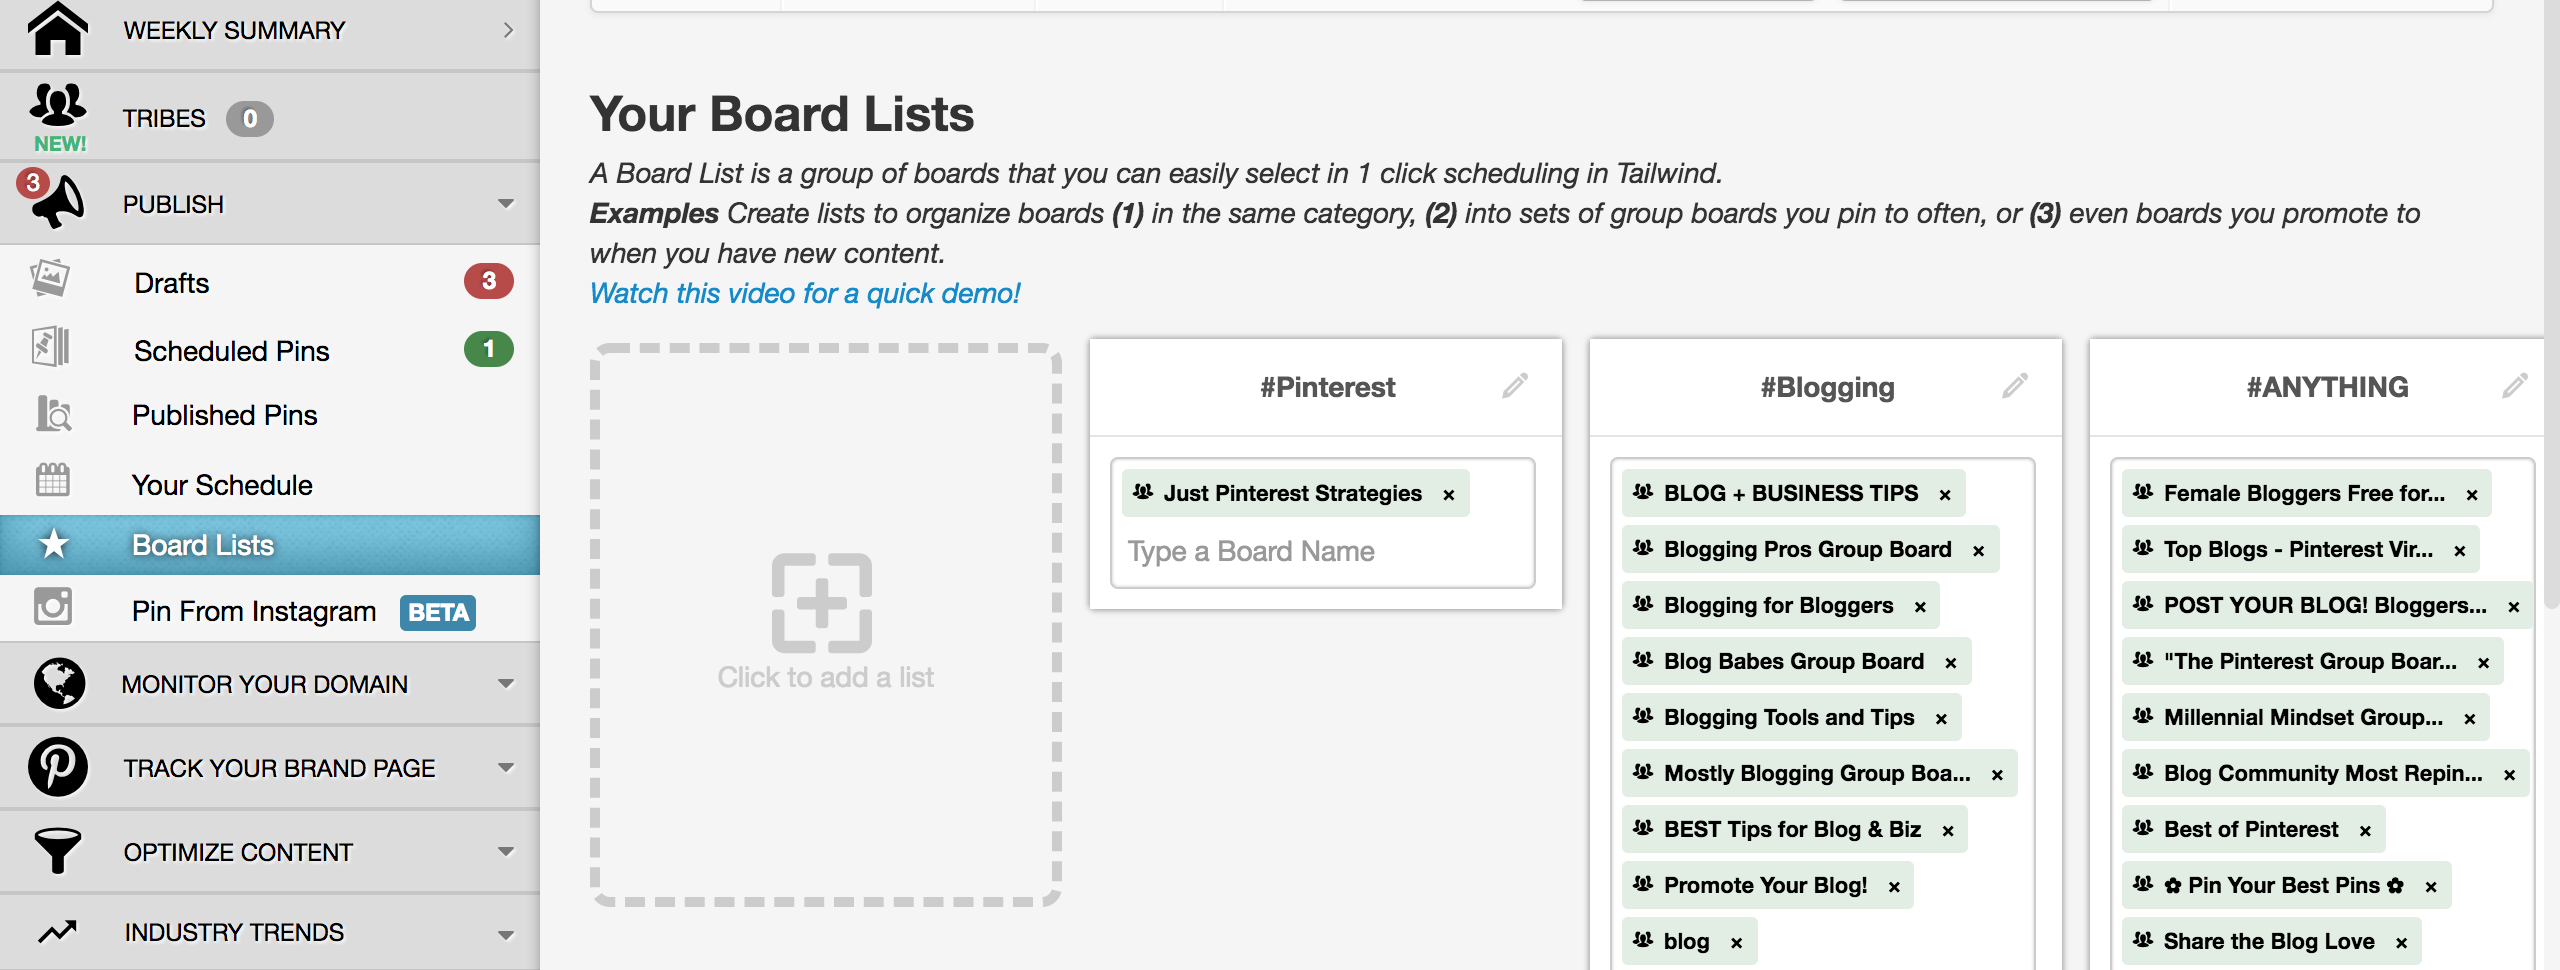
There are a couple different ways to organize your boards, and I’ll share the two ways I use for my blogs:
By Topic
I use the following Board Lists on my Interior Design blog’s Tailwind account:
- #GENERAL – for general interior design pins. (group boards + 1 of my own boards)
- #BATH – for bathroom-related interior content
- #KITCHEN – for kitchen-related interior content
By Board Content
On my Travel blog I use topic-based boards like #FOOD and #EUROPE, but I also have a lot of “general” travel-based boards which I break down into two lists:
- #PHOTOS – Some boards allow travel photos only (without text) so I use this list for those pins
- #POSTS – Other boards are mainly for post-like pins (image + text)
I format my board list names with a hashtag and all caps to make sure I can differentiate them easily in Tailwind.
Start Scheduling
Now you’re ready to start scheduling your posts. If you have Chrome, go ahead and install the Tailwind browser extension which will make it super easy to schedule all the images on your post at once.
Simply click the icon from your post page, and then select the images you wish to send to Pinterest.
On the next page, you can choose the boards and edit the caption of each photo. You’ll notice Tailwind automatically pulls the source URL from your blog post, so you don’t have to worry about that!
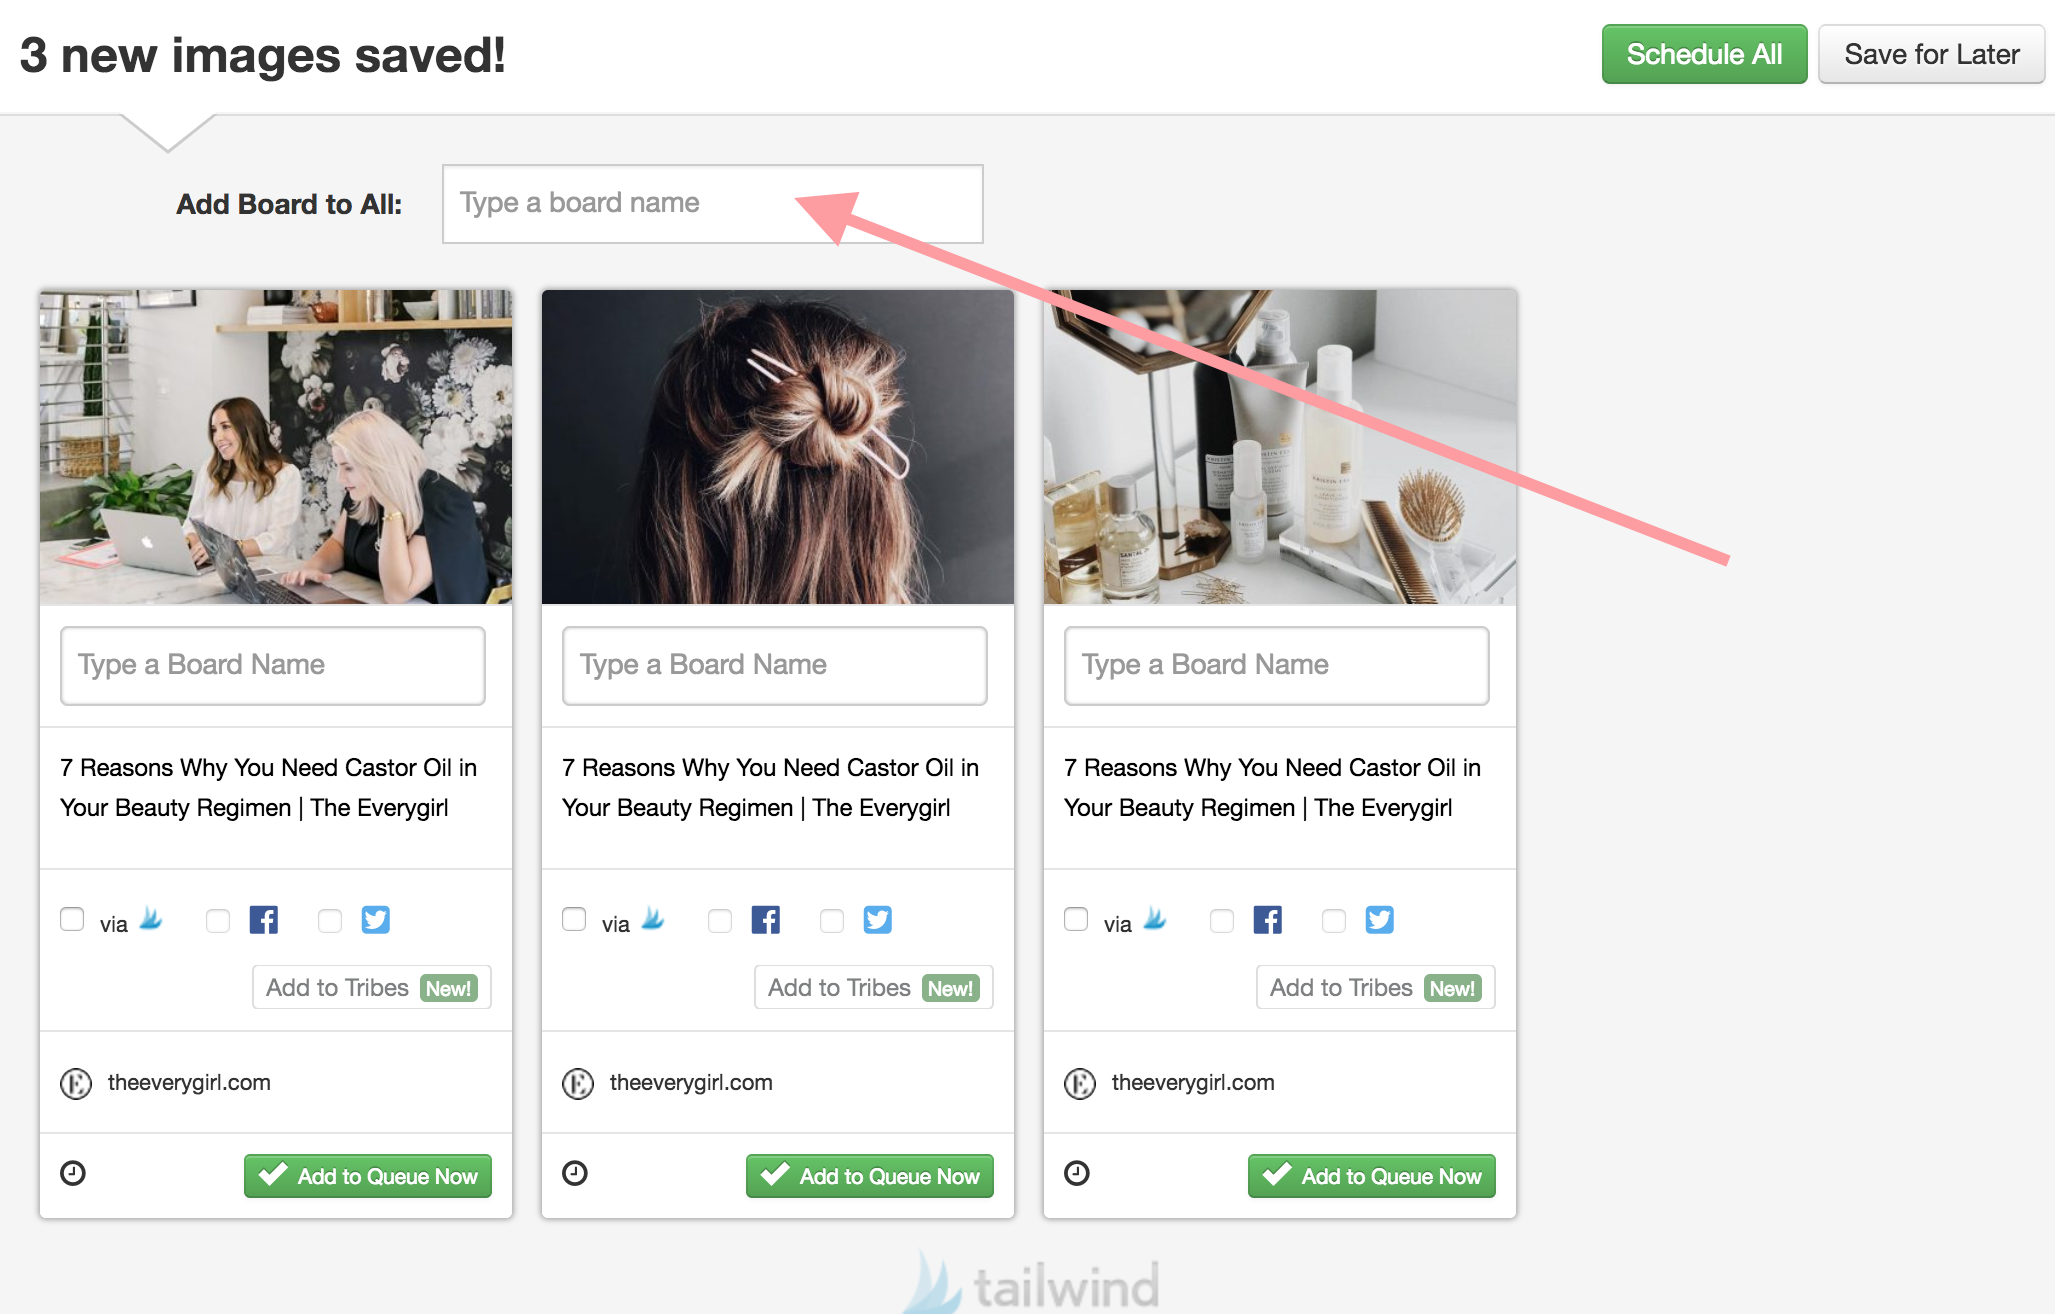
If you’d like to schedule all the photos to one or more of your board lists, use the field at the top called “Add Board to All,” which will apply to every image you’ve chosen!
If you’d like to choose the boards for each individual pin, then use the field beneath the image.
When all the images you’d like to pin are ready to go, click “Schedule All” at the top to send them to your queue!
Intervals
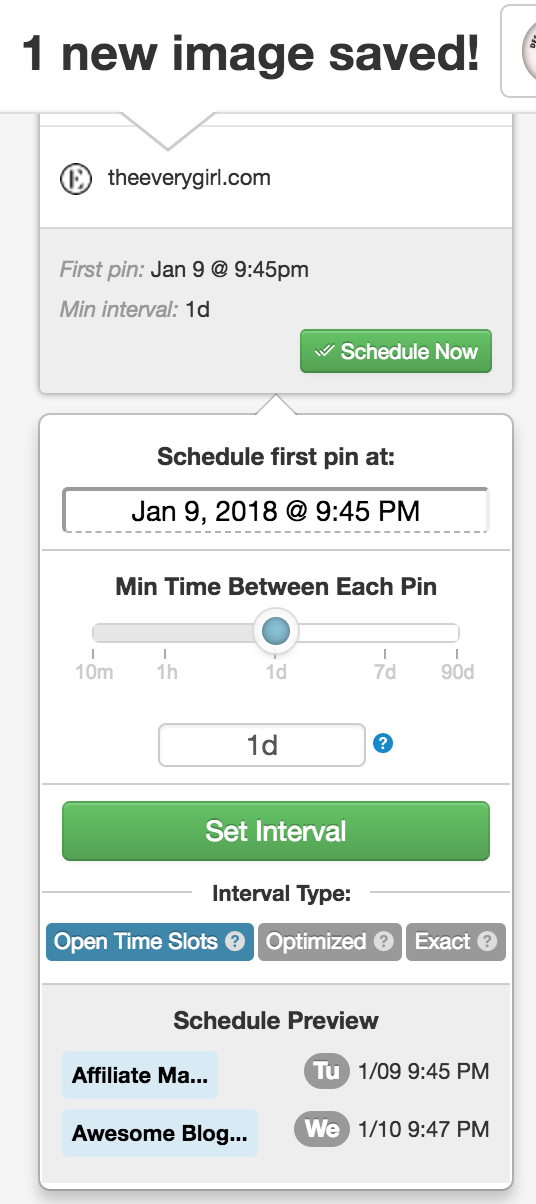
Tailwind gives you the option to schedule pins at intervals of your choosing. Personally, I do not use this feature, but if you wanted to send a pin out once a day, it could certainly be useful. Don’t worry, using Intervals is still bound by the master schedule you set earlier.
Analytics
Analyzing which pins perform best is KEY to success on the platform. I check my Pinterest analytics almost daily to ensure that I’m creating pins that have a high outbound click rate.
Tailwind also has analytics you can take advantage of to keep track of your profile performance, and how many repins you receive. Using this data can help you optimize your Pinterest strategy over time.
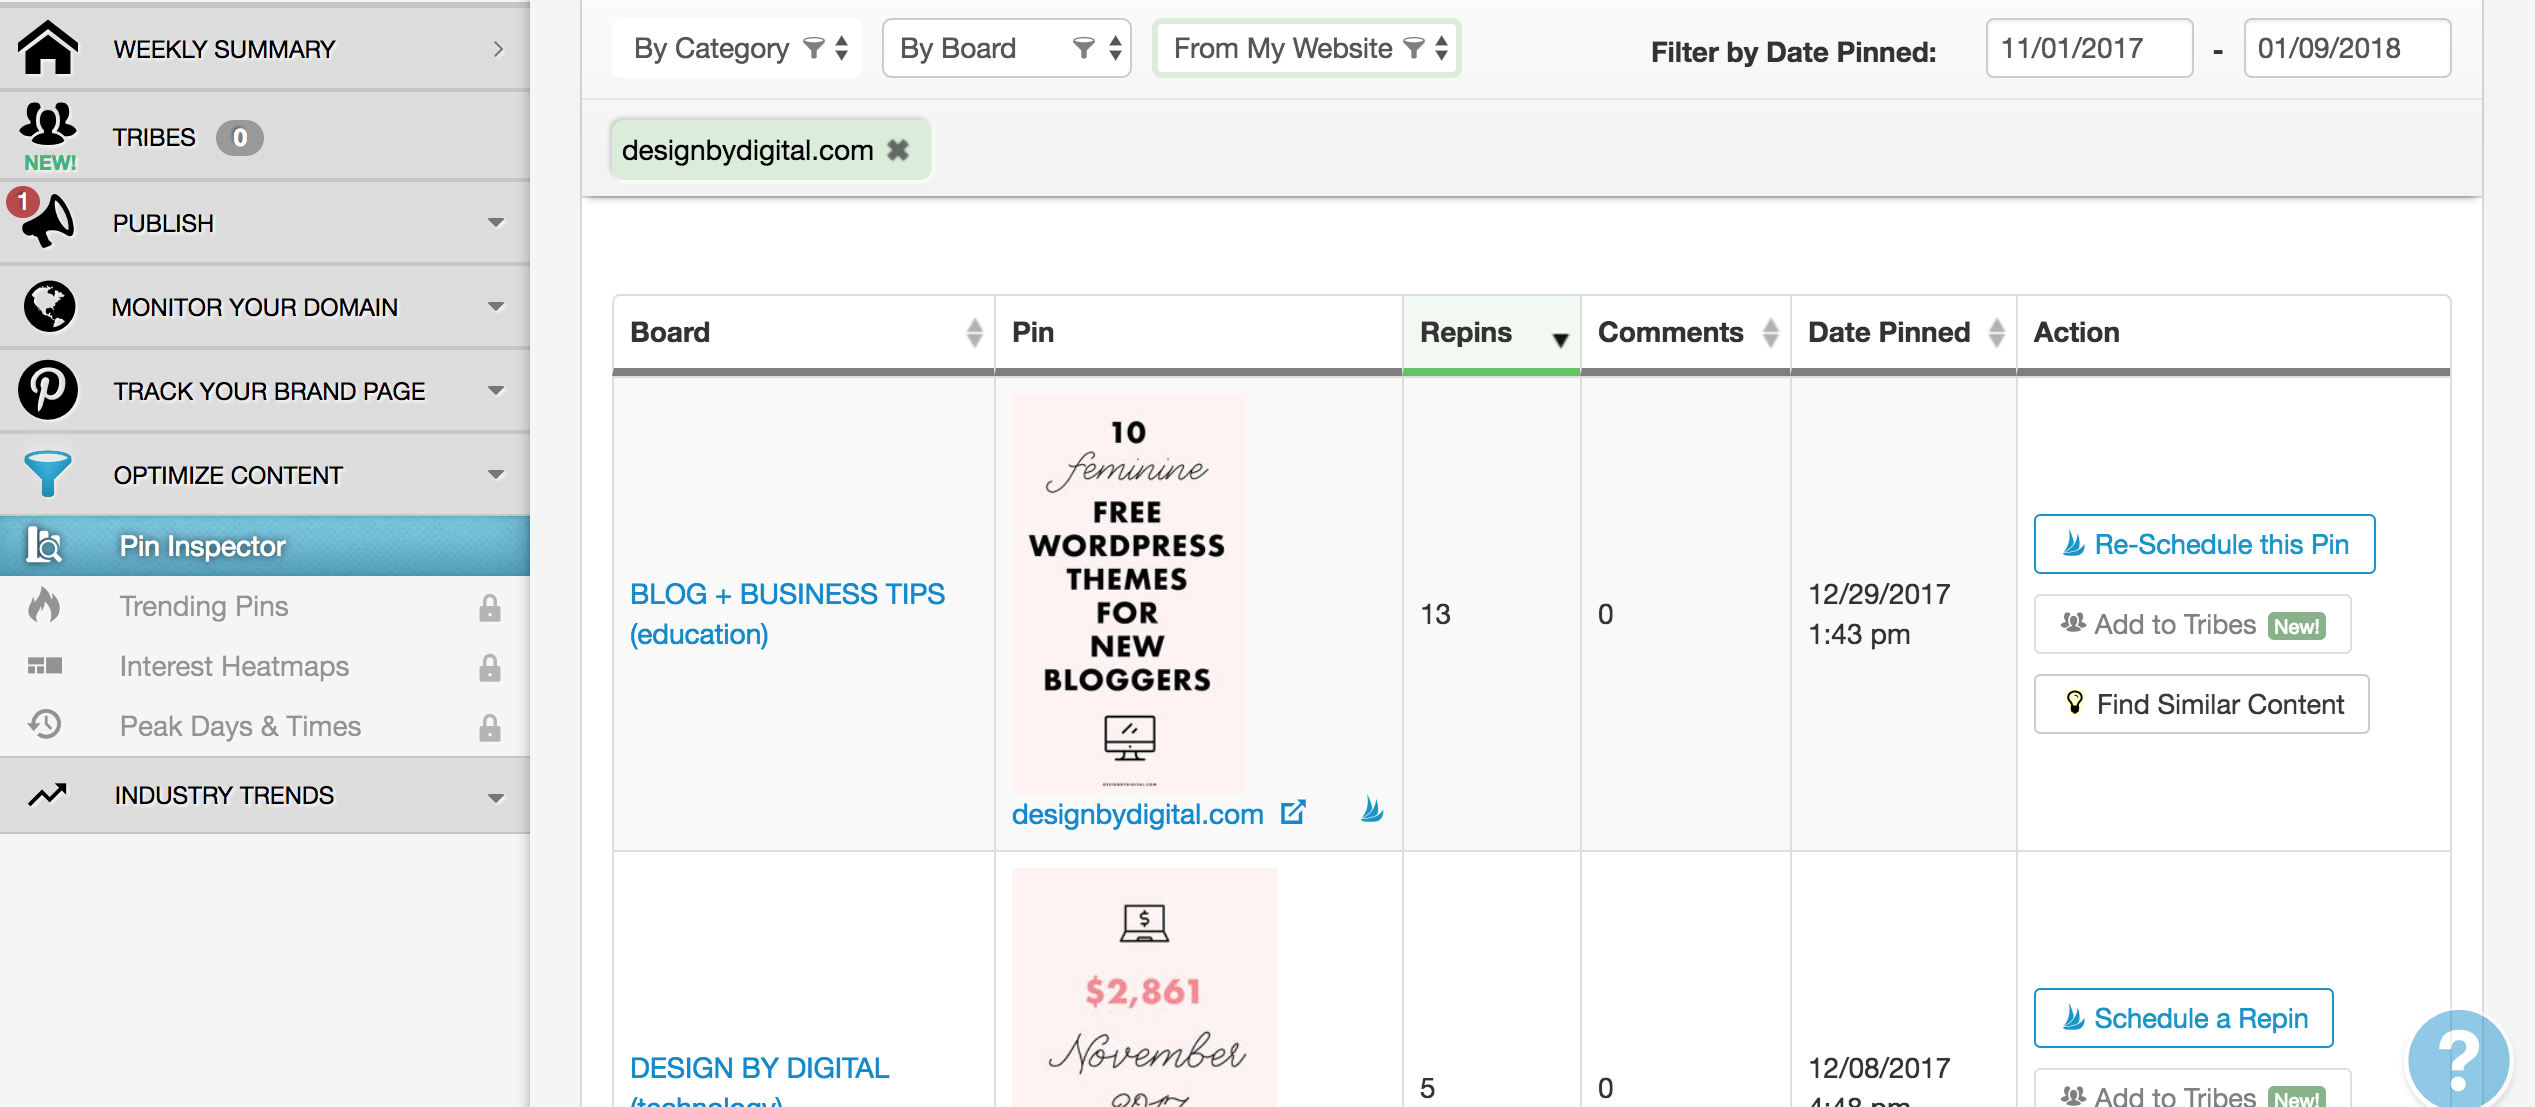
Want to see which of your pins have been repinned the most? Head over to the Pin Inspector:
I hope you’ve found my little guide to Tailwind useful!
You may be wondering about Tailwind’s pricing after the free trial.
Tailwind is very reasonably priced, at just $15 per month or $10 per month if you pay for the year upfront. I paid for the year upfront because I was so happy with the automated pinning, and I knew many bloggers had fantastic results using the tool.
Furthermore, it’s actually an official partner of Pinterest, so you don’t have to worry about using a sketchy automation tool. Tailwind is Pinterest-approved!
If you haven’t already, I’d highly recommend signing up for the free trial of Tailwind to get your feet wet and see if Tailwind can work for you and your blog!

Hi there, I love your comment about the intervals. I totally agree with it. What I love about Tailwind is its Smart Loop feature as well as the Tailwind Tribes. They are very helpful to me as a blogger in growing my website traffic.
Valerie