Welcome to the WordPress for beginners guide. After you’ve installed WordPress, you should be ready to work with your brand new content management system. WordPress is the world’s leading web publishing platform and it’s used by millions of websites – even some really big media sites still use WordPress to manage their posts and articles!
In this post, we’ll go over all of the basics you need to know to get started managing your website. I’m not going to share every detail about WordPress but instead, give you the basics so you can get up and running fast. Leave me a comment if there’s something specific you want to do that isn’t covered here and I’ll let you know if it’s possible!
Let’s begin with understanding how to navigate the WordPress backend dashboard.
As a reminder, you can log in here if you are not already: yourwebsite.com/wp-admin/
WordPress Dashboard
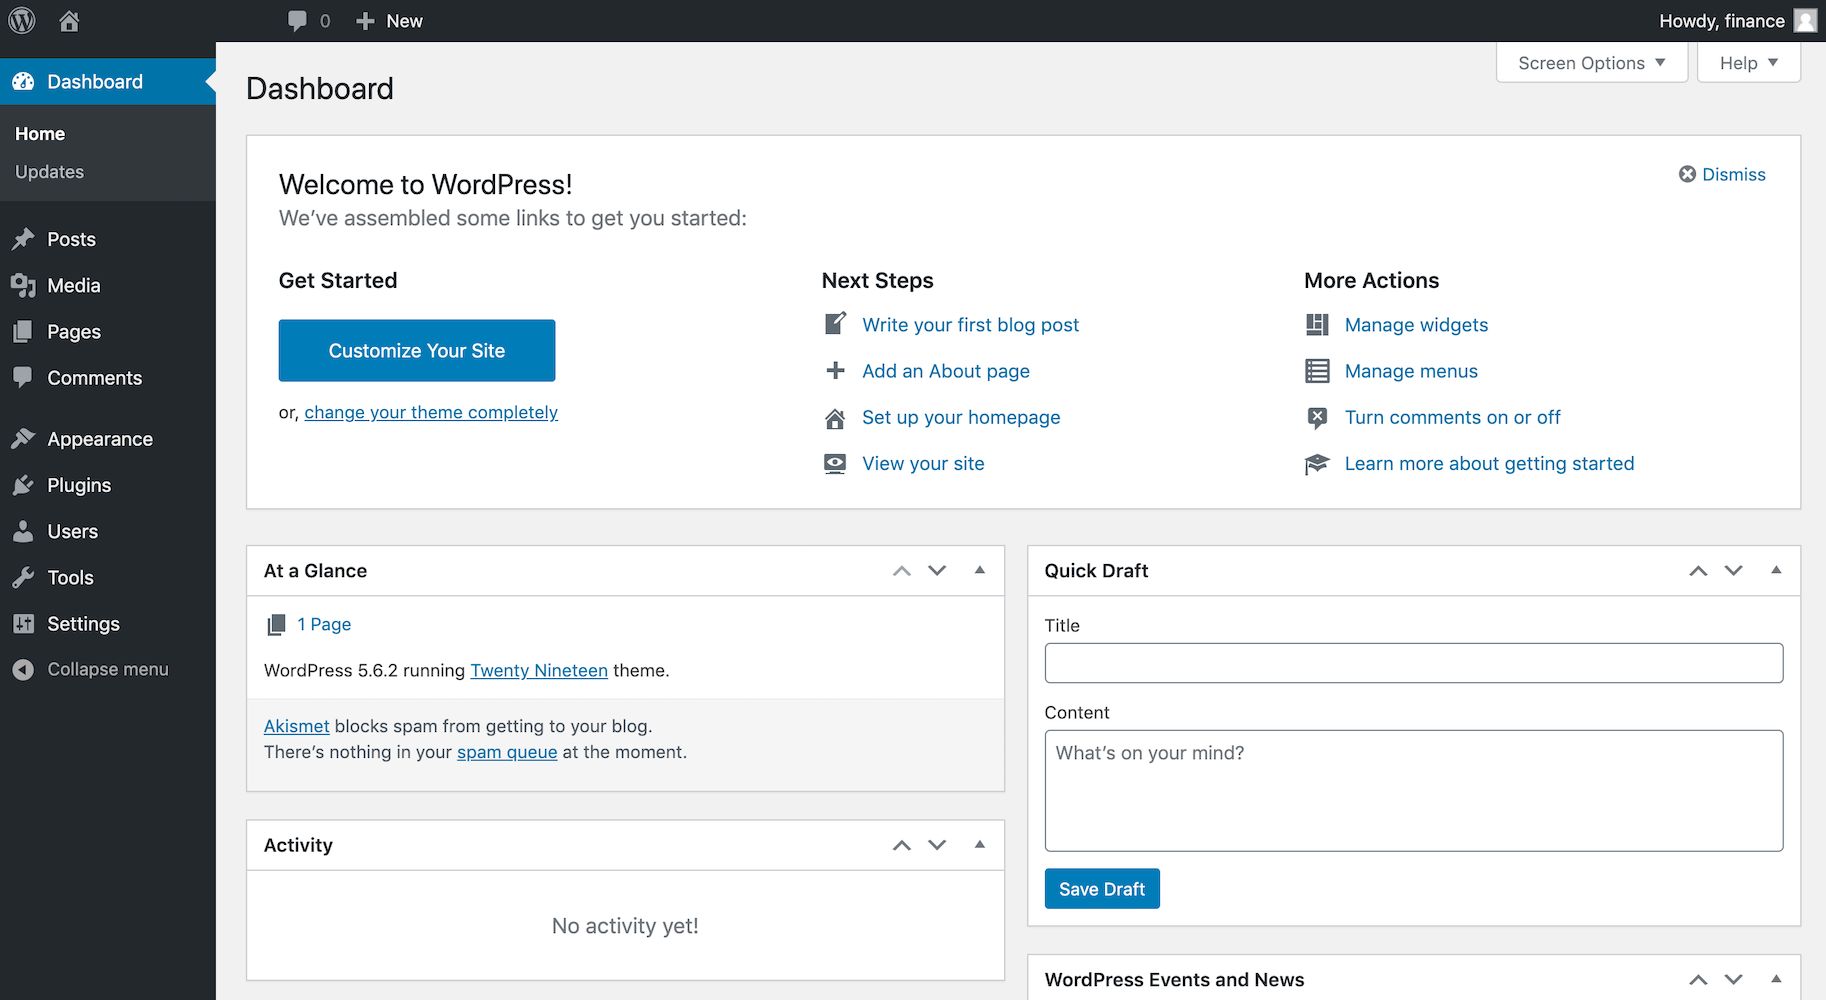
After logging into your WordPress website, you’ll be taken to the dashboard. This is where you’ll see the three main sections of the WordPress backend:
- Top Bar: The black bar at the top of the screen which is also visible when previewing your site.
- Sidebar: To the left is your admin sidebar where you can access your posts, media, settings, and much more.
- Work Space: The main central section of the backend includes a large workspace where you can visually explore different areas of the backend of your site.
Settings
First things first, let’s check out the Settings of your new WordPress website!
General
The General Settings of your blog is where you can control numerous aspects about your site including its name, tagline, URL (this must be your domain name), email address, users, language, time zone, and date formatting.
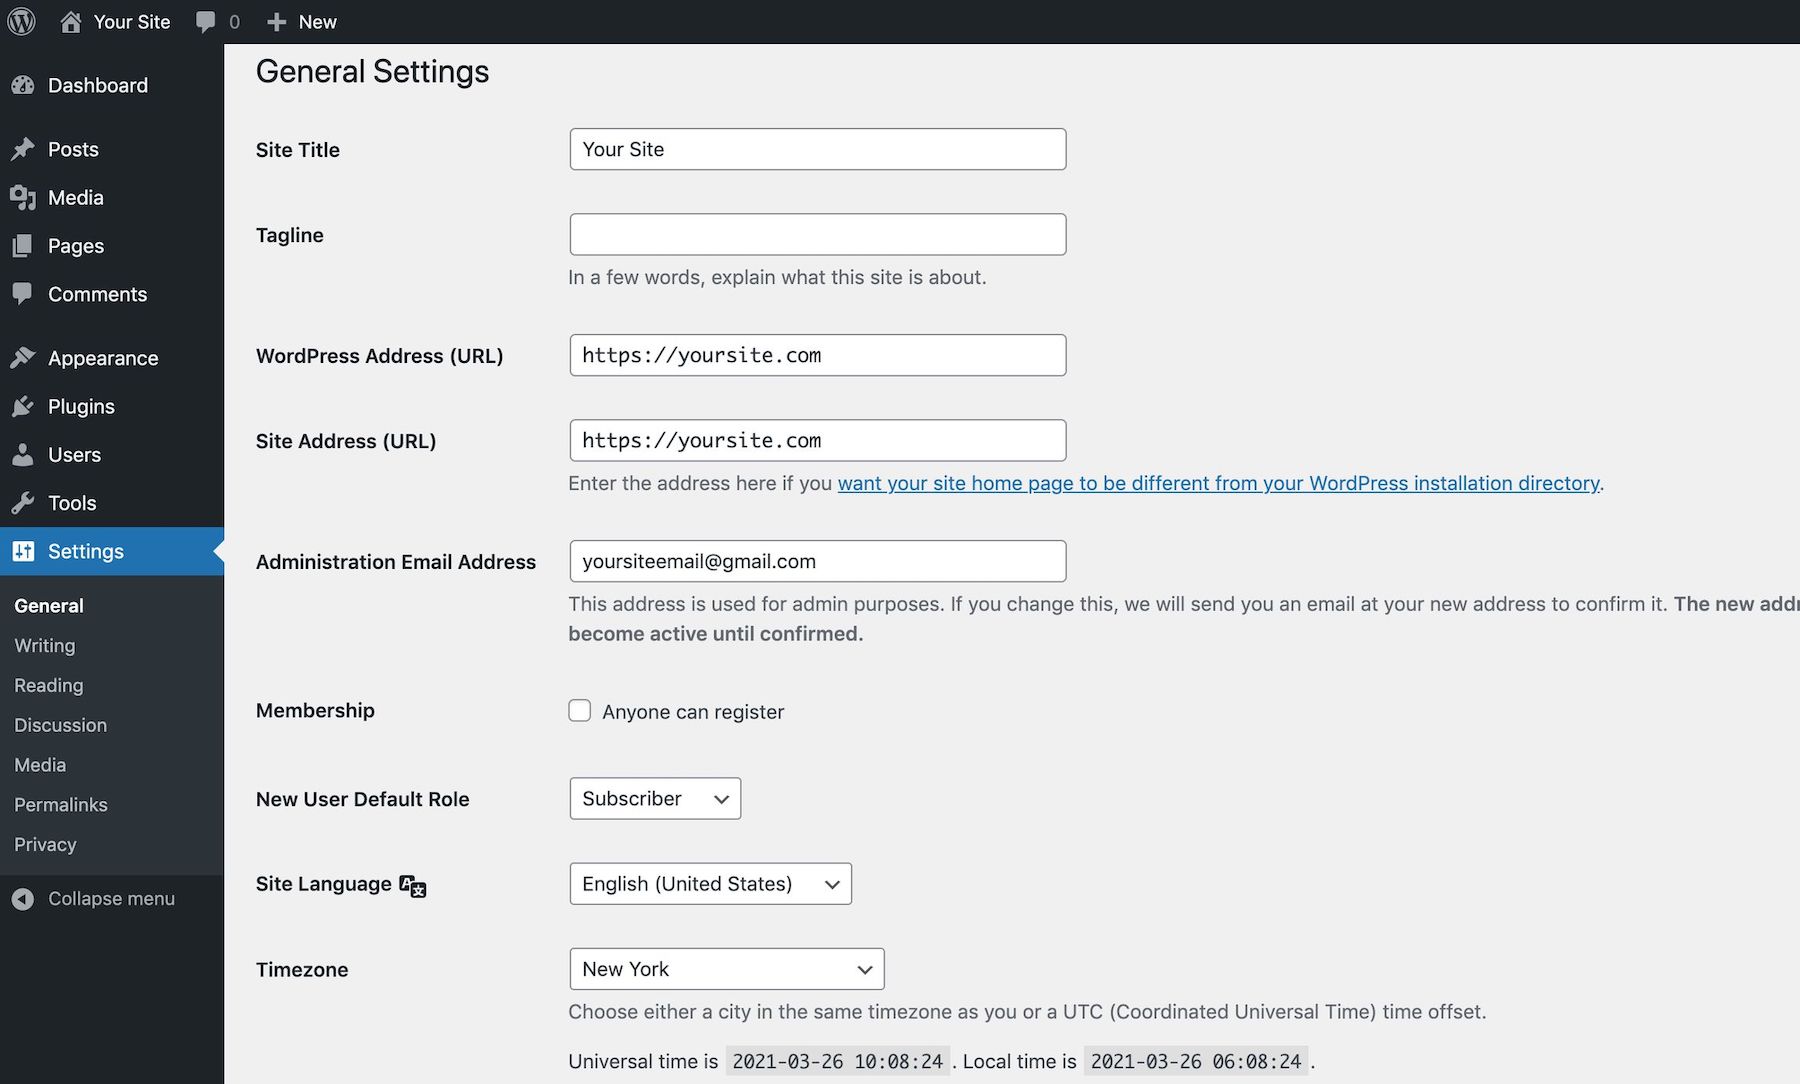
I have the first option selected for each of the Date Format, Time Format and Week Starts On options below.
Writing: the Writing section is where you can control the Default Post Category for new posts.
Reading: This is where you choose whether your site shows your latest posts or a static homepage. You can also select how many new posts your homepage shows. A good range is between 8 and 12 posts total, otherwise, the site will take a long time to load. I have Summary selected in the “For each post in a feed, include” option. Lastly, if you want to you can disable search engine visibility, but we don’t want to check that box.
Discussion: These are the options for controlling who can leave a comment on your site and how you handle them. I leave all these settings as they are by default.
Media: This page controls the dimensions of your images when they are added to the Media Library. You can leave the default values here.
Permalinks: Under “Common Settings” I change the Permalink settings to Posts name so that my posts appear like this: mysite.com/sample-post/
Privacy: Sites must have a Privacy Policy and WordPress can walk you through creating one on this page. Definitely do this to make sure your site is squared away legally.
Users
Another place to control your blog settings is under the Users and then “Profile” section. You can choose how your name is displayed on your blog here, add your social media accounts, and add new users if you wish to work on the blog with someone else.
Creating Content
Once you have your blog settings squared away, let’s go over how to create content on your new blog. We will go over how to add a post and images in this section.
Create a New Post
Go to Post > Add New on the left sidebar of your admin area to create a new blog post on your site. Alternatively, you can click “+New” from the top bar and choose Post.
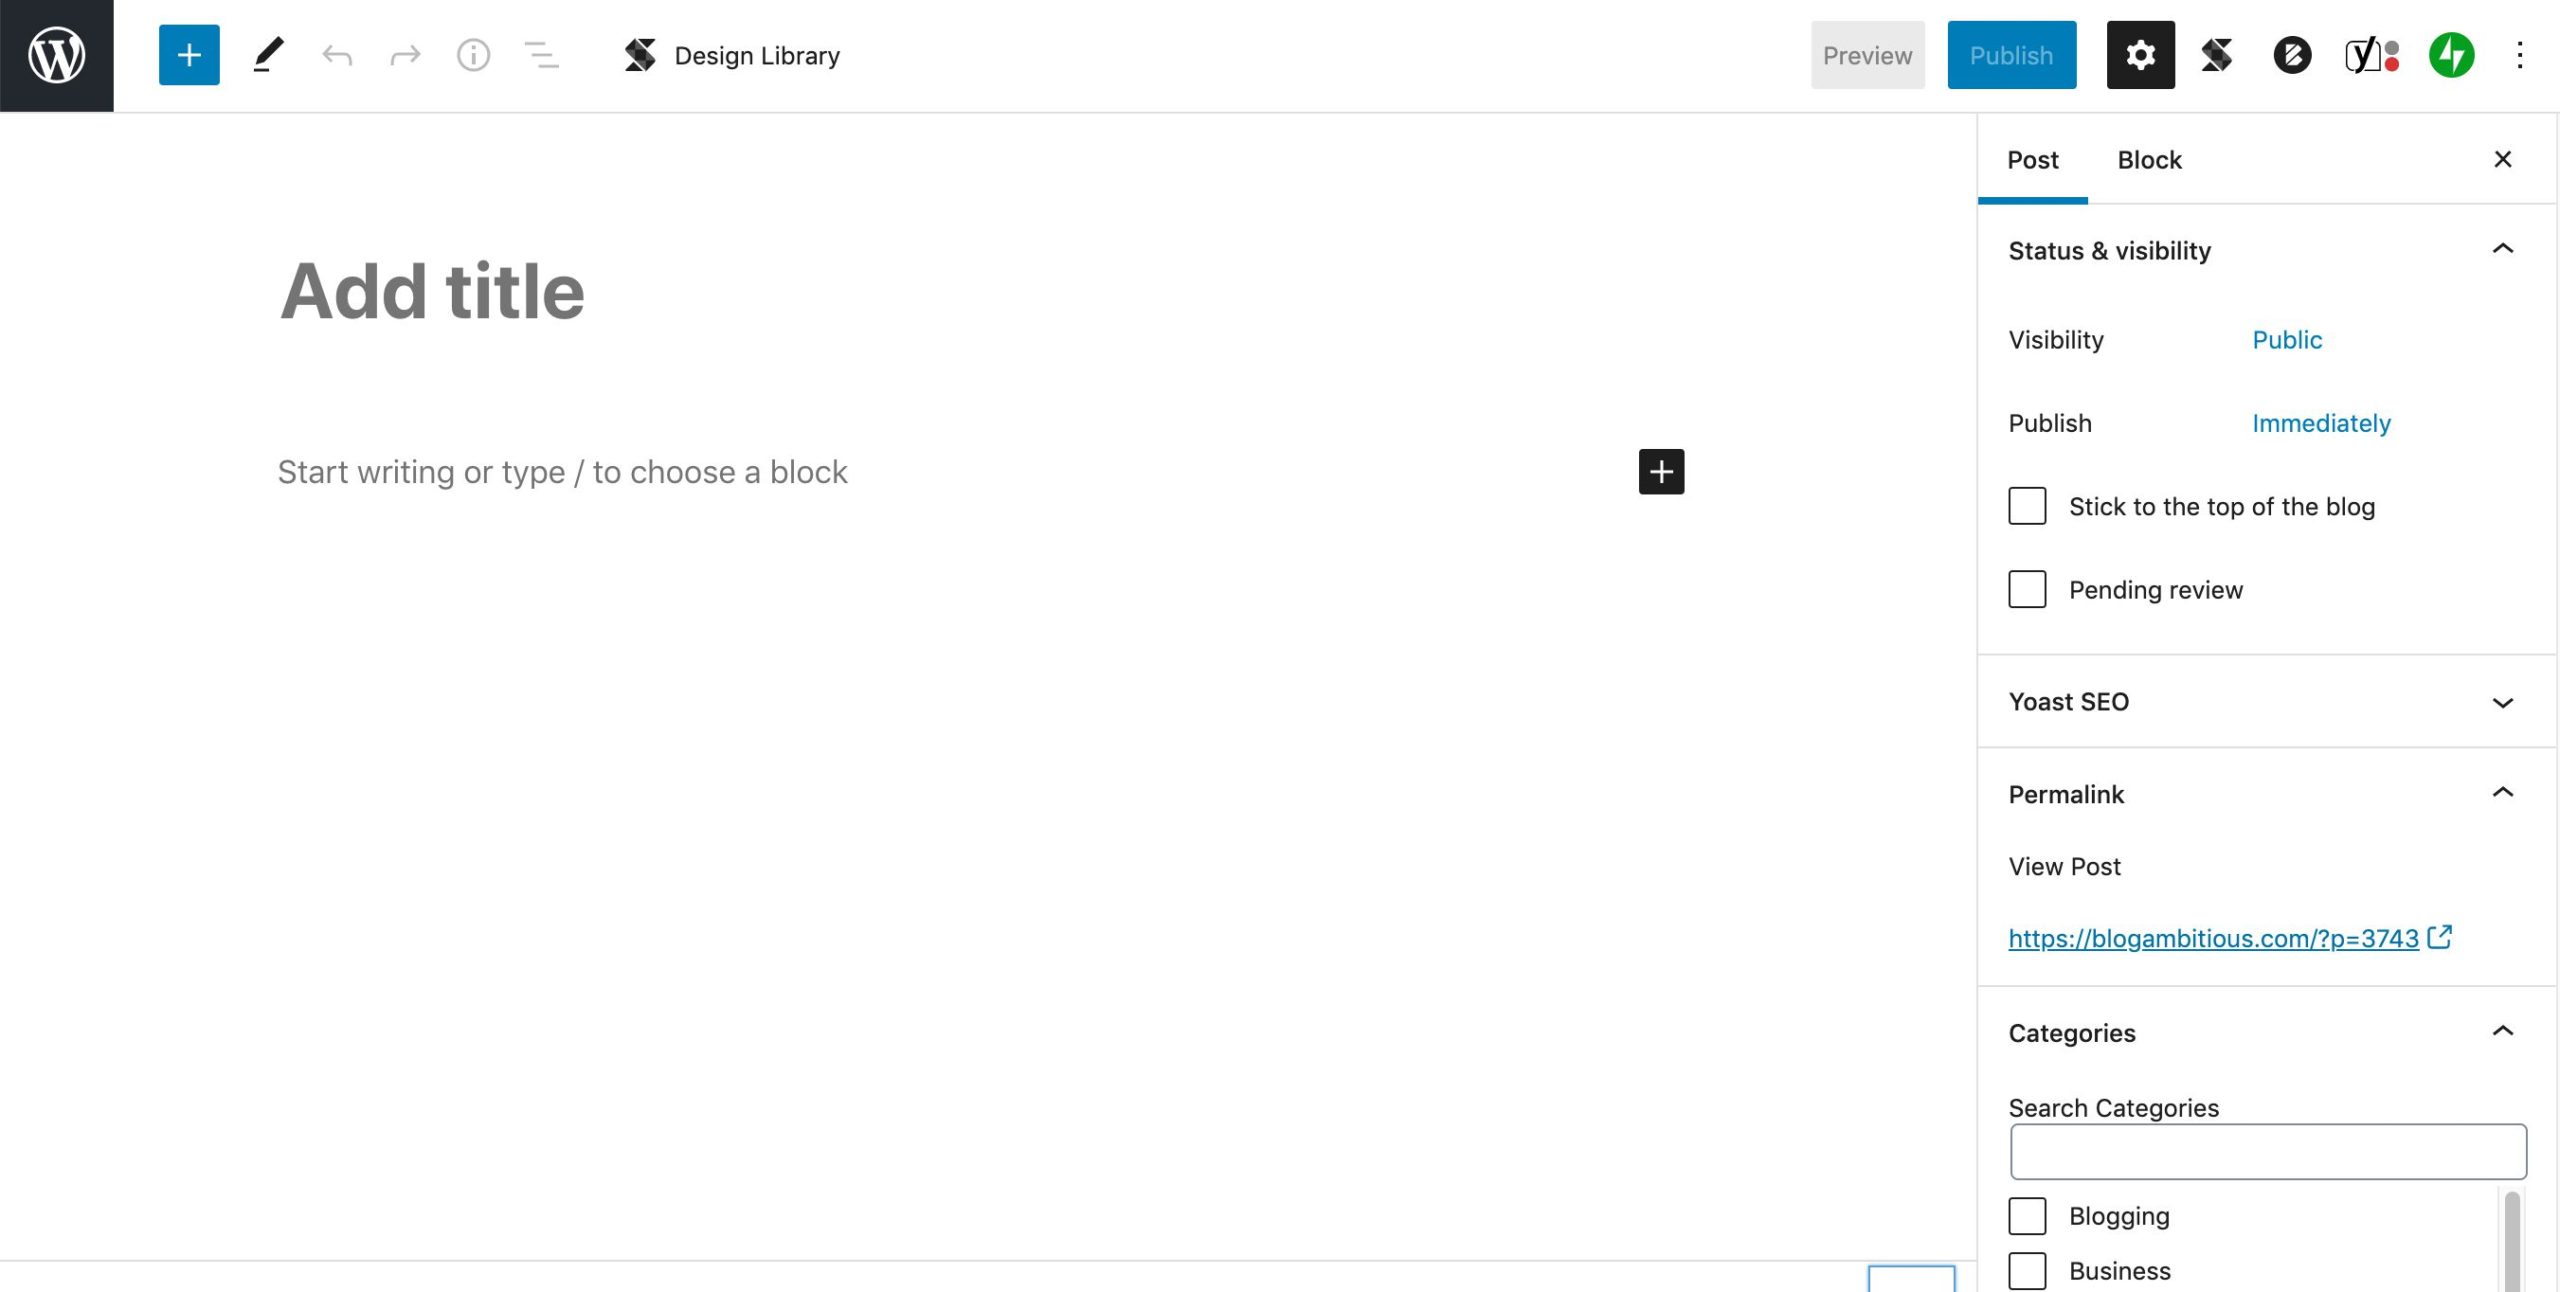
You can fill in your blog post title and content fairly easily in the workspace provided.
Posts are comprised of groups of blocks. One paragraph or one image is equal to one block.
To the right, you have a sidebar with options for publishing your post, changing the Permalink (the slug of your blog post), filing the post under a Category, and adding Tags to the post.
After, you can add a Featured Image, which is used by your theme to show a visual representation of what the post is about on the front page and archives category.
You can also control other aspects of your post such as a custom excerpt used by some themes as well as the comment section.
You’ll notice that the sidebar is divided into 2 sections: Post and Block. The Post area controls aspects of the post itself, while the Block area gives you options for the selected block which vary based on the type of block it is: text, image, embedded data, etc.
How to Add an Image
You can add a new image in one of two ways:
Click the black + icon and then select “Image” or type /image in a new paragraph and select “Image”
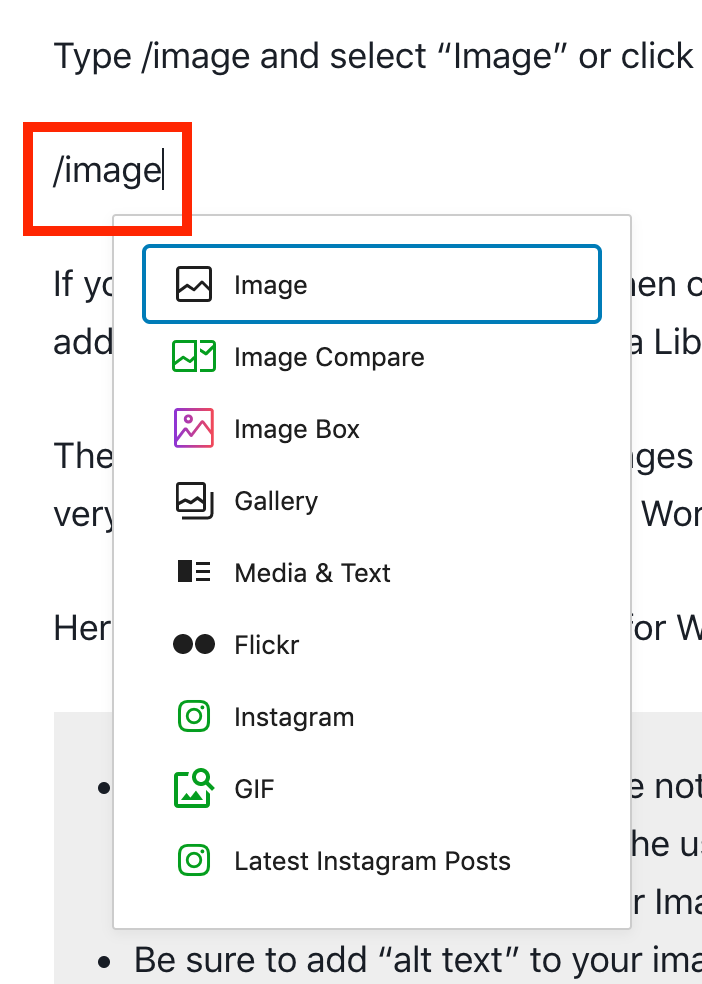
If you want to add just one image, then click “Upload” otherwise, select “Select Image” to add a group of images to your Media Library.
The Media Library is where your images are organized. It’s not a place you need to access very often, but you will see it in your WordPress backend admin area.
Here are some tips to keep in mind for WordPress images for beginners:
- Do not upload images that have not been resized ahead of time. Images that are too big will be slow to load on the user’s side. Make them smaller using Preview or an application like XnConvert or ImageOptim first!
- Be sure to add alt text to your image – a text-based description of the image itself which helps Google understand what the image depicts
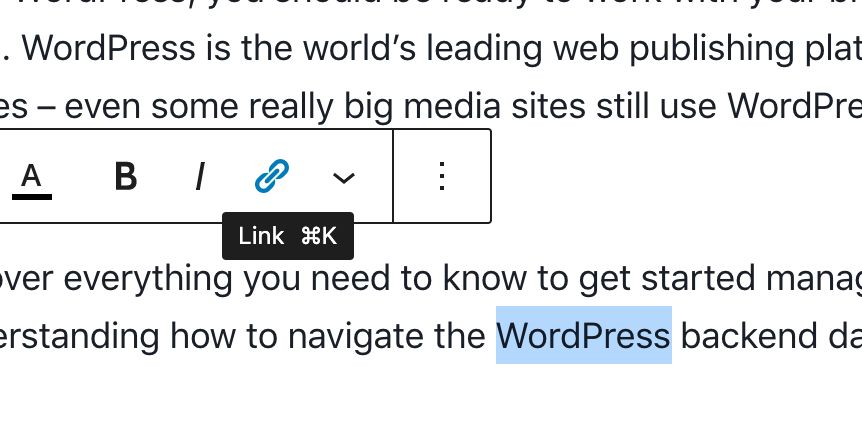
Add Links and Buttons
You can add links to your text as well. This is helpful for linking to other articles on your site or externally. You can click the chainlink icon and then either search your existing posts or paste in a URL. Click the arrow on the right to submit the link you want to use.
Add a Featured Image
Before publishing your post, be sure to select a featured image on the right sidebar. You can upload a new image or select one that has already been uploaded.
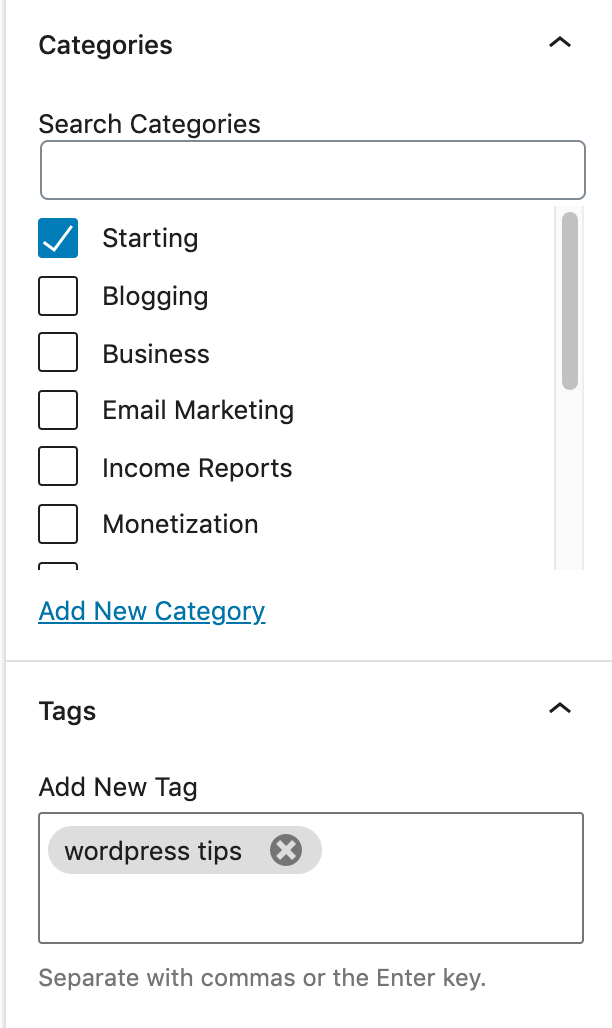
Categories and Tags
Categories are used to group your posts and tags help users discover related content. These are a great way to keep your site organized by topic. Tags are used to describe micro-topics within a category. Categories are necessary for a blog, but tags are optional.
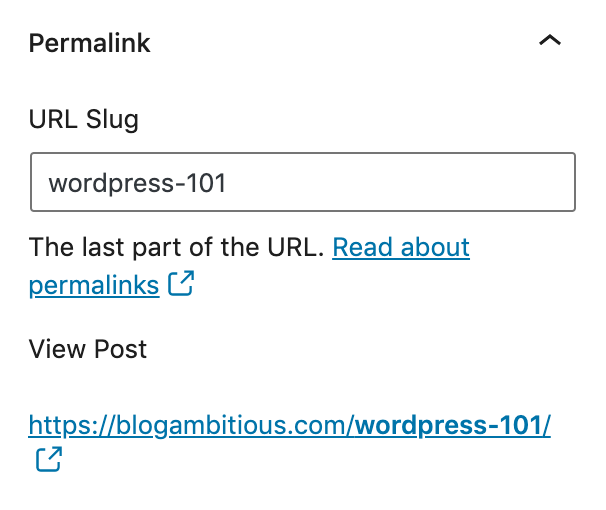
Permalink
Be sure to choose the slug you want for your post. A good idea is to use the keyword your blog post is targeting as the slug. I’ve noticed that you have to save the post as a draft (click “Save draft” on the top bar) before WordPress lets you set the slug!
Publishing Options
By default, your post will publish immediately after clicking Publish which is great at the beginning, but down the road, you may want to schedule posts ahead of time, so you can do that here. Just click “Immediately” and change the time and date to when you want. The big blue “Publish” button on the top bar will change to Schedule.
You can also Preview your post using the top bar or Save draft to work on it later!
Manage & Edit Existing Posts
If you’re still in the WordPress editor, you can click the WordPress logo at the top left to go back to your admin area.
Click Posts on the left-hand menu to see a list of your recent posts. You can click “Edit” when you mouse over a post to make changes to an existing post. “Quick Edit” will allow you to make smaller changes to the Category or Tags without opening up the text editor.
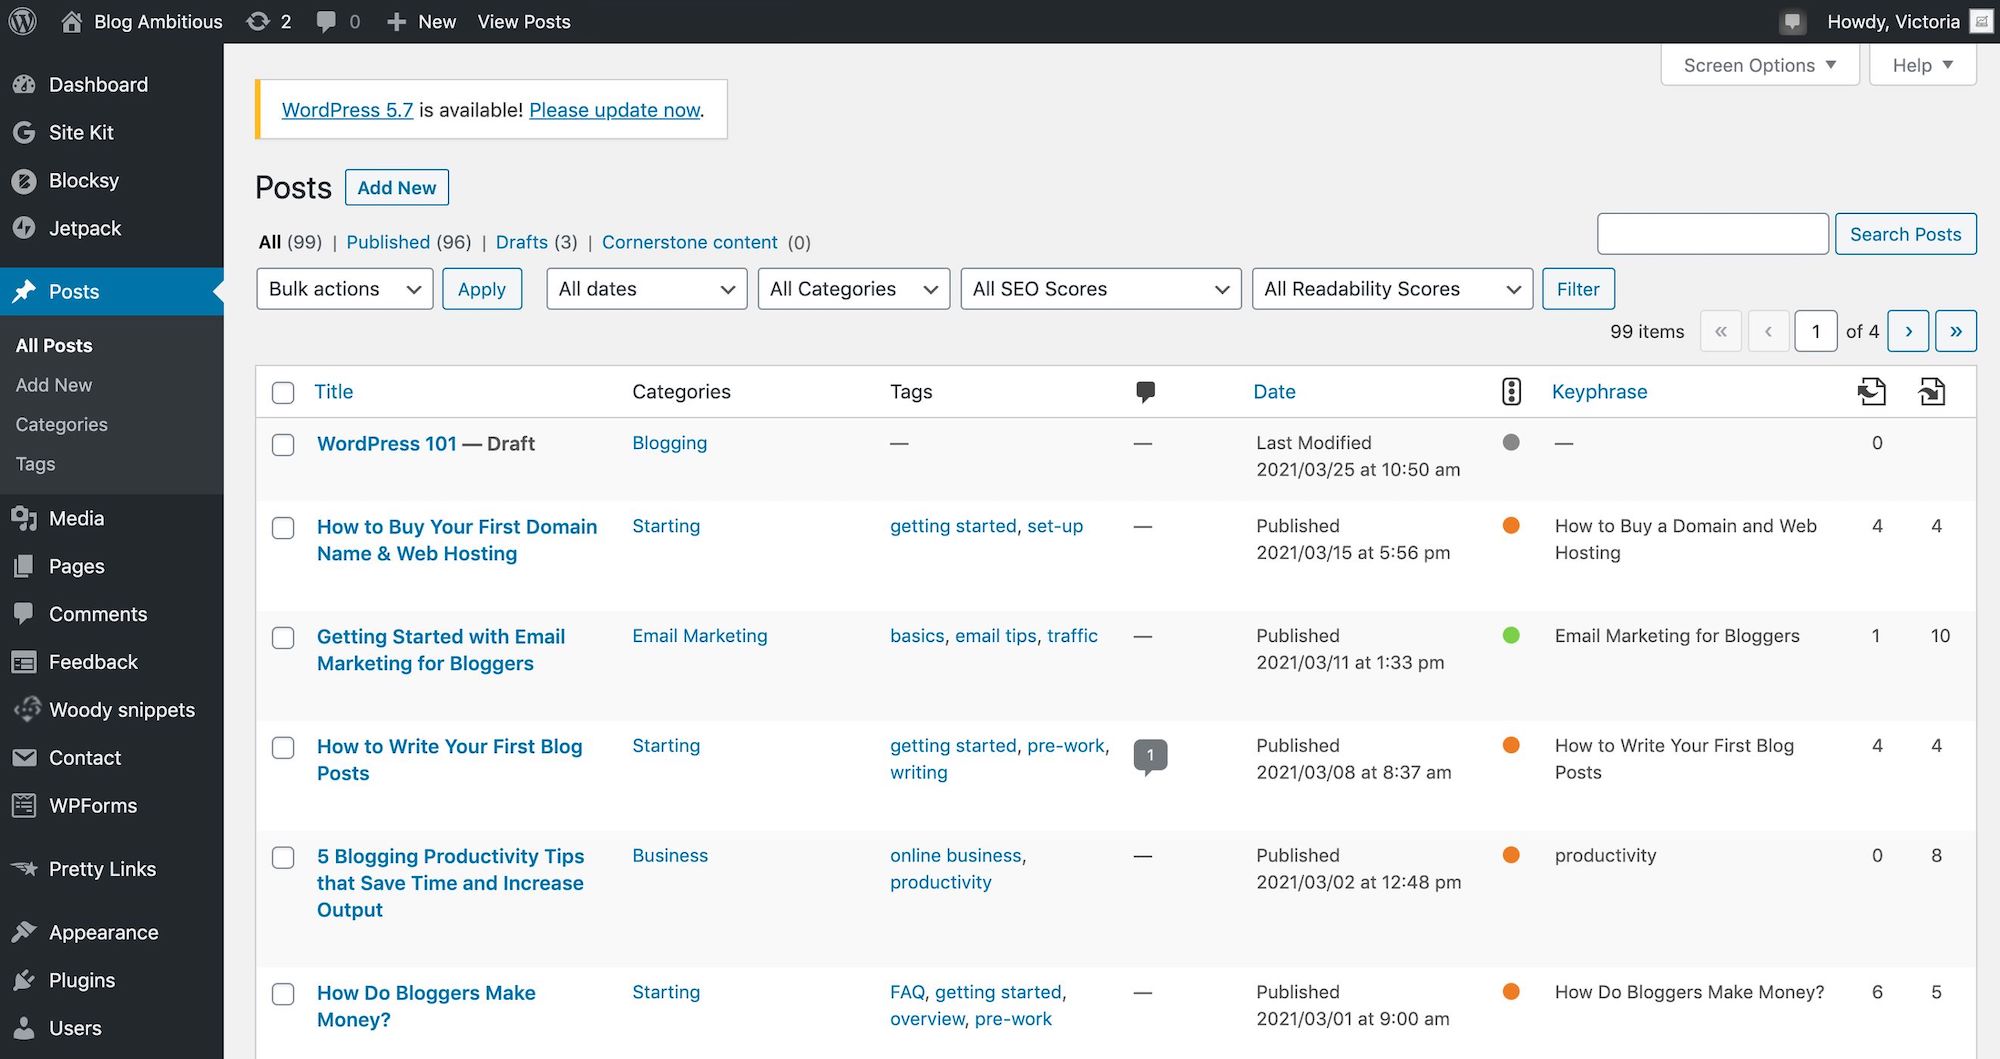
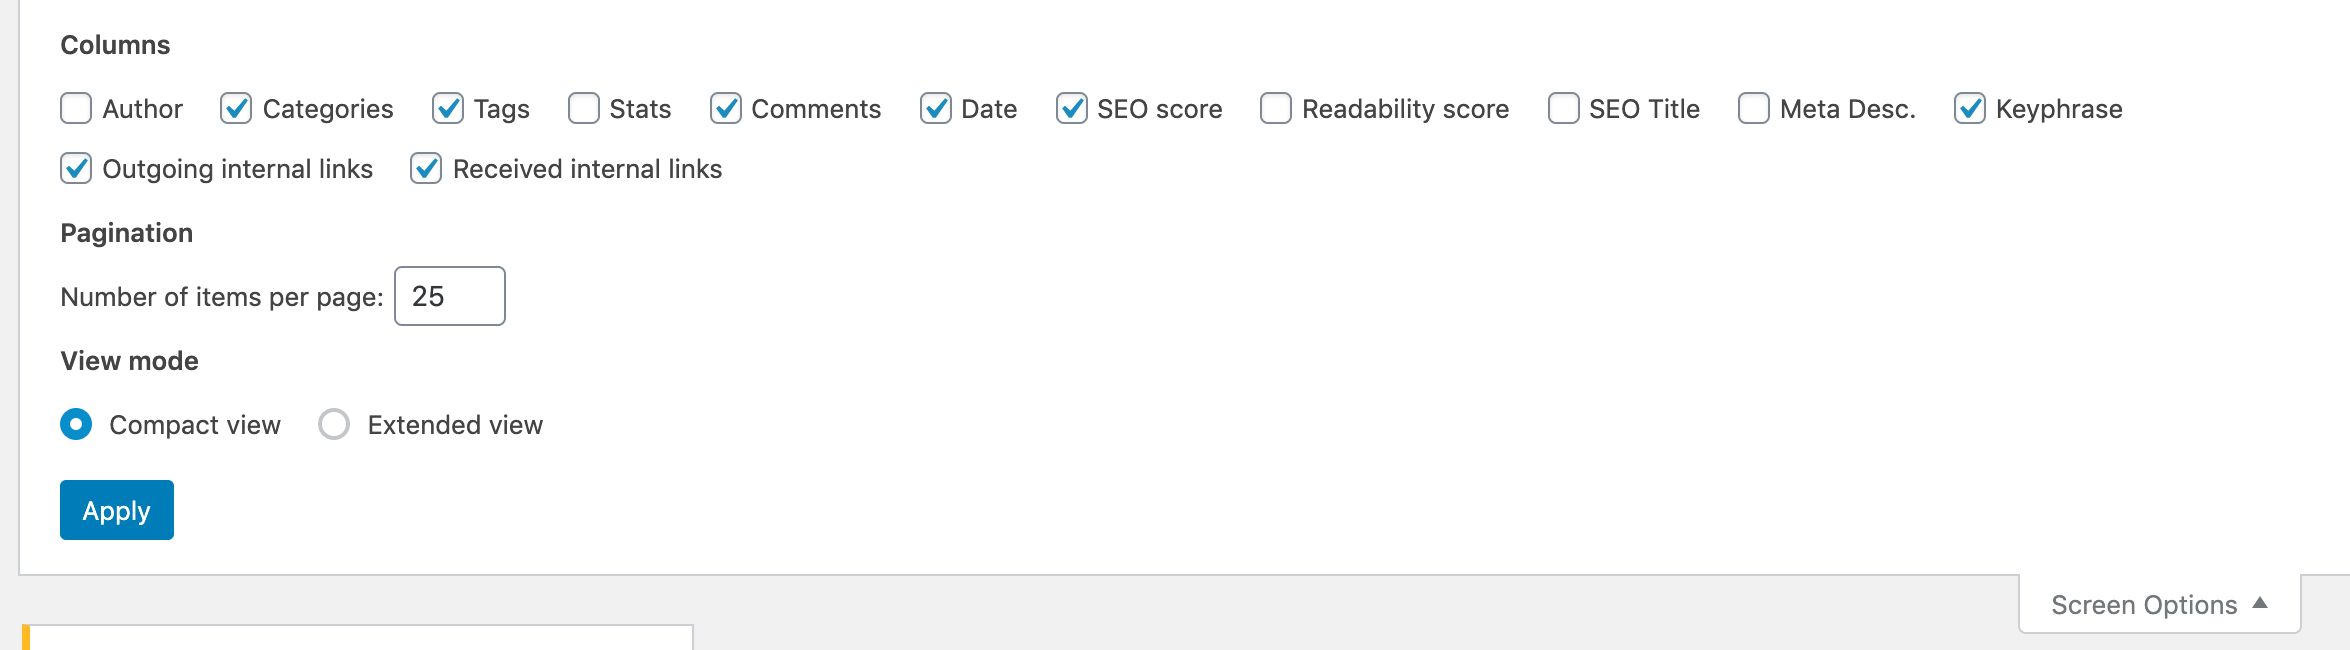
You can click Screen Options at the top right corner to show a dropdown that allows you to choose the columns that are visible on the Posts page:
Create Pages
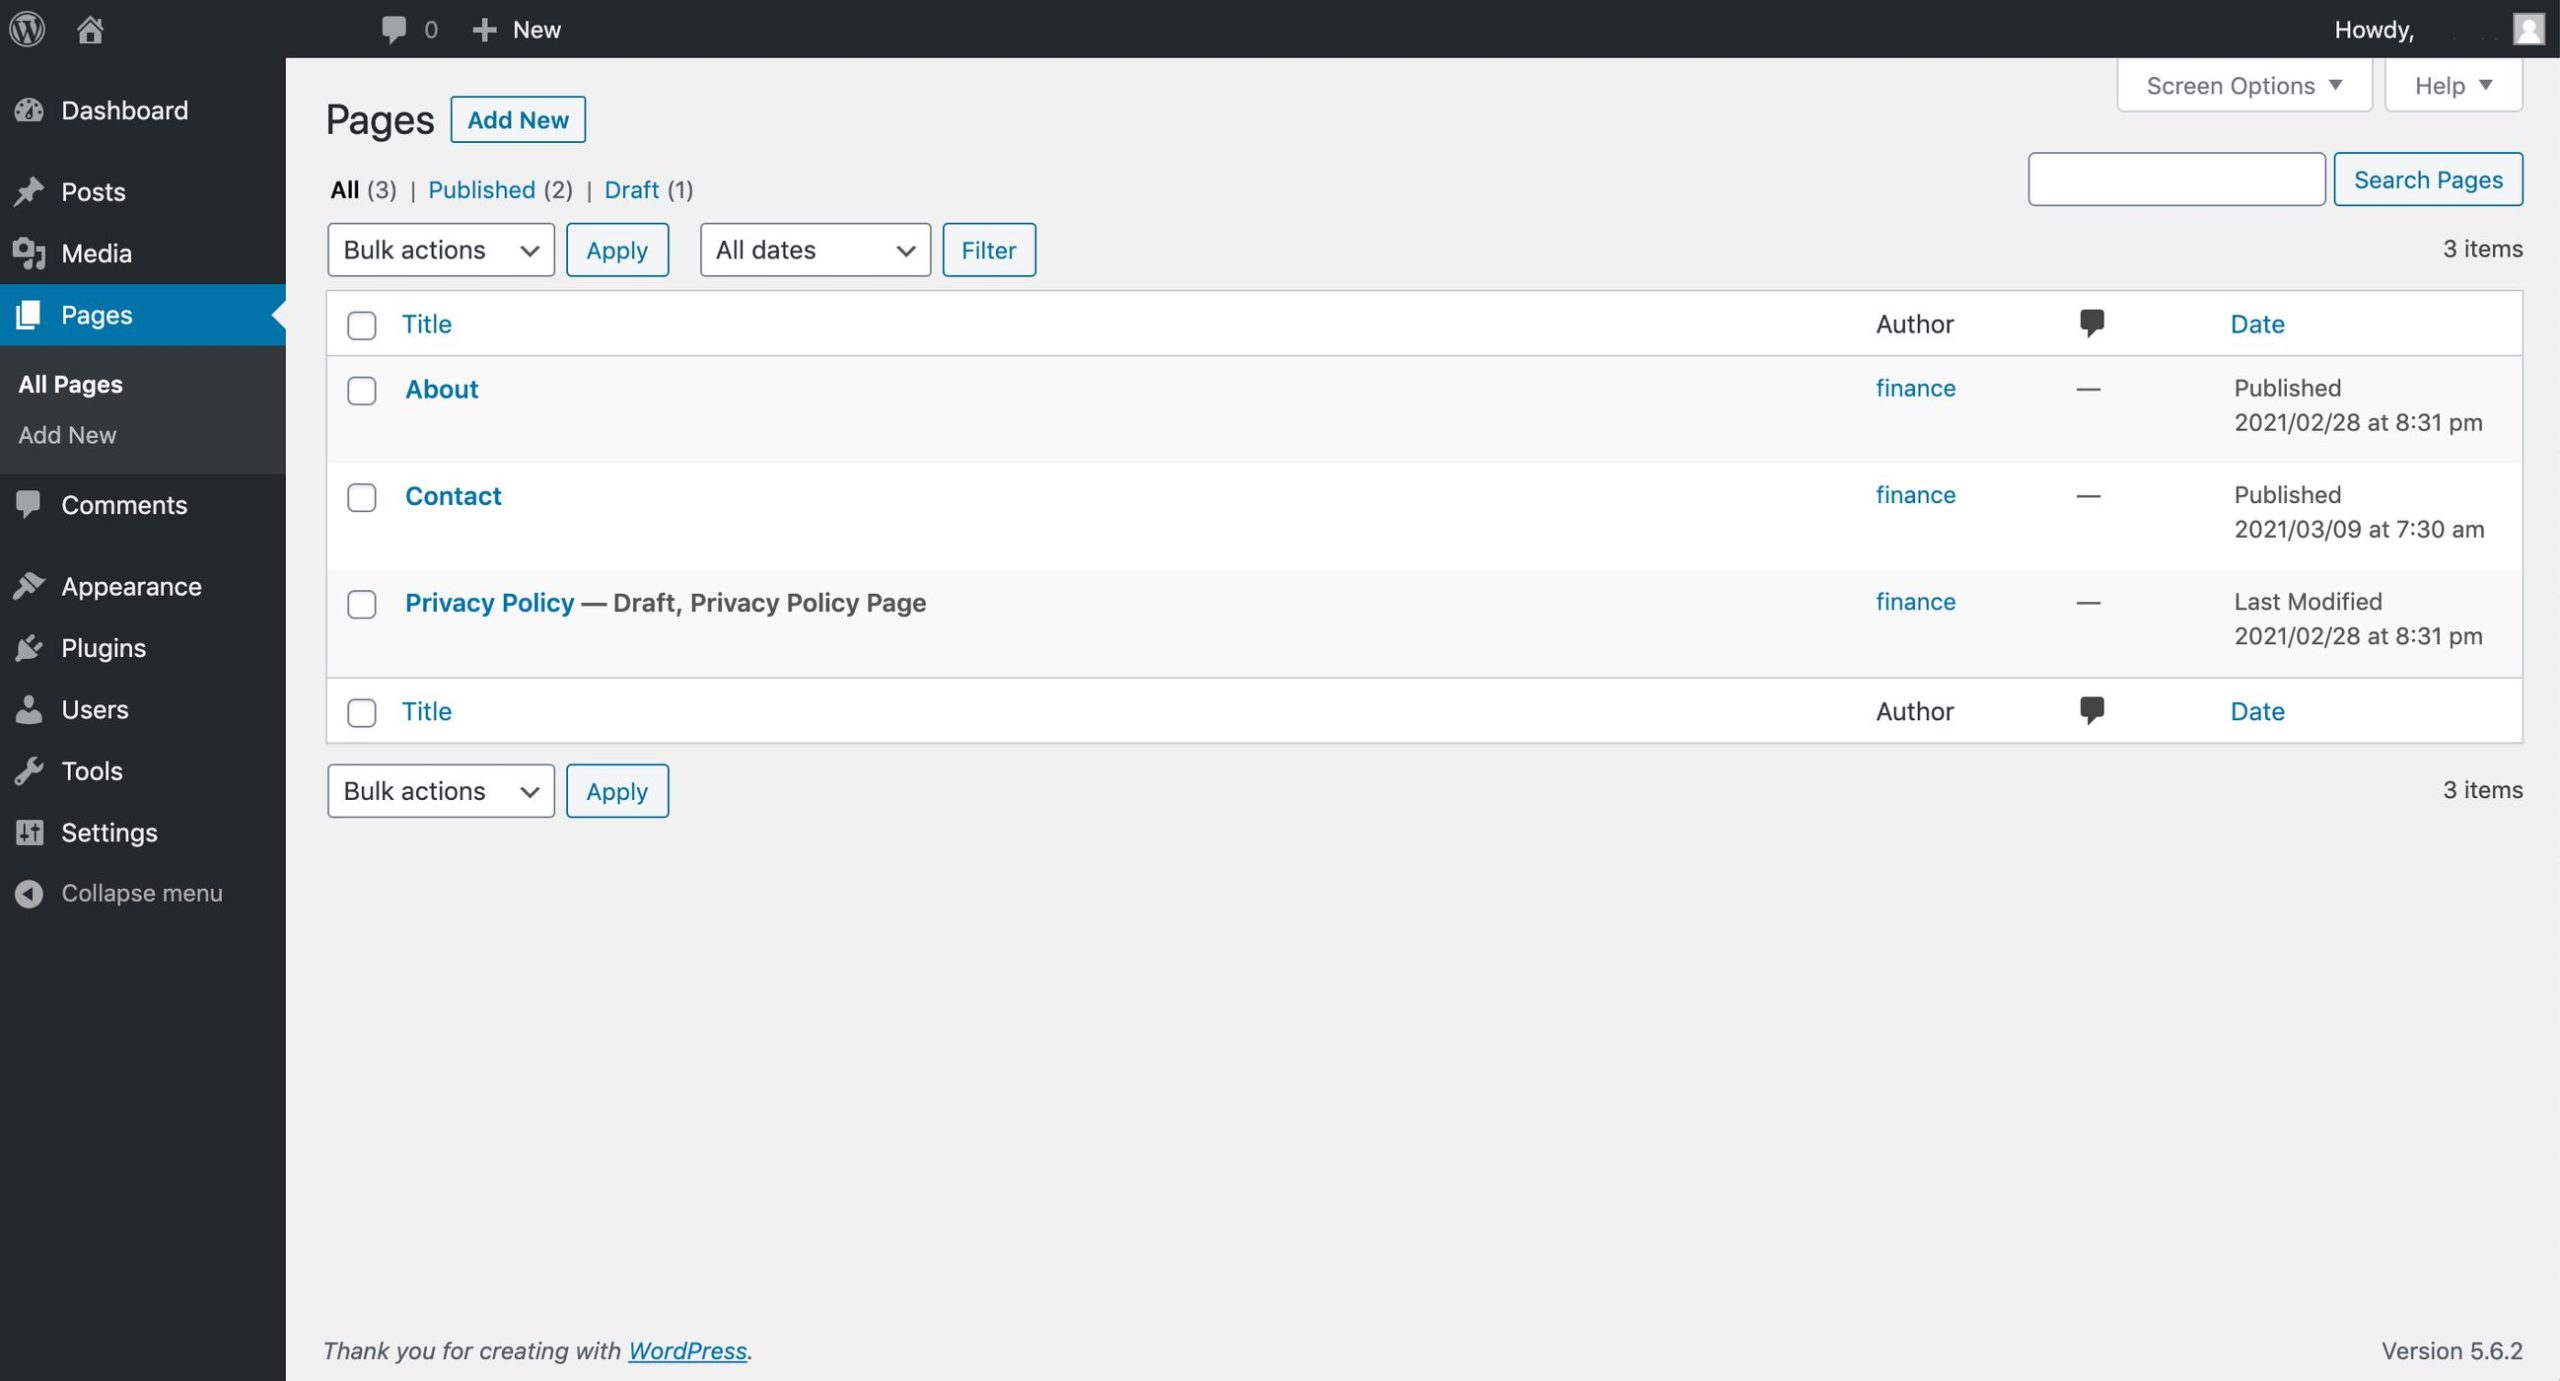
You probably want to create some Pages for your website which you can do by clicking the “Pages” option on the left-hand panel in your admin area.
I typically have the following pages on my sites:
- About
- Contact
- Privacy Policy
Customizing the Look of Your Site
Once you have a few posts published, you probably want to change how your site appears on the front end! Let’s talk about how to control the way your site looks.
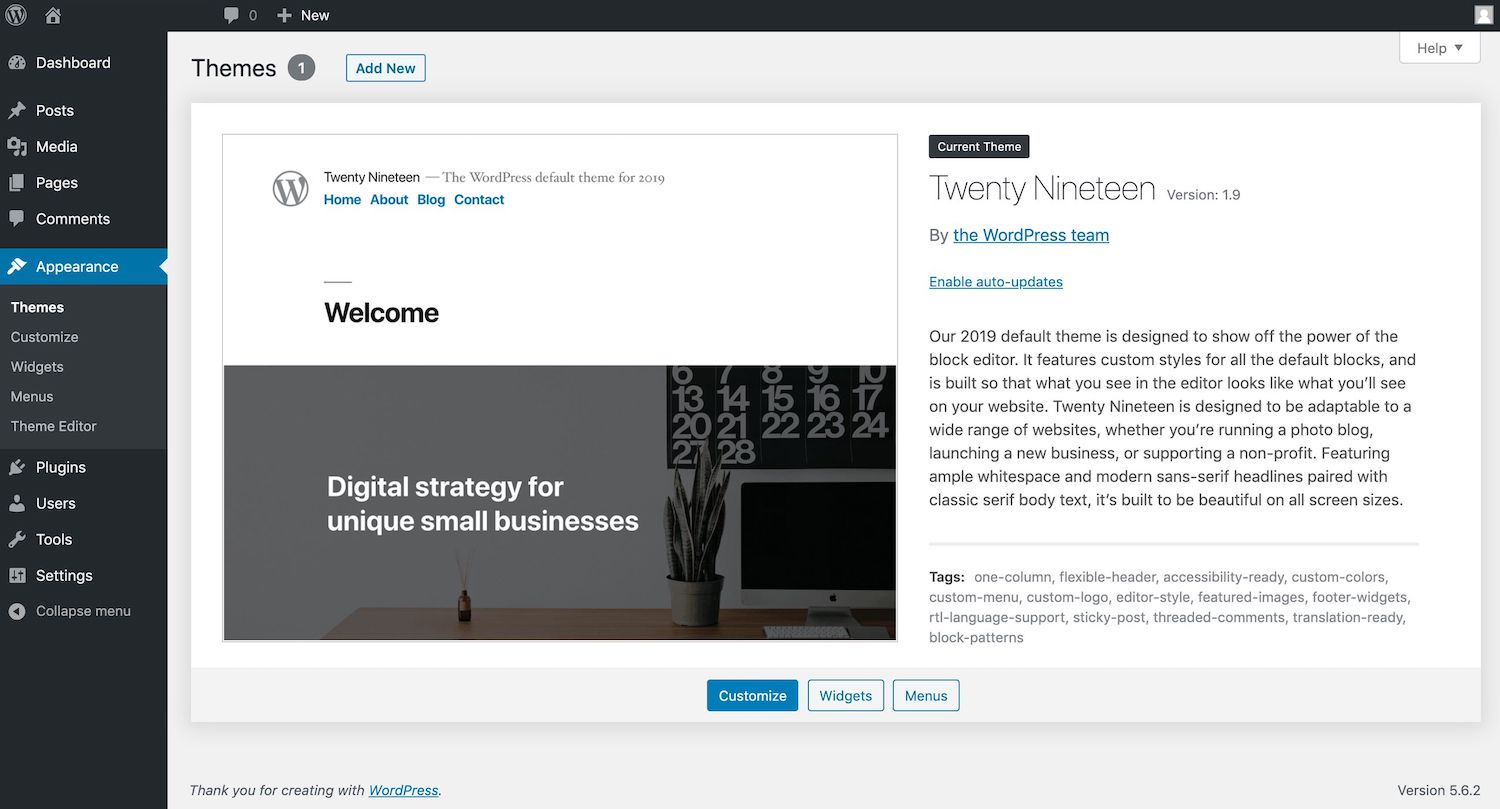
Themes
Under the Appearance option on the left-hand sidebar, select Themes. A WordPress theme is a set of files that determine how your website looks to the public. You can use a free theme or a paid theme for options and a sleek design. As a beginner, don’t worry too much about your theme. The default theme installed on your website should do just fine!
Customize Your Theme
The next option under the Appearance menu allows you to Customize your theme. If you click this, you’ll be taken to another part of your admin area which allows you to dive deeper into the customizations of your current theme as well as preview how another theme might look. These options will change depending on the theme you use.
Widgets
Widgets are small elements of a website that appear on the front of your blog: mostly in the sidebar and footer areas, though potentially also near the header, depending on the theme you have installed. Widgets can be used to display dynamic or static information.
- Static Widgets: Static widgets can display information like an about me section or they can gather email addresses through a sign-up form
- Dynamic Widgets: Dynamic widgets display information that changes such as a list of recent posts, recent Instagram images, or tweets
Creating Menus
Sites generally have two menus that your readers can use to navigate the different topics of the site. The main menu is typically composed of links to the top-level Categories on the site and is often found beneath the header. The footer menu often has static pages like About, Contact, and Privacy Policy.
I would recommend creating two menus with each of these components as a beginner! After the menus are created, click the tab “Manage Locations” to assign each menu to a location depending on your theme.
Install New Themes
You can change your theme at any time by clicking “Appearance” and then the button Add New. From there, you can search the database of free WordPress themes or click “Upload Theme” to add a .zip file containing the theme you want to use.
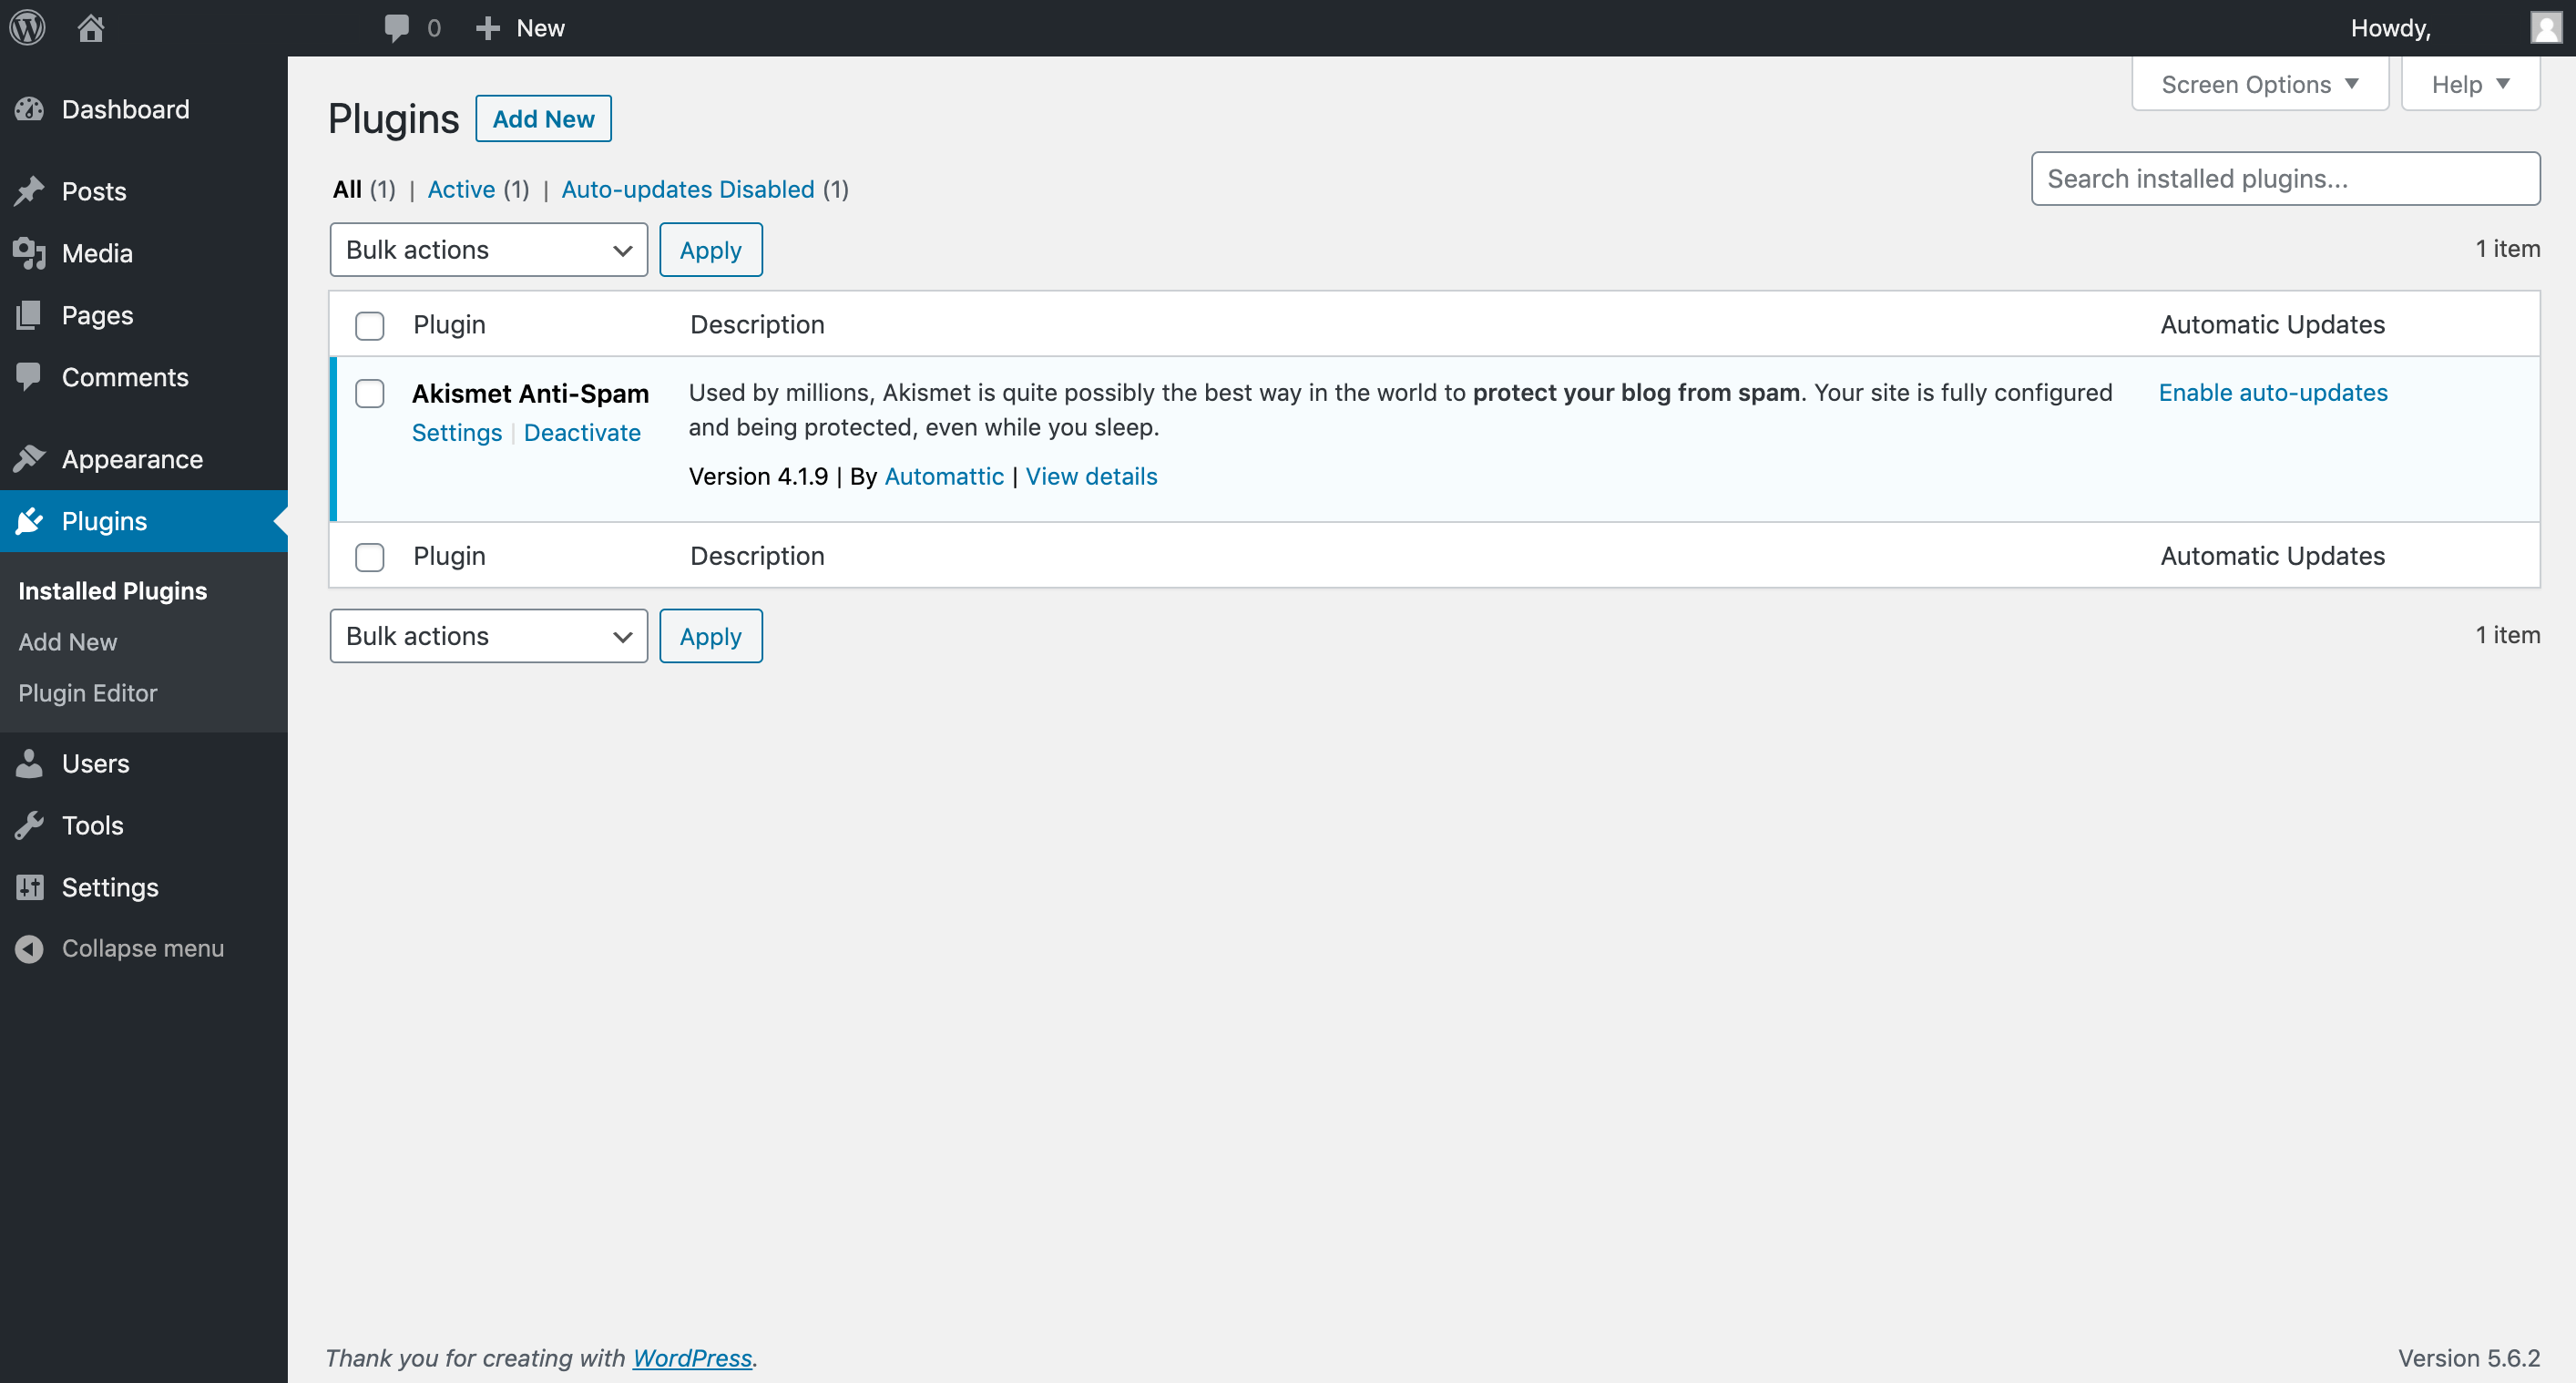
Plugins
Plugins are useful add-ons that give your WordPress website greater functionality. They can do just about everything you can think of from filtering spam comments (Akismet), creating easy contact forms, redirecting old links, securing your site, backing up your site, or helping you improve your SEO.
Site Management
Lastly, I want to share some of the ways you can manage your site.
Photos
You can see all of the photos and images you’ve added to your site in the “Media” section located on the left-hand sidebar in your admin area.
Comments
Over time, your blog will begin to receive comments and you can approve or deny them in the Comments portion of your admin area, also visible on the left-hand sidebar!
Users
I only have one user on my blog (myself) but if you eventually hire freelance writers, you may want to create their own author profile. This is where you would do that!
Tools
The tools area is a place I rarely go but it can be useful if you are transferring a site and need to use the export and import feature. I also have some plugins like Redirection and Better Search and Replace that appear in this menu.
I hope you found this WordPress for beginners guide useful! Let me know if you have any questions in the comments below!